 价格、用料与规格最佳平衡点!!
 华擎ASRock Extreme系列不论在用料、规格还是价格上都相当有竞争力,提供不错的CP值,这次Z370平台也有推出相对应产品,用料部分CPU采用12相供电并搭配了超大电流的60A电感、Nichicon 12k 黑色电容与双层堆叠 MOSFET,MOSFET有独立大面积的散热模组,记忆体供电采用高效合金电感,提供更稳定的供电品质,外接传输介面采用了目前相当夯且传输速率相当高的USB3.1 Gen2 Type-A与Type-C,音效部分采用天籁美声技术四代,采用Realtek ALC 1220音效晶片搭配Nichicon Fine Gold系列音效专用电容,前面板音效输出搭配TI NE5532高级耳机扩大器,并支援600ohm耳机,在音效品质上提供更佳的输出品质,记忆体部分支援DDR4,并可超频至DDR4-4333MHz以上,M.2介面部分导入两组Ultra M.2提供了高达32Gb/s,Ultra M.2提供PCIe Gen3 x4与SATA Gen 3讯号,并支援Intel Optane技术,PCIe x16插槽导入金属遮盖,降低杂讯,提高效能与讯号品质,网路部分采用Intel网路卡,并预留了Wi-Fi网路卡升级空间,提供相当不错的网路稳定度与速度,RGB LED控制也几乎是现在主机板的标准配备,可透过工具软体做灯光调整,还可搭配支援RGB LED的产品同步控制,功能相当齐全与强悍,现在就来看看价格、用料与规格最佳平衡点的华擎ASRock Z370 Extreme 4。
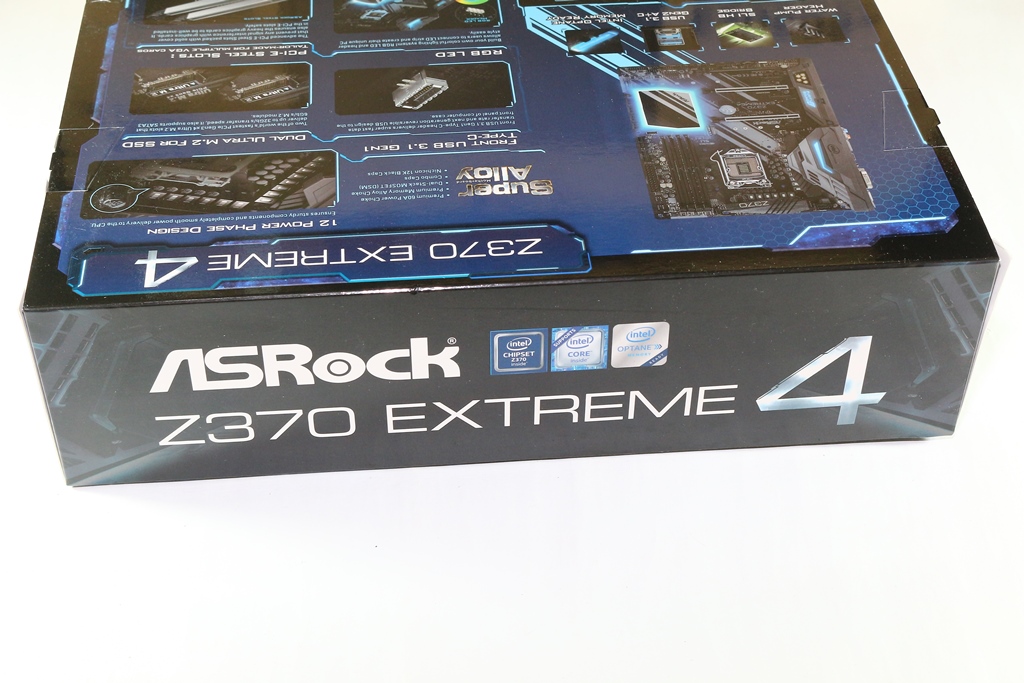
包装与配件▼彩盒标示产品型号与特色
▼华擎ASRock Logo
▼产品型号:Z370 Extreme 4,并标示HDMI认证Logo、支援AMD CrossFire与NVIDIA SLI、支援RGB LED控制、采用Intel Z370晶片组、支援第八代Intel Core系列处理器与Intel Optane技术
▼包装背面标示产品特色与规格
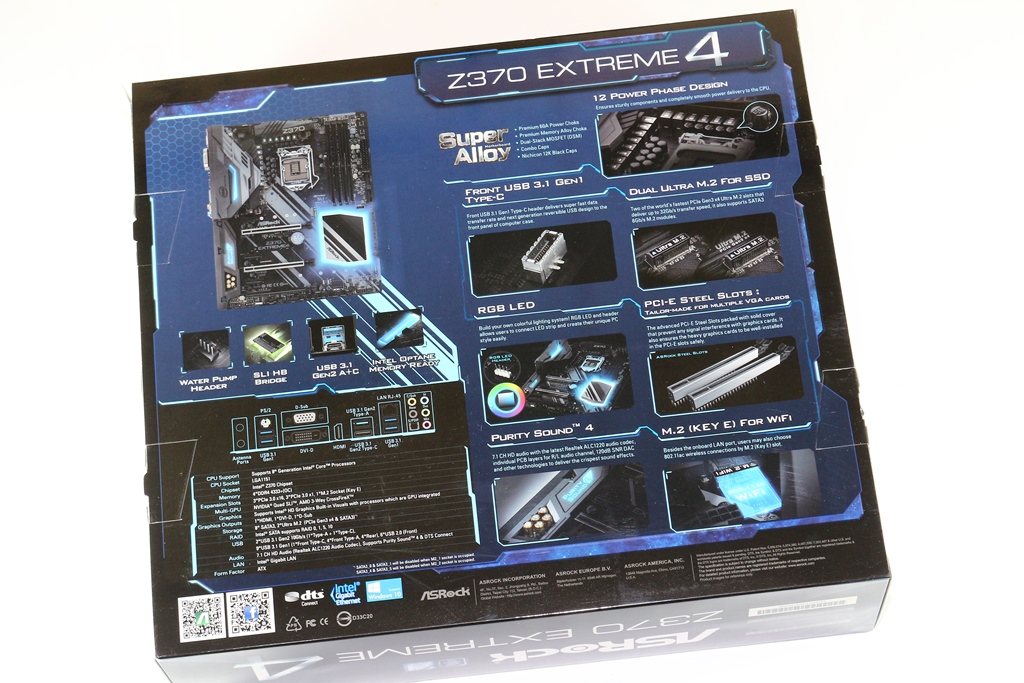
▼采用ASRock 超合金:60A 高效电感、记忆体供电高效合金电感、双层堆叠 MOSFET、组合式电容与Nichicon 12k 黑色电容;CPU供电采用12相数位供电、支援两组Ultra M.2提供PCIe Gen3 x4与SATA Gen 3讯号、支援前面板USB 3.1 Type-C接头
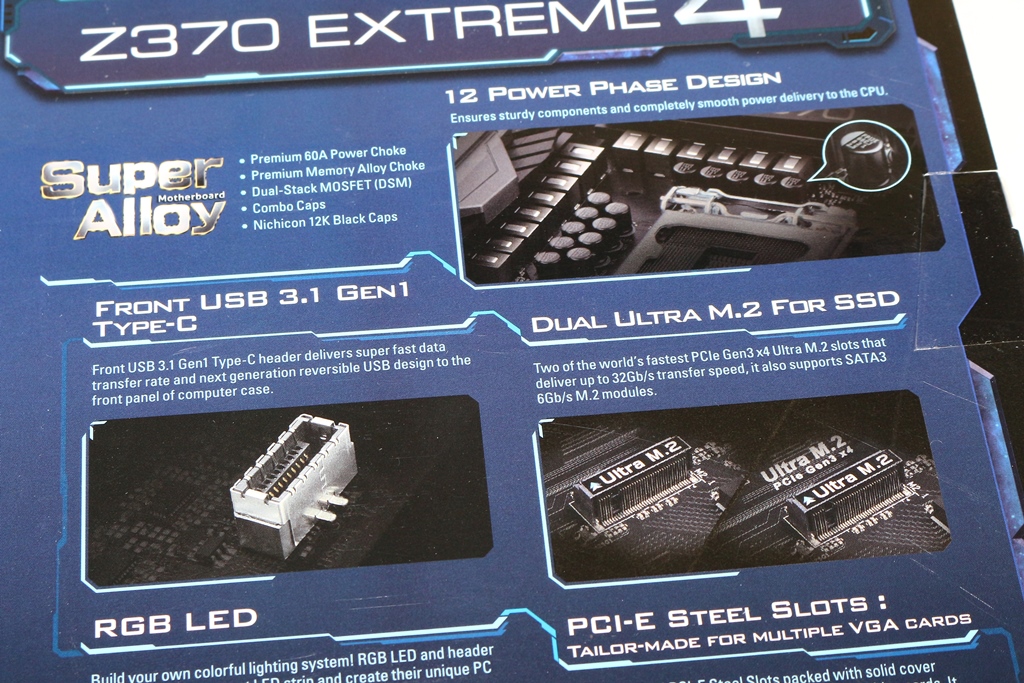
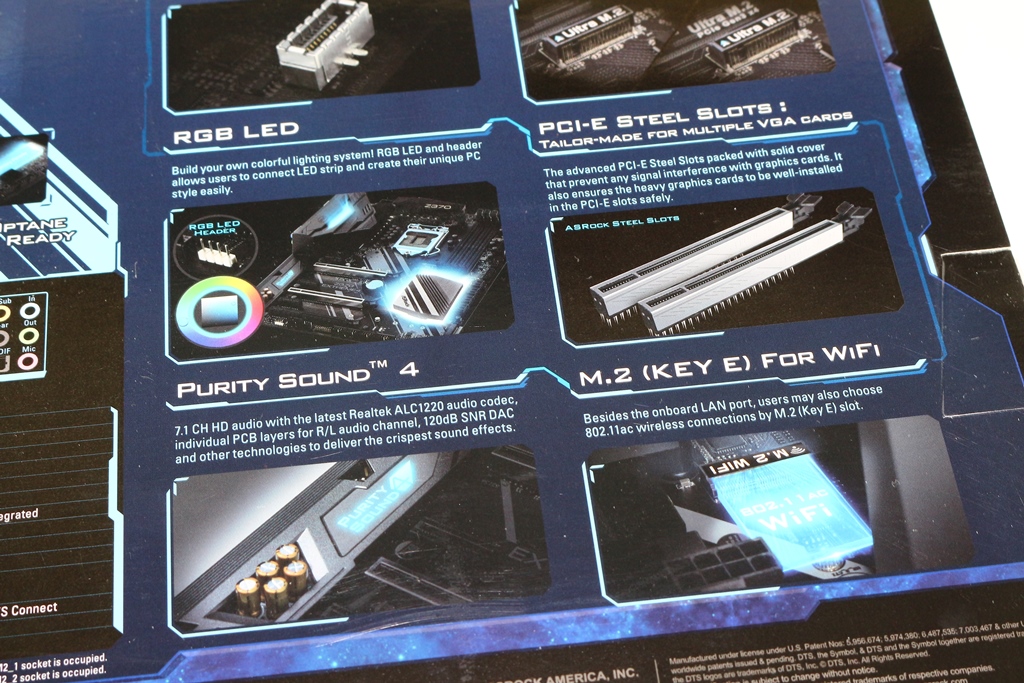
▼支援RGB LED控制、两组PCIe x16插槽金属遮盖、音效采用天籁美声四代、提供M.2(Key E)Wi-Fi升级空间
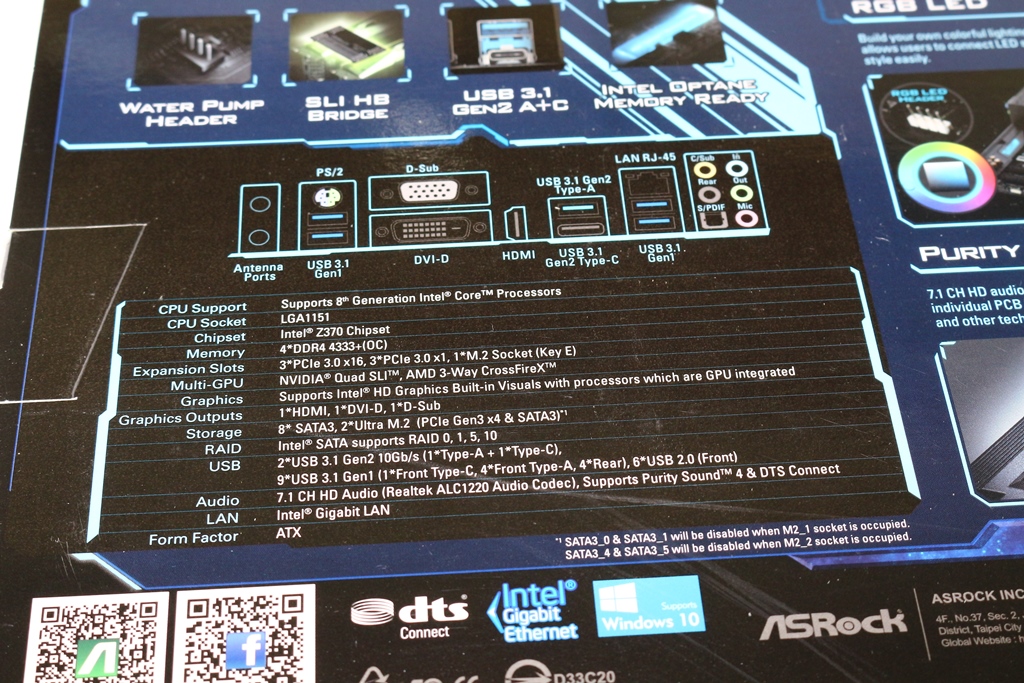
▼I/O标示与产品规格
▼包装侧面为产品型号
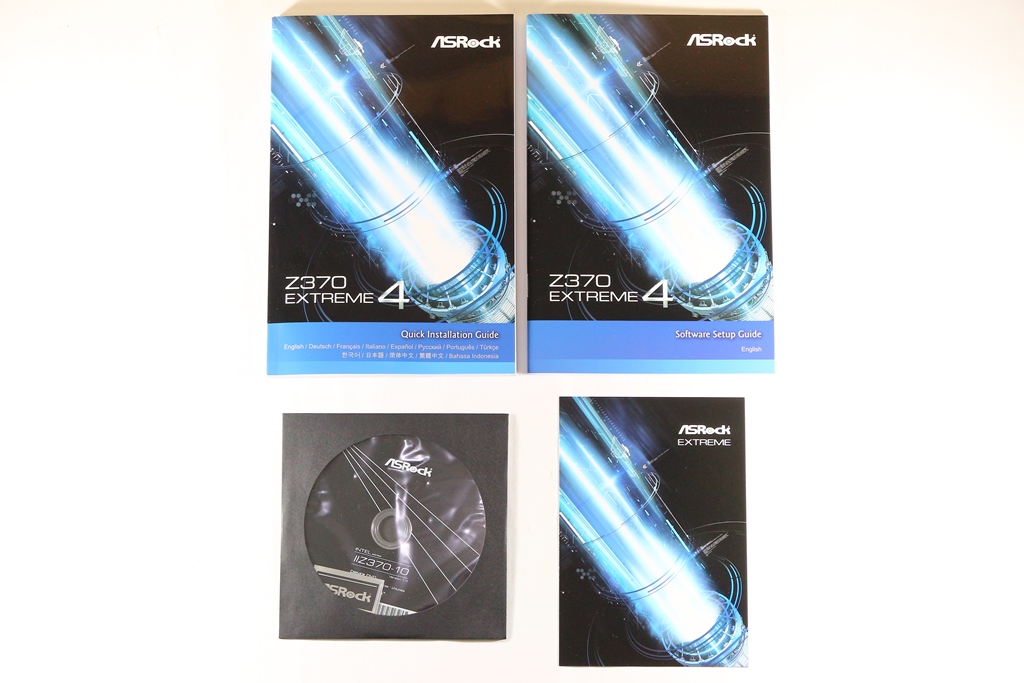
▼配件:主机板说明书、软体说明书、太极主机板明信片、ASRock贴纸、驱动光碟、SATA 6Gb/s传输线*4、SLI HB桥接器、I/O挡板与M.2固定螺丝*3
 用料与规格介绍
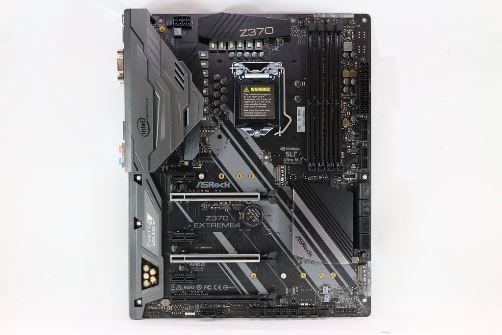
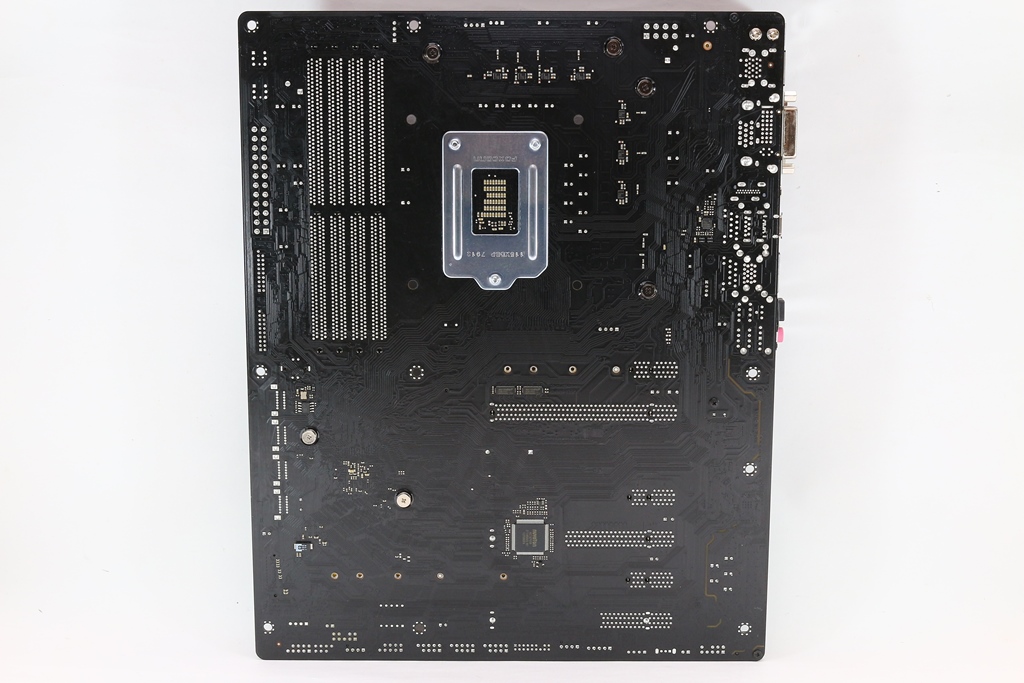
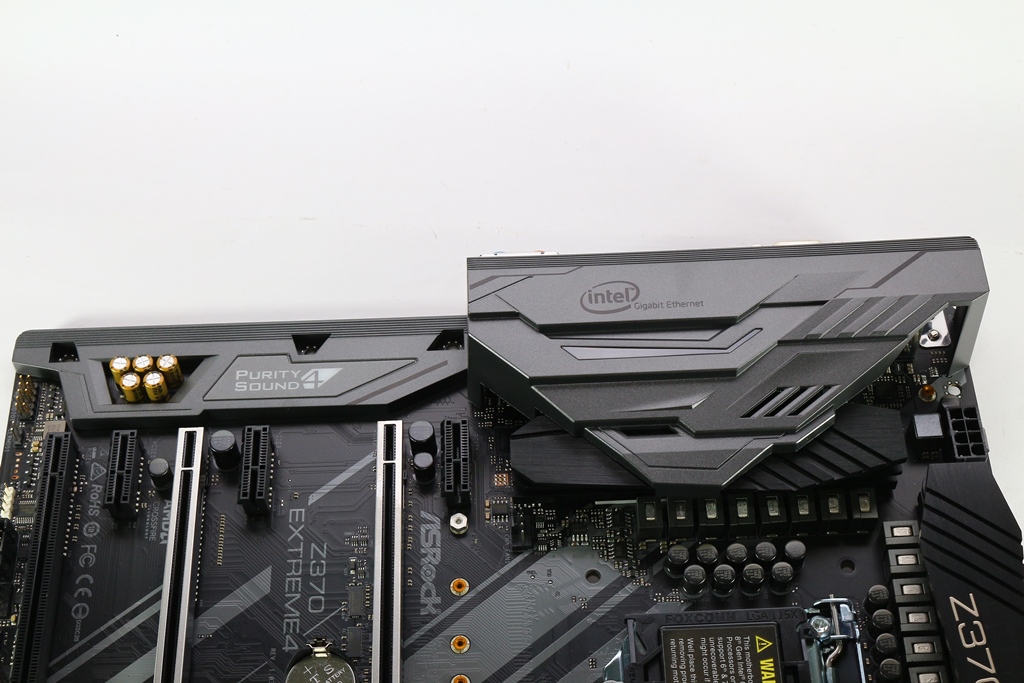
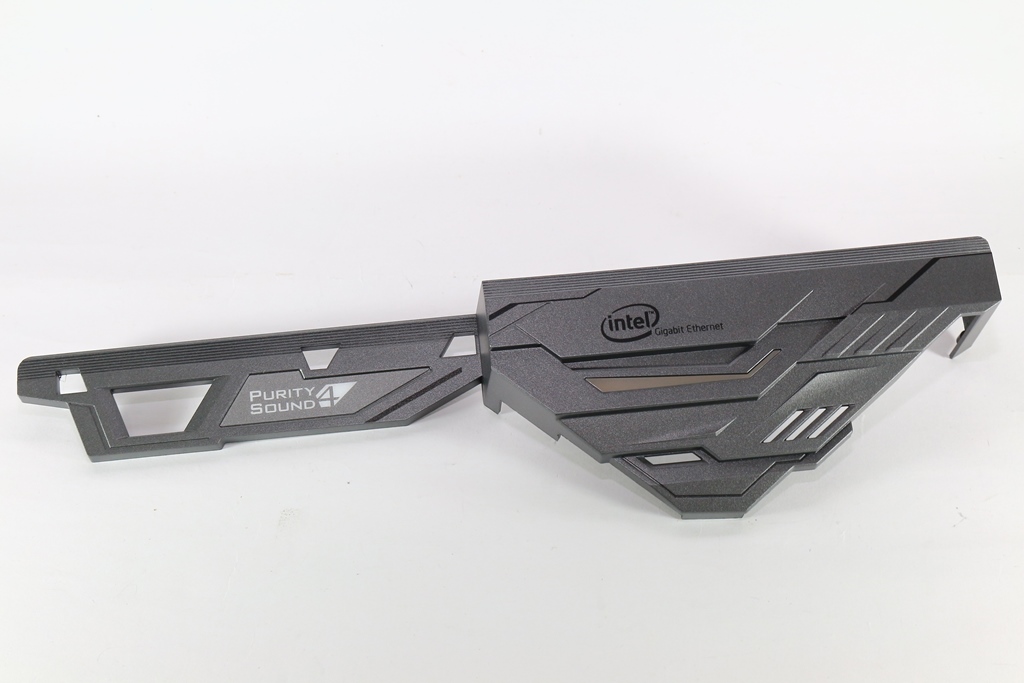
▼主机板正反面一览,采用黑色PCB与灰色做搭配,图案连PCH散热片也有一整体的搭配,整体质感相当不错,I/O上方有一块灰色饰板
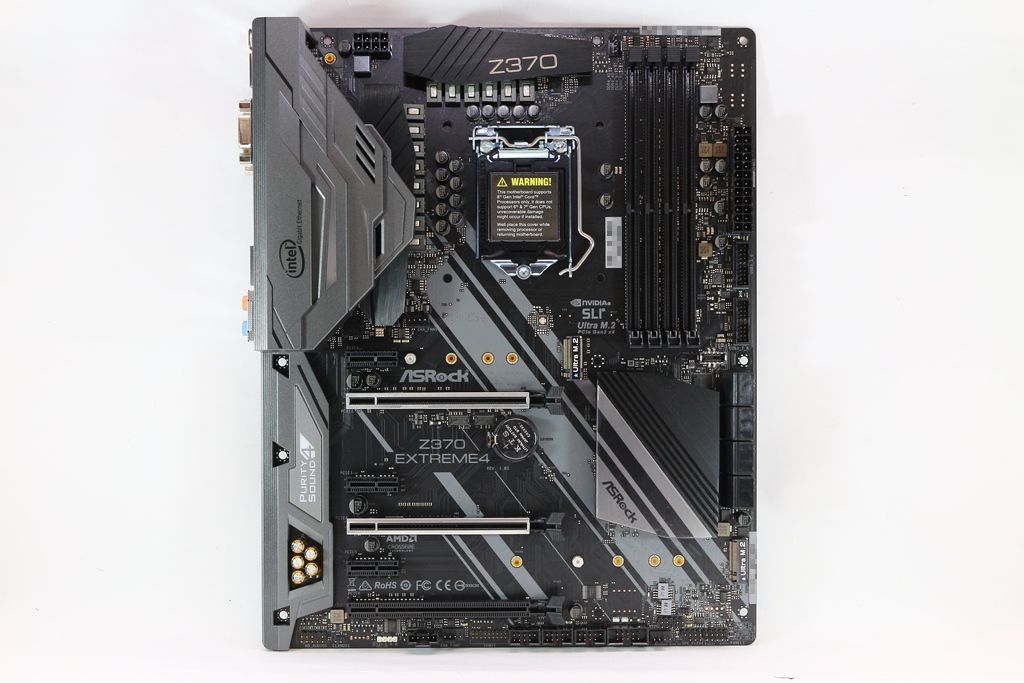
▼I/O灰色饰板有RGB发光,发光区域为天籁美声四代字样与Intel Logo下方
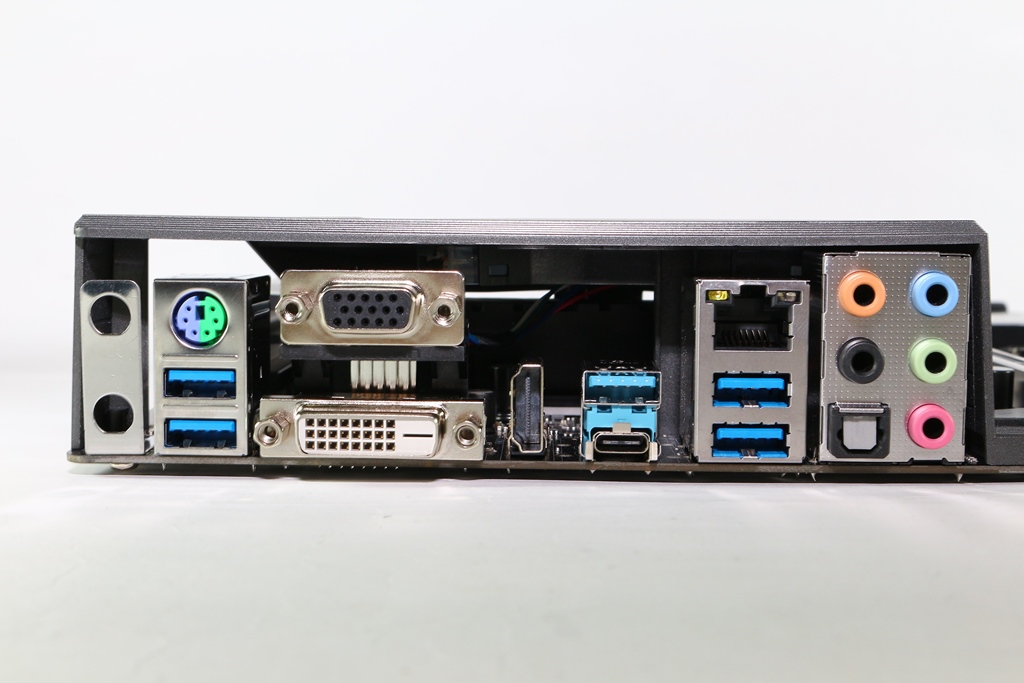
▼I/O部分:PS/2、USB 3.0 *4、VGA、DVI、HDMI、RJ-45*2、7.1声道音讯输出、USB3.1 Type-A与USB3.1 Type-C
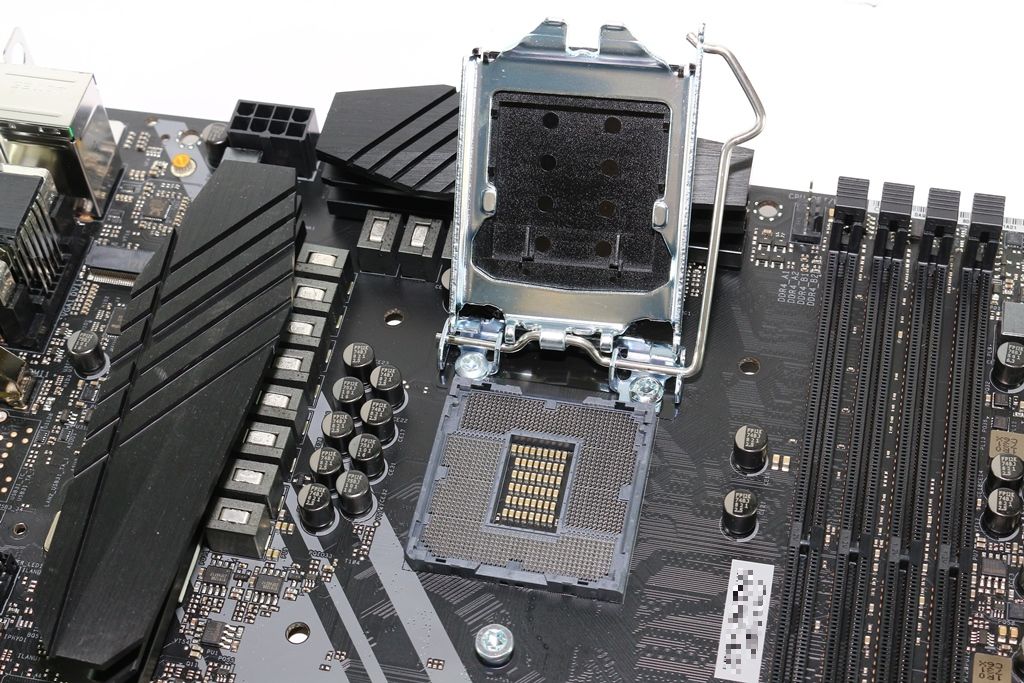
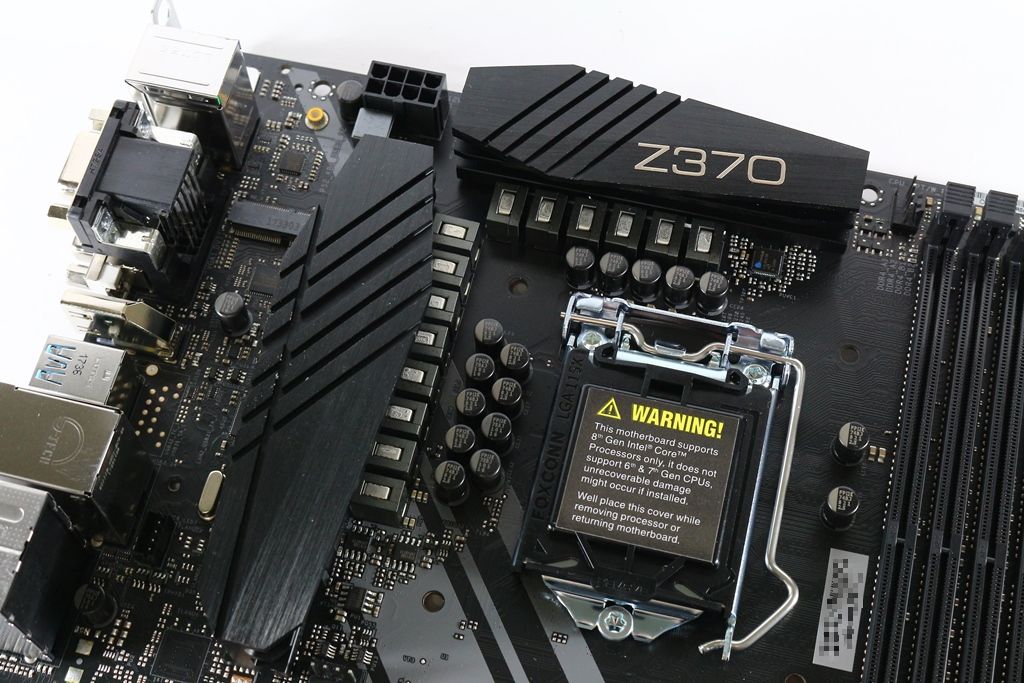
▼CPU脚座,支援LGA1151处理器
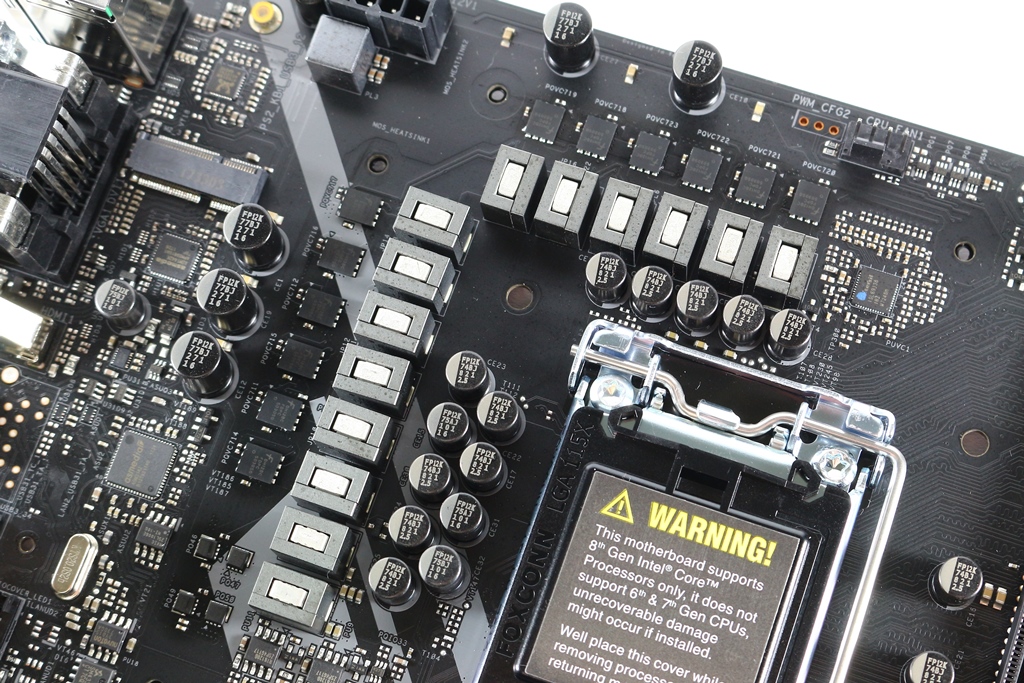
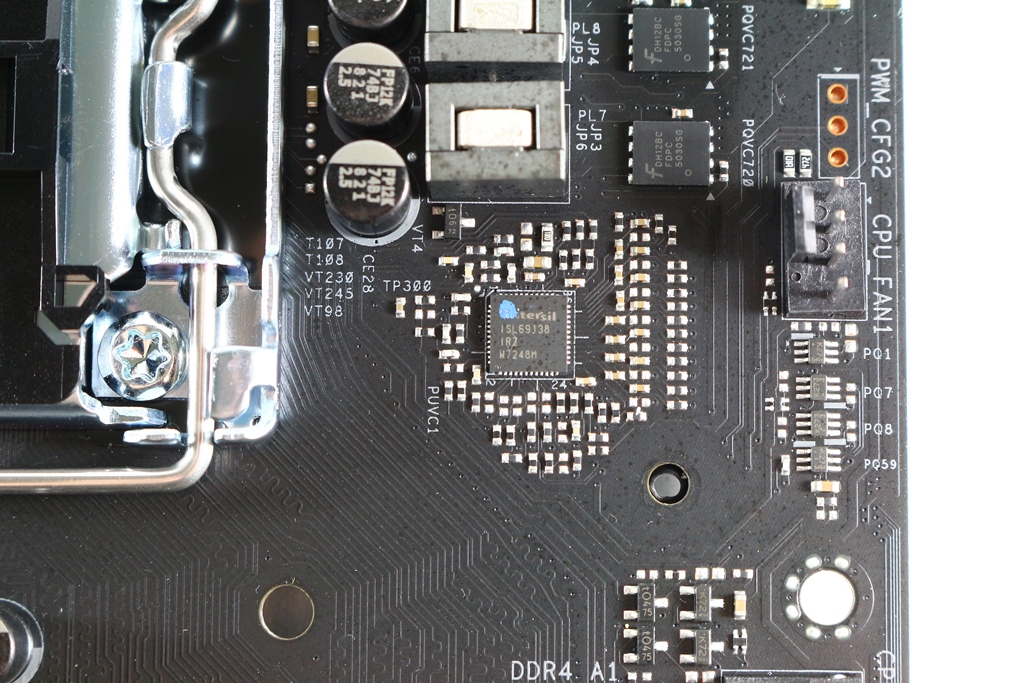
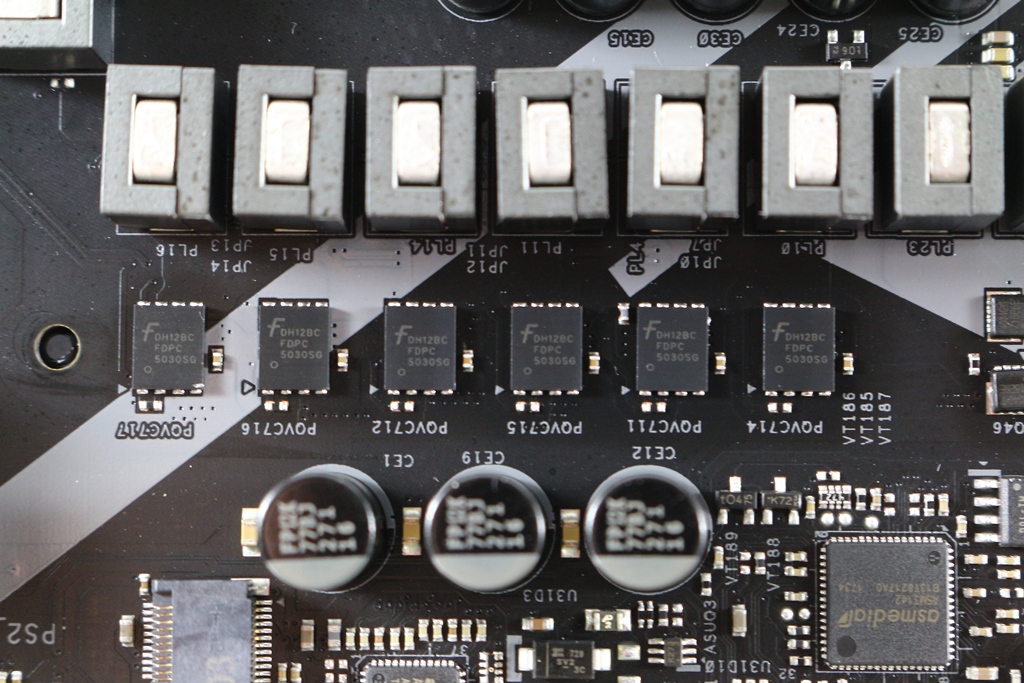
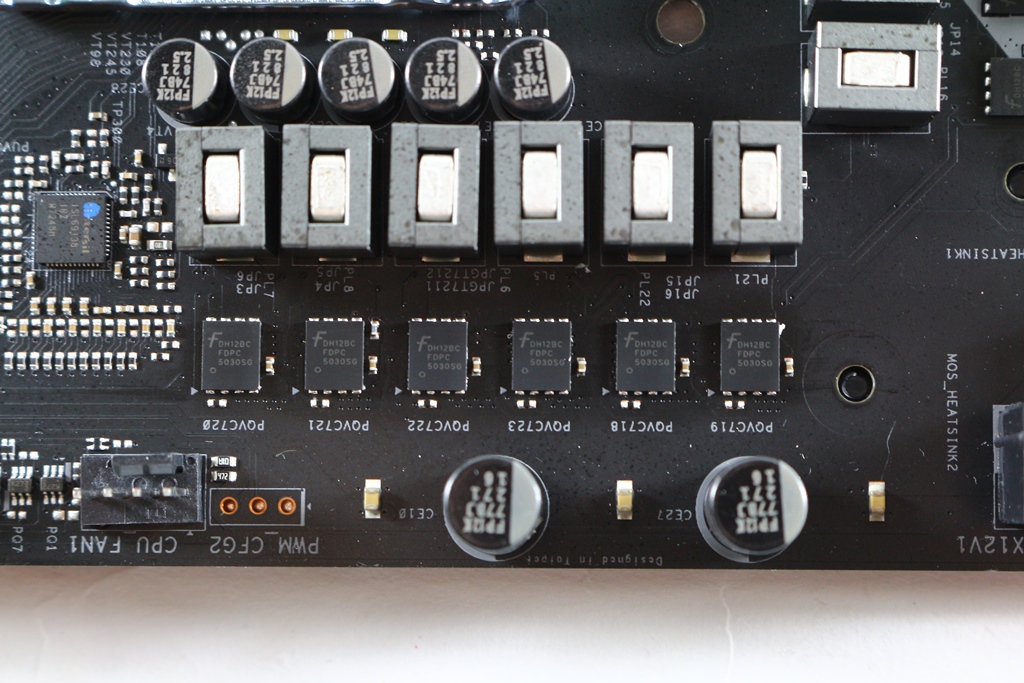
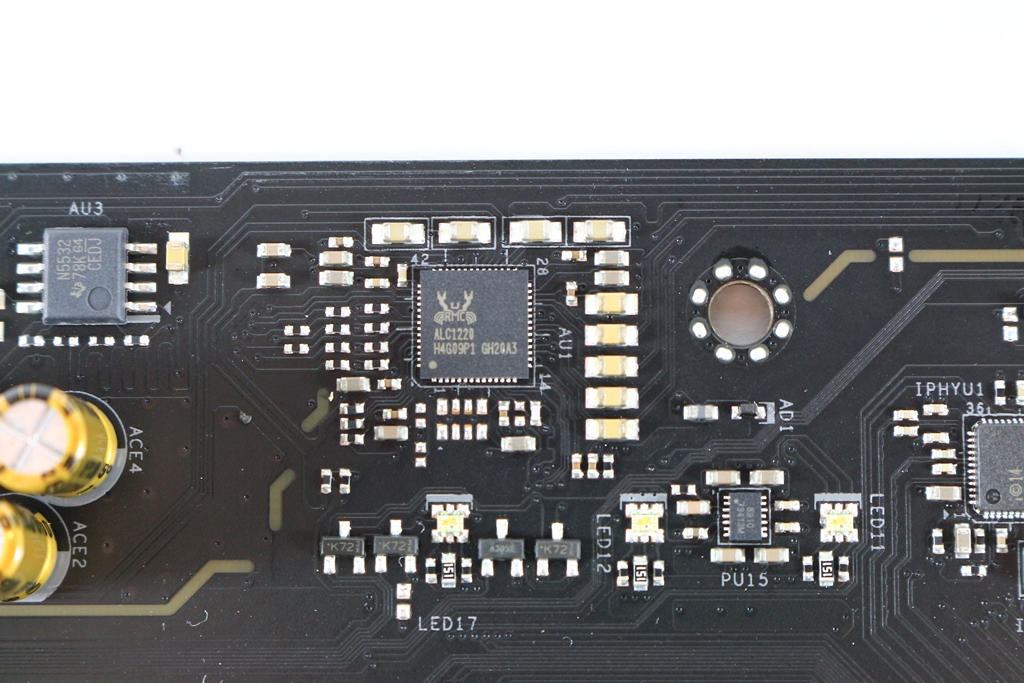
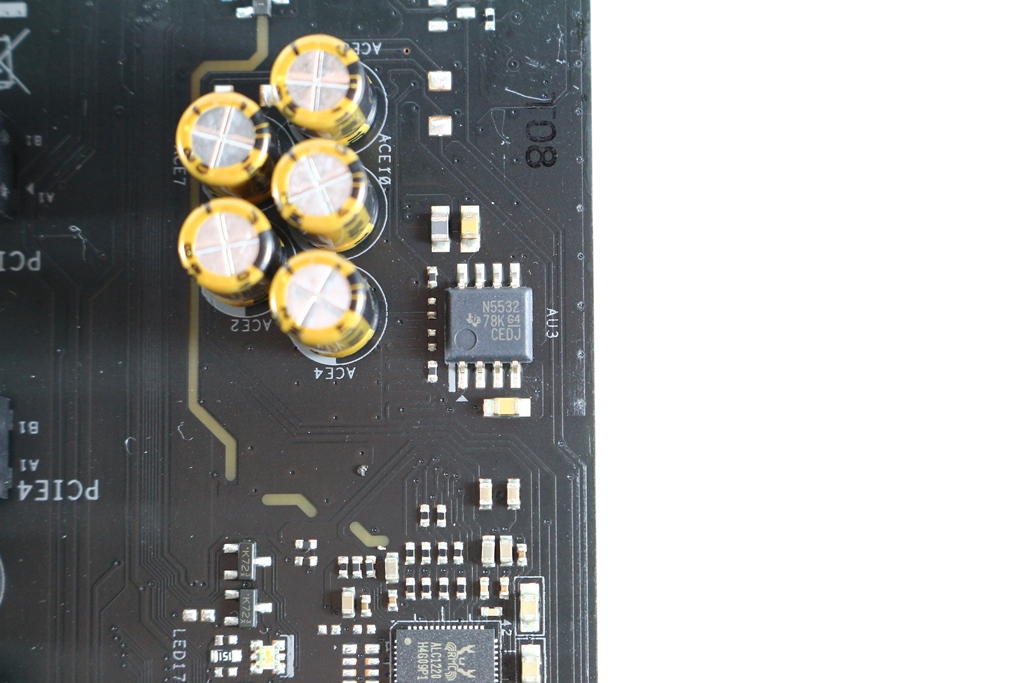
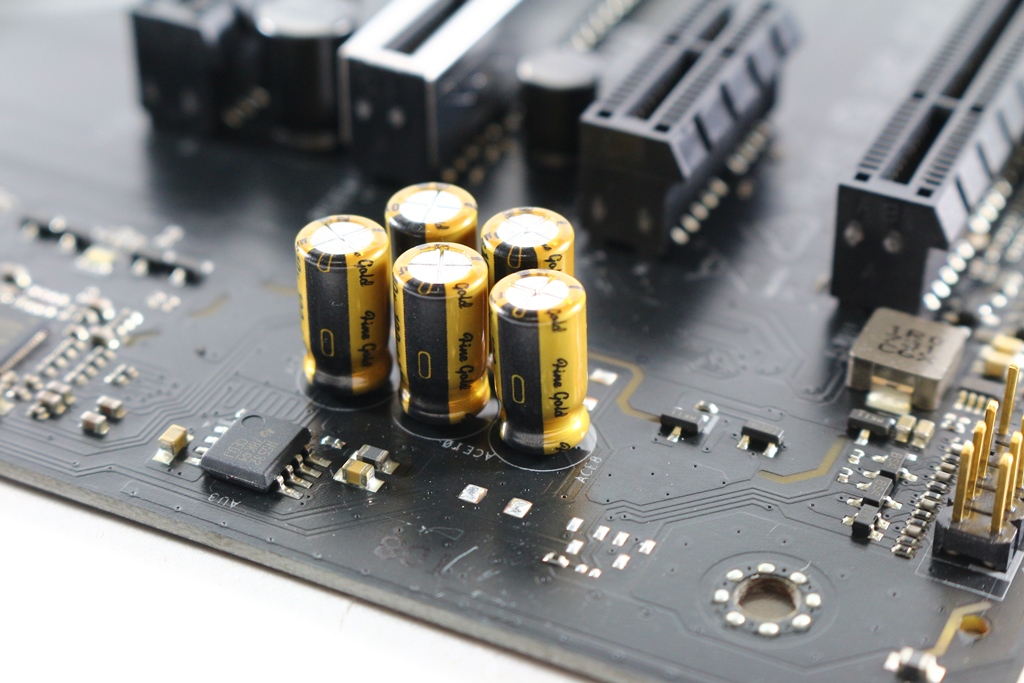
▼CPU供电部分采用12相供电,搭配Intersil ISL69138PWM控制器,搭配双层堆叠 MOSFET FDPC5030SG并有独立散热片做散热,背面有MOSFET DRIVER,CPU VCore供电为8 Pin,电容部分采用Nichcon 12K黑电容
▼记忆体扩充槽为4条
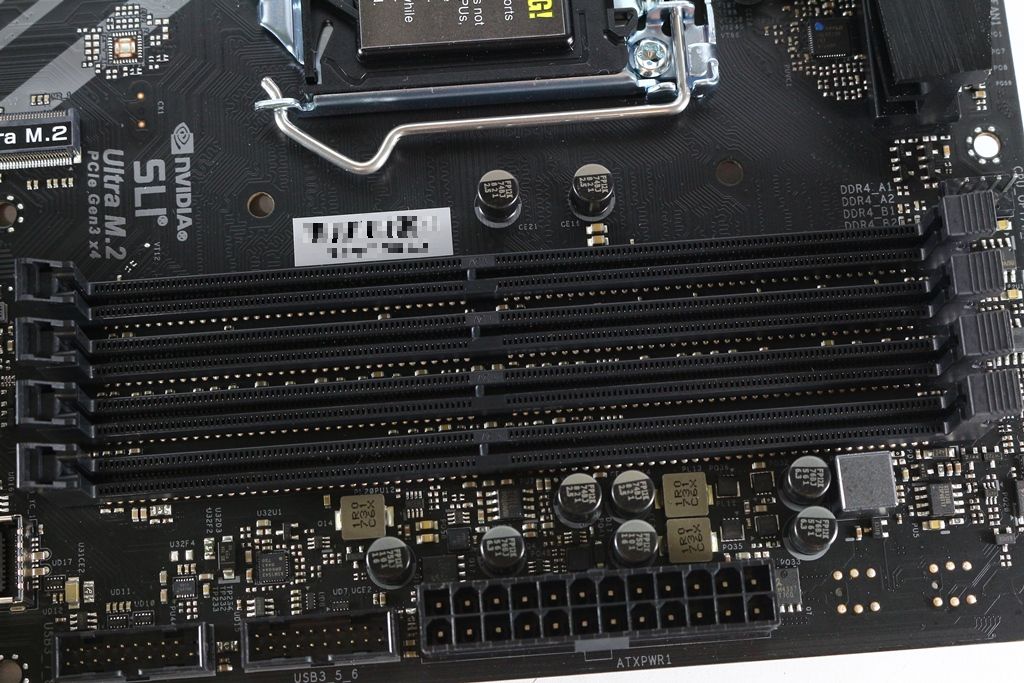
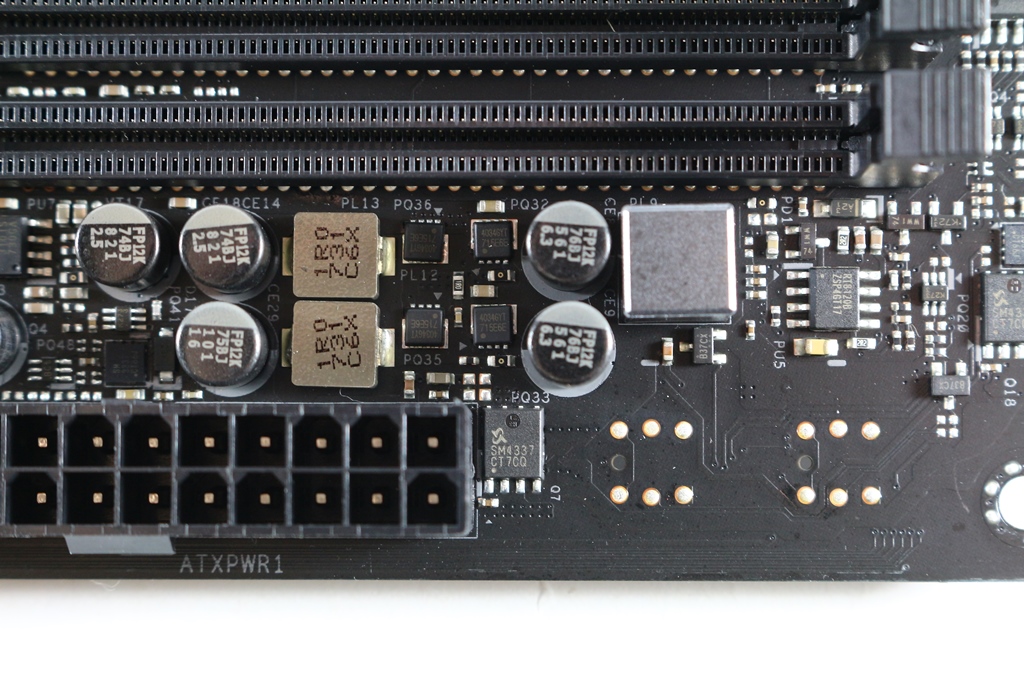
▼记忆体电源用料
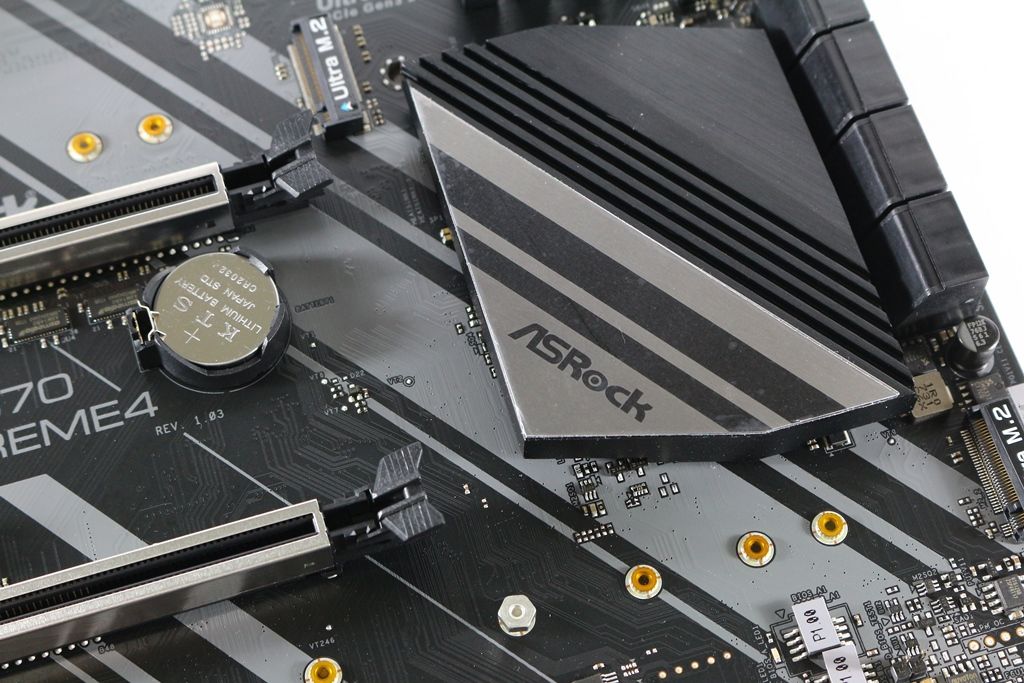
▼M.2(Key E)Wi-Fi升级空间
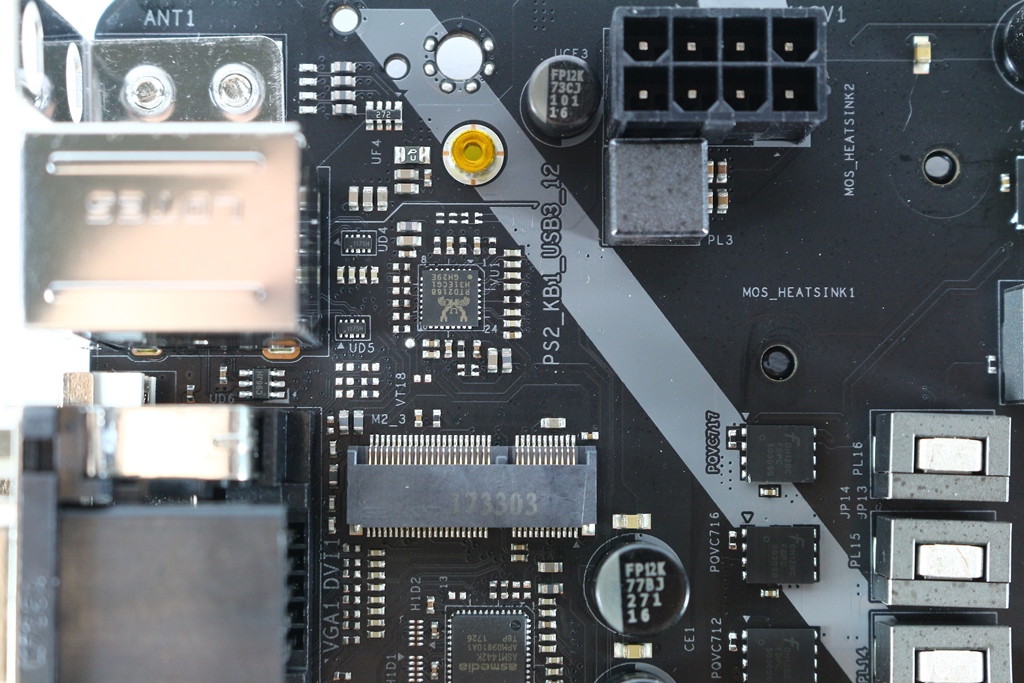
▼DP转VGA晶片:Realtek RTD2168
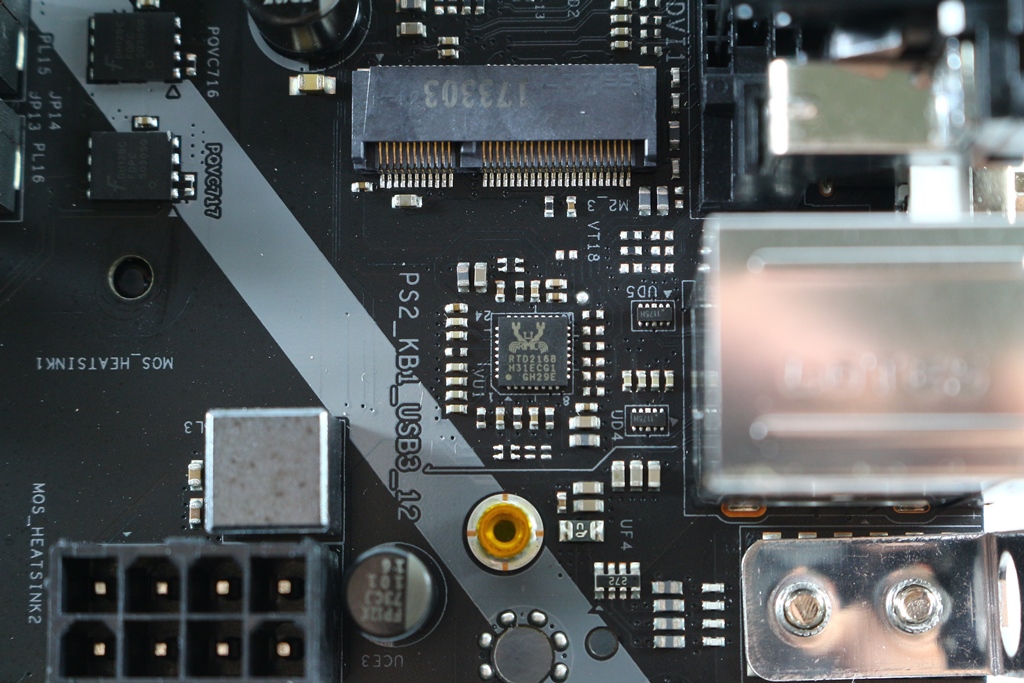
▼ASMedia ASM1442K HDMI Level Shift晶片
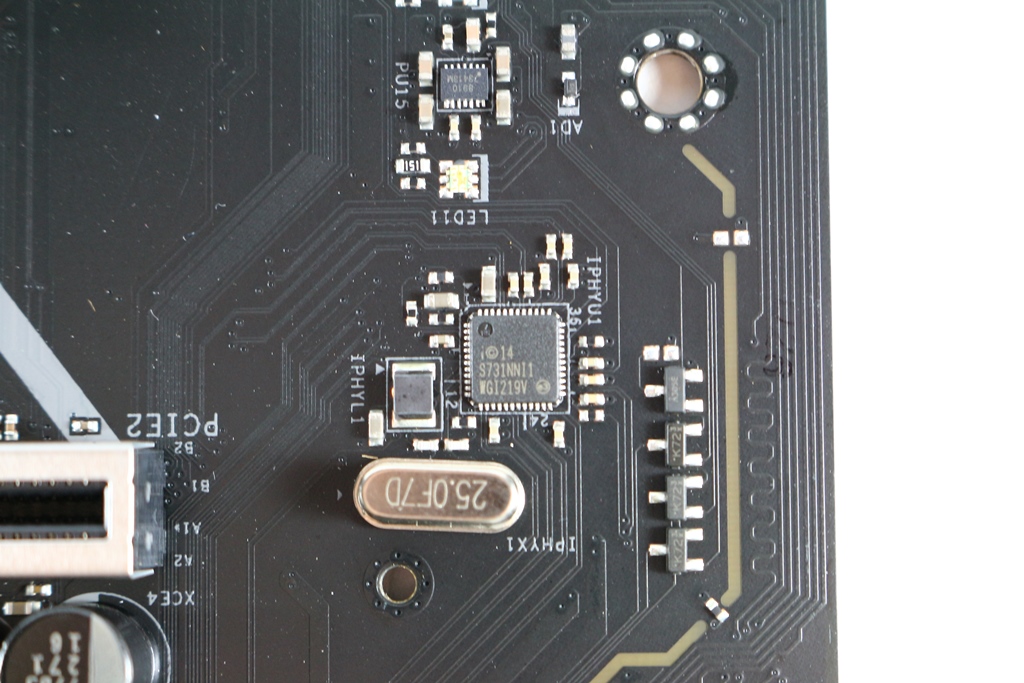
▼网路晶片:Intel WGI219V
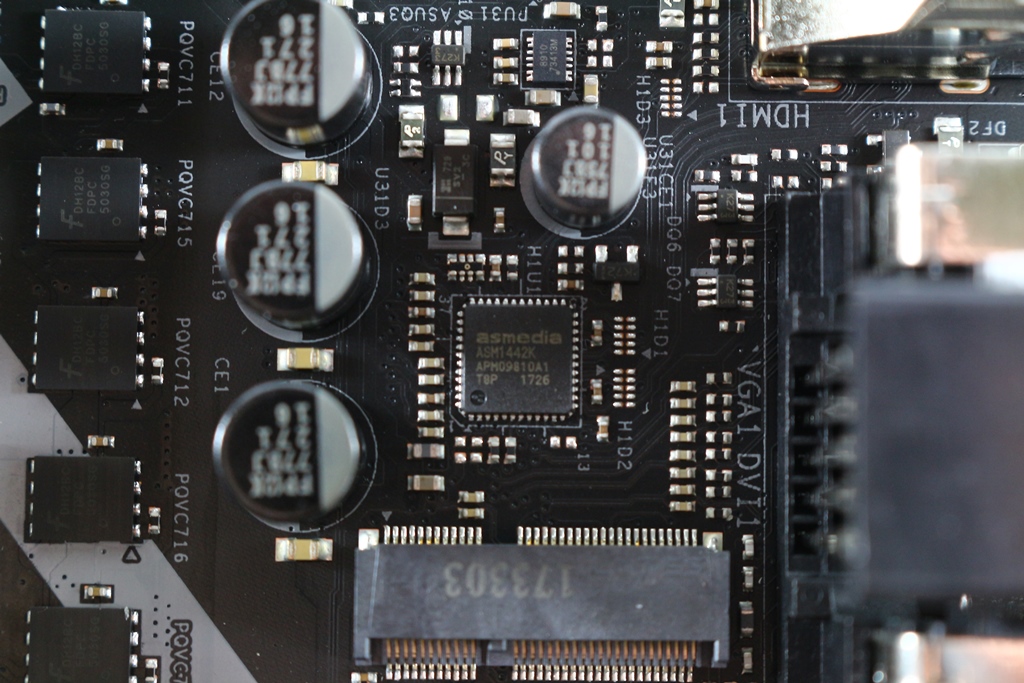
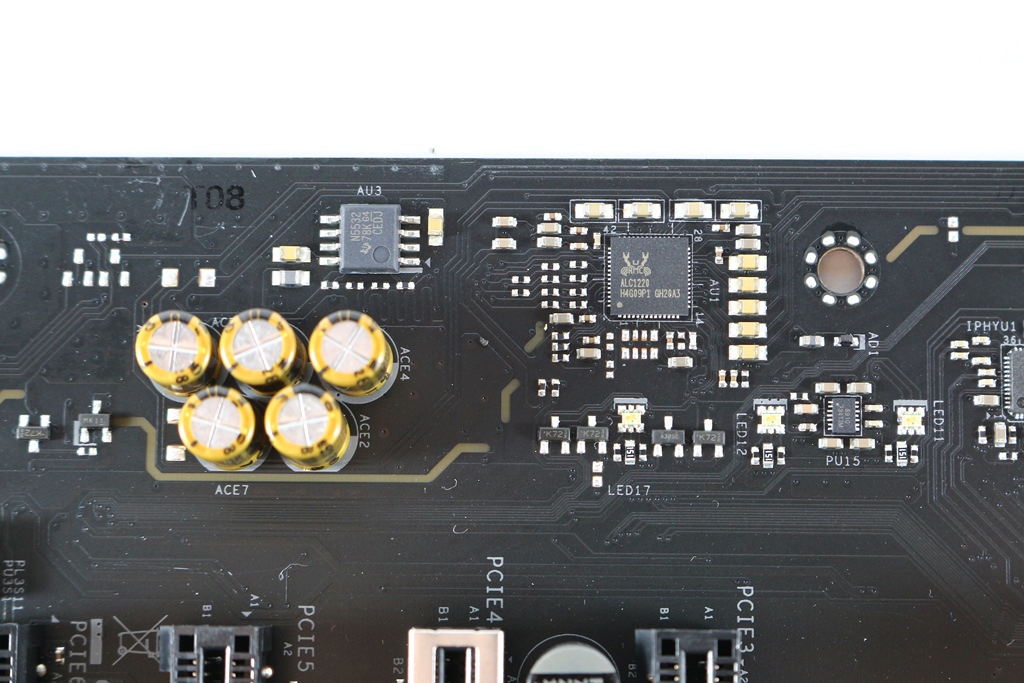
▼音效采用天籁美声四代并搭配Nichicon电容,音效晶片采用ALC1220,输出端搭配发烧级TI N5532 OPA放大器
▼ASMedia ASM1543 USB3.1 Type-C侦测晶片
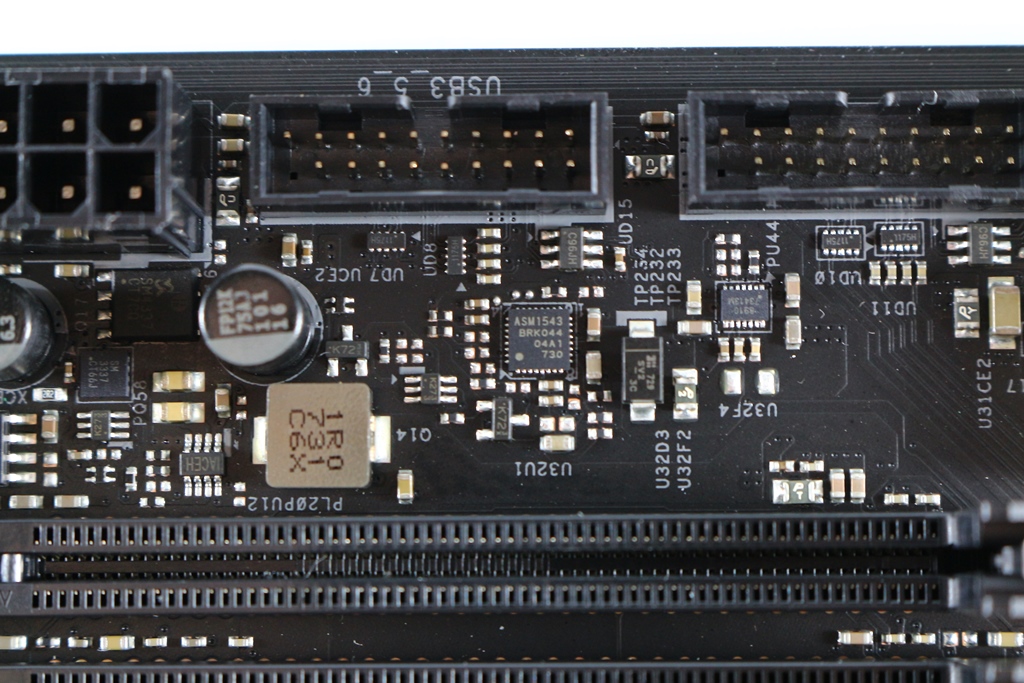
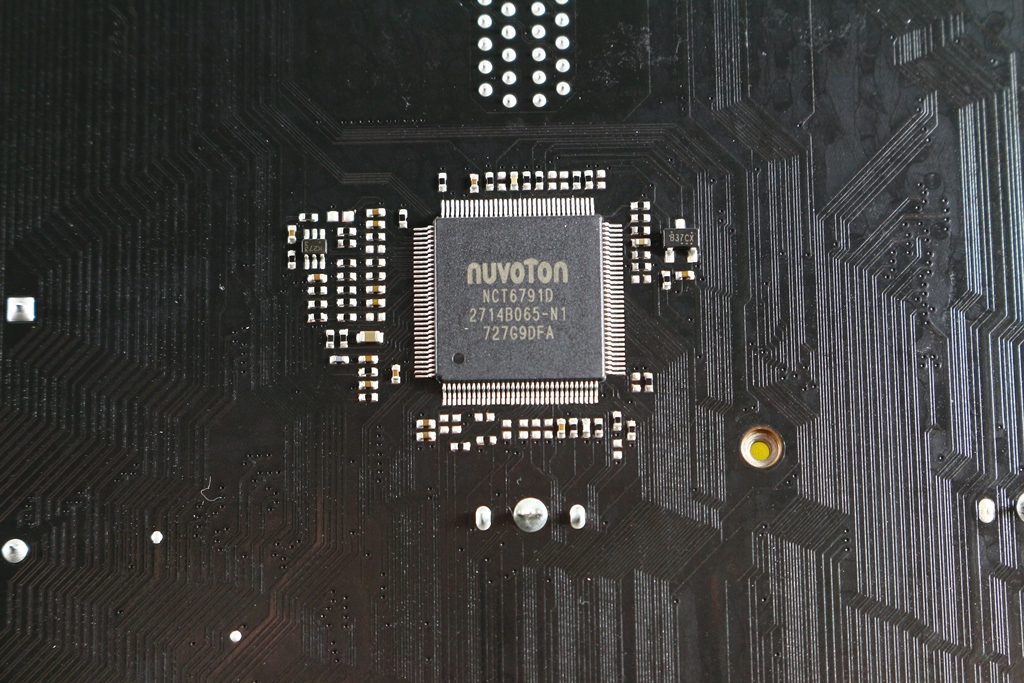
▼nuvoTon NCT6791D Super IO晶片
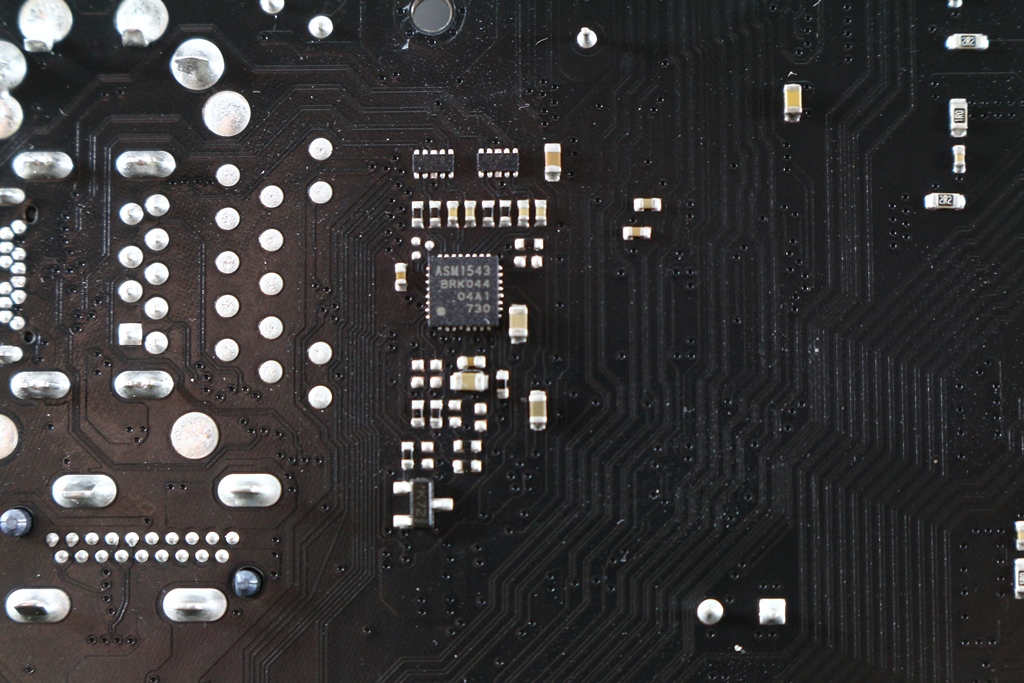
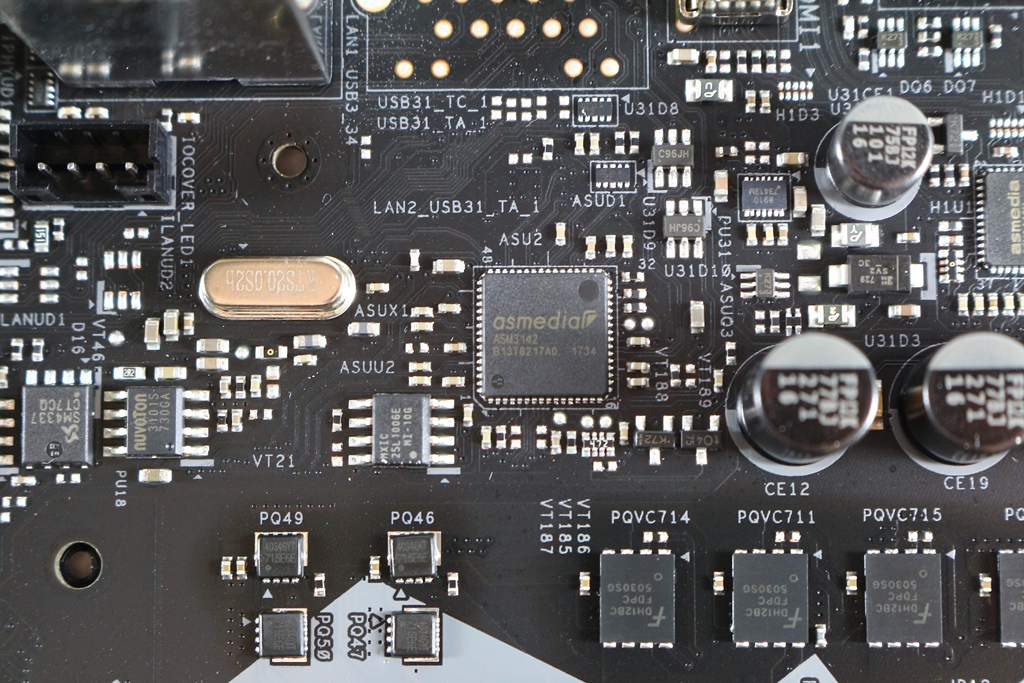
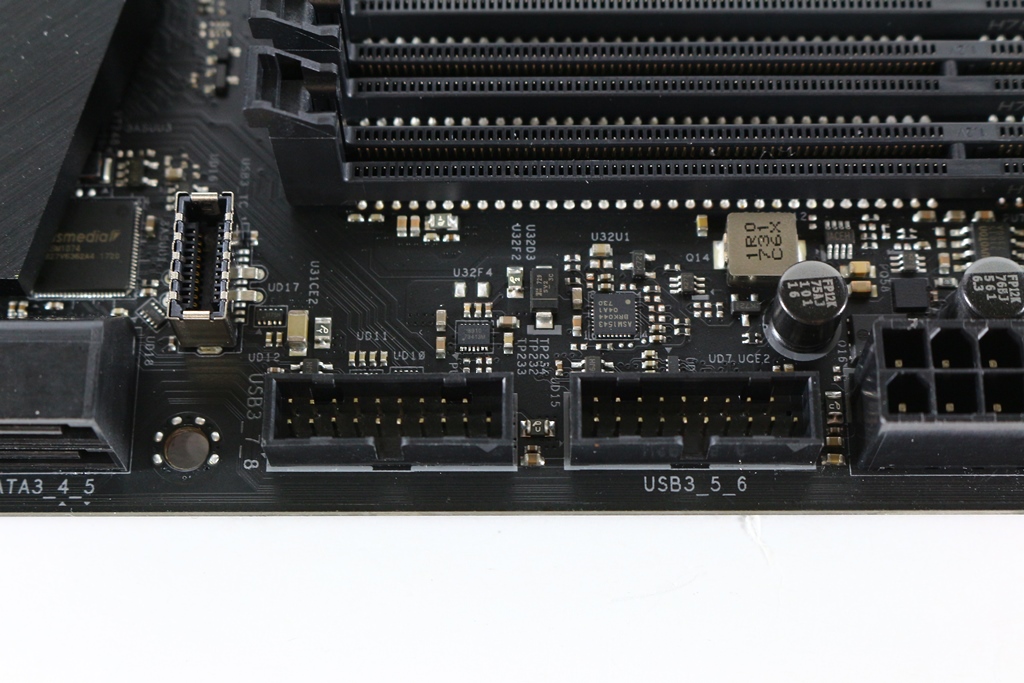
▼ASMedia ASM3142 PCIe转USB3.1晶片
▼ASMedia ASM1061 SATA 6Gb/s晶片

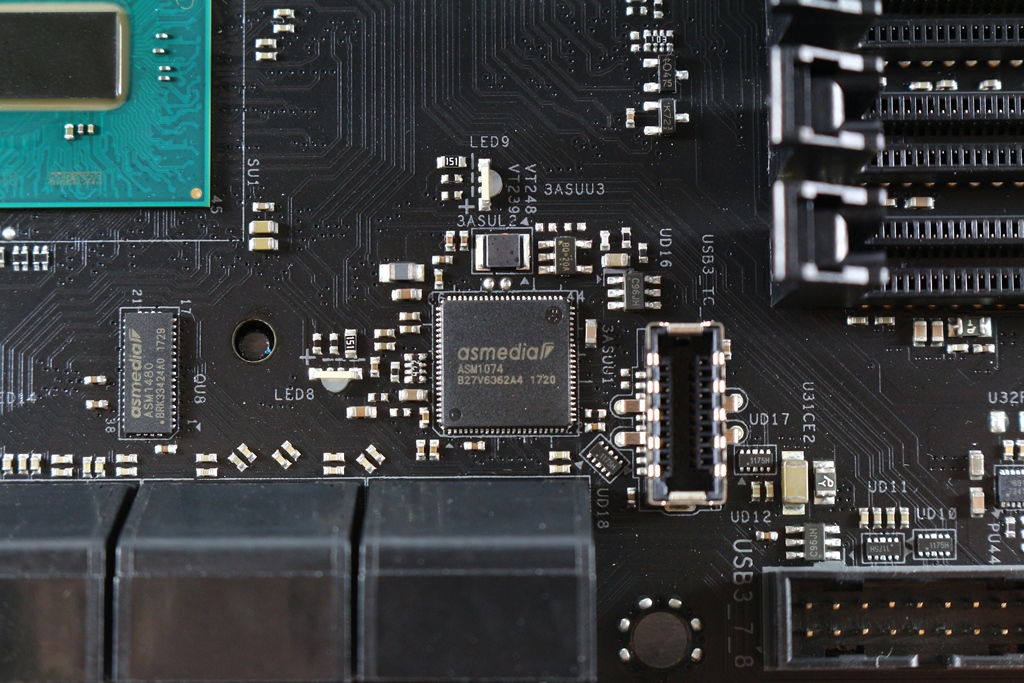
▼ASMedia ASM1074 USB3.0 Hub晶片
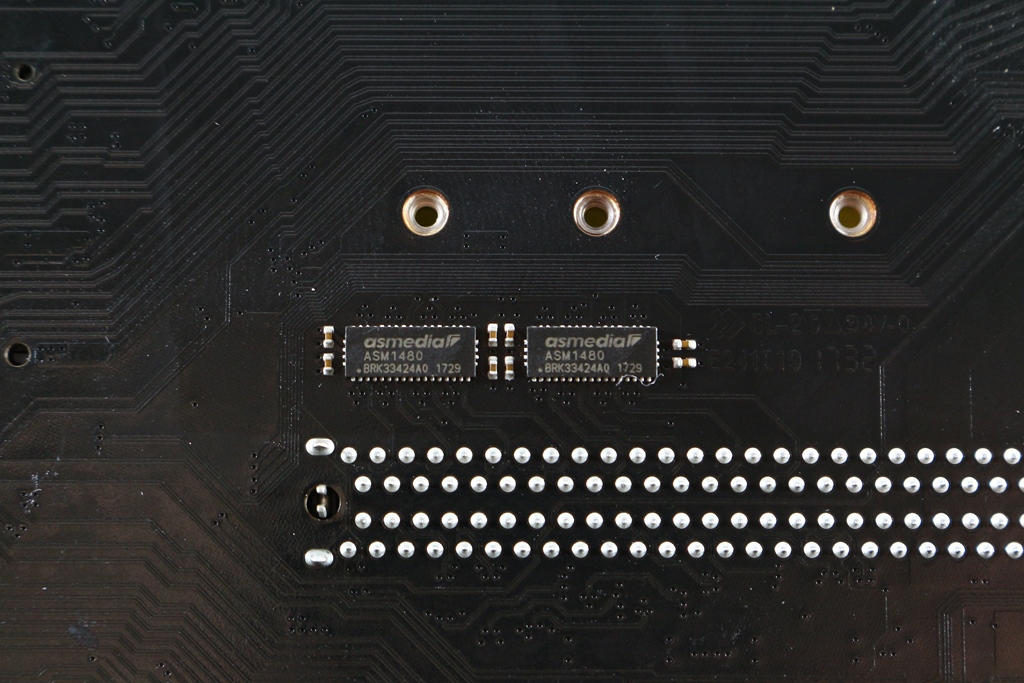
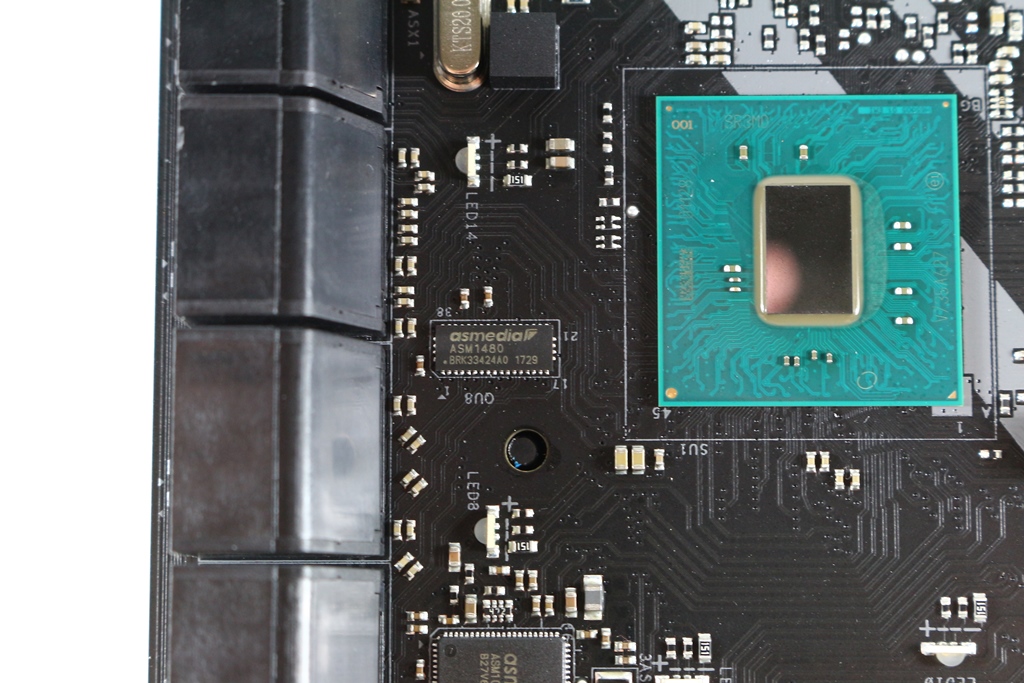
▼ASMedia ASM1480 PCIe 3.0切换器
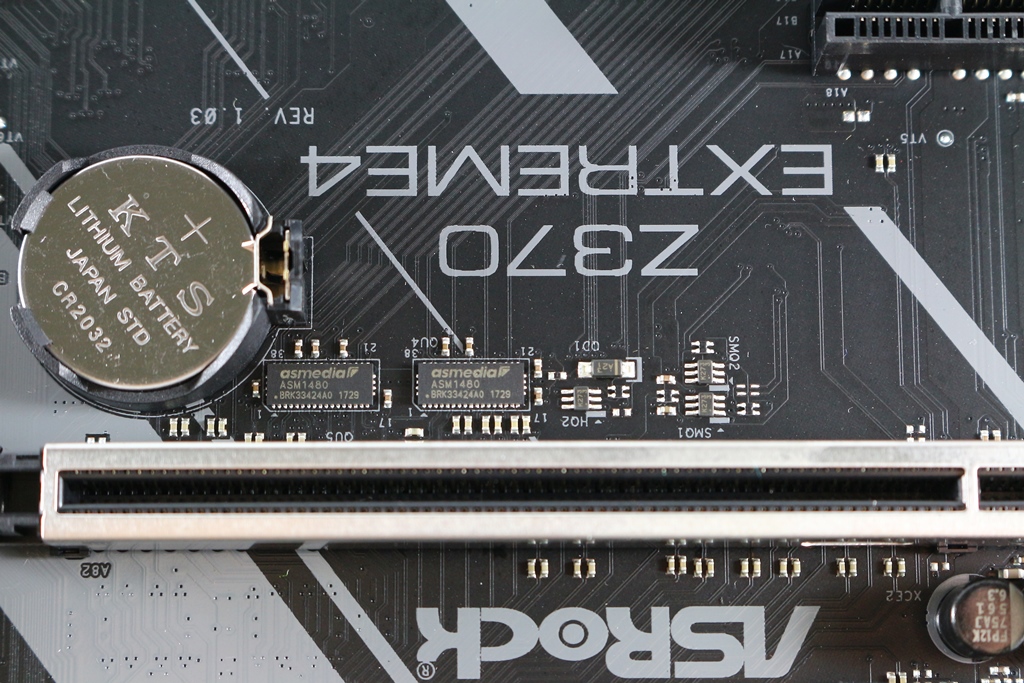
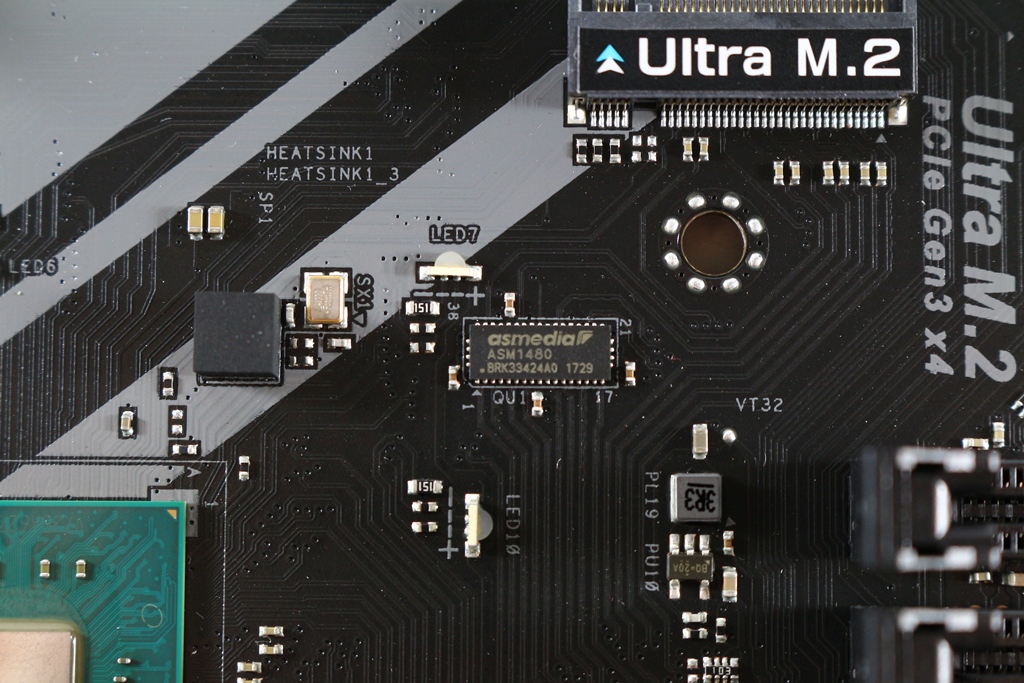
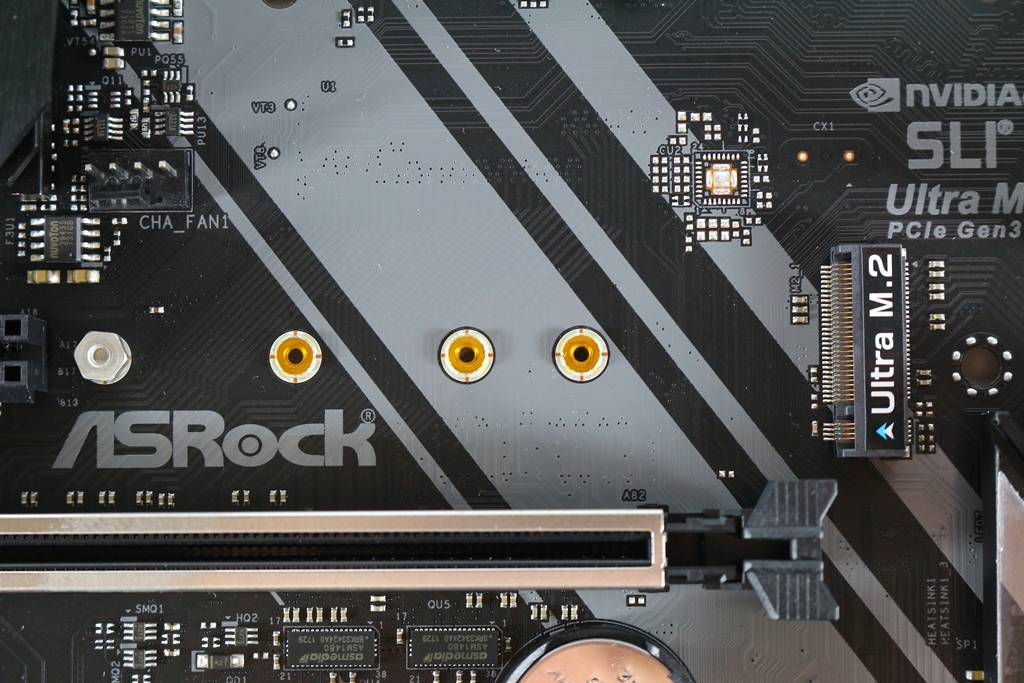
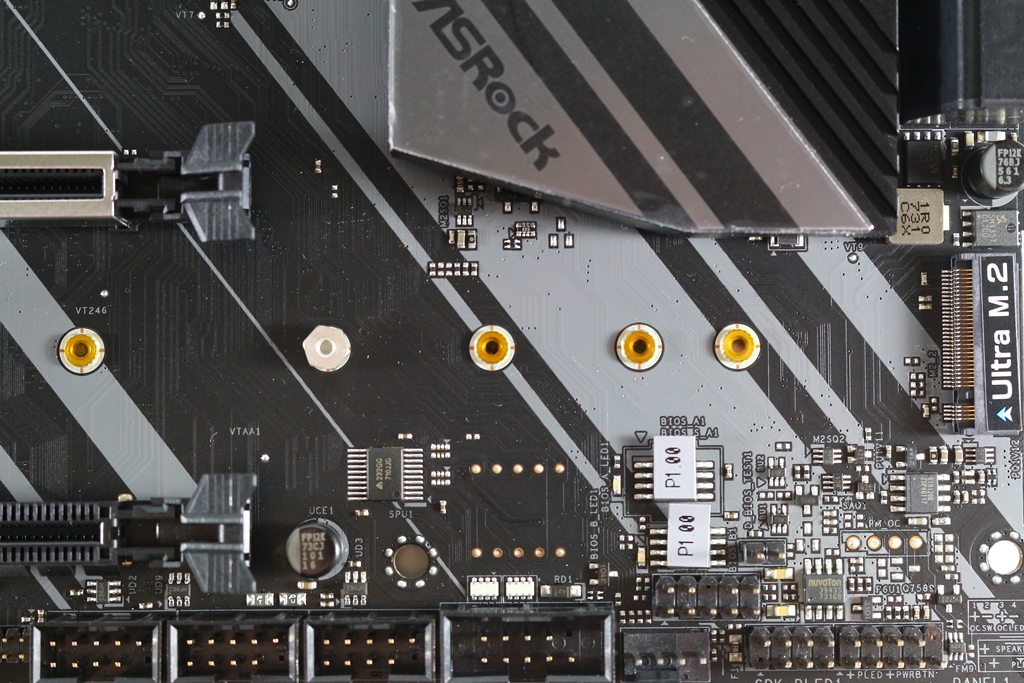
▼两组Ultra M.2提供PCIe Gen3 x4与SATA Gen 3讯号
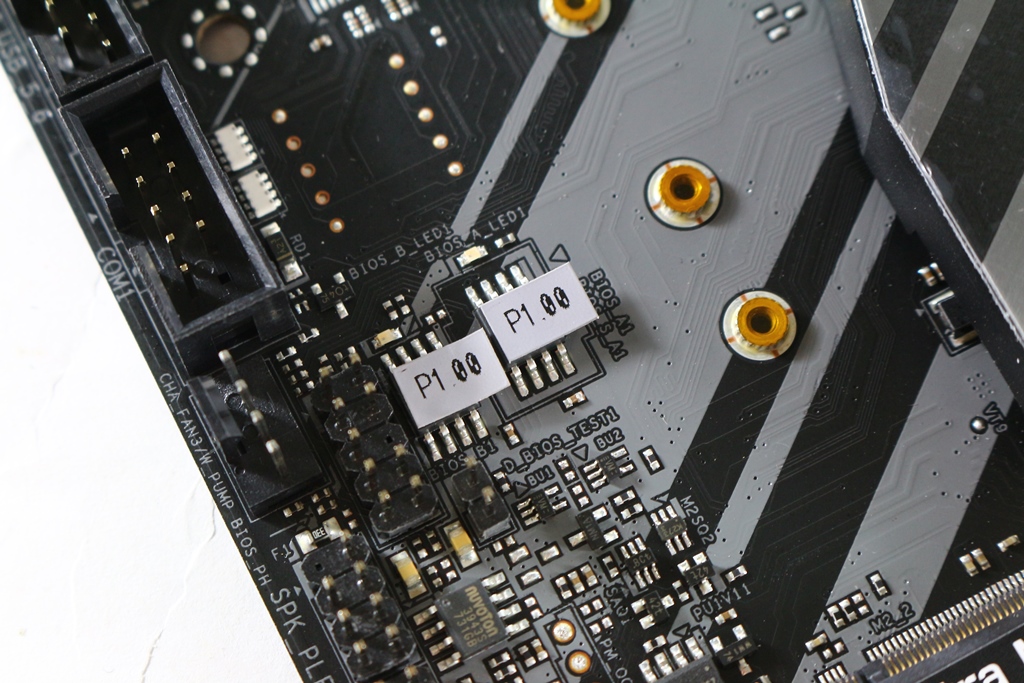
▼BIOS部分有双BIOS设计
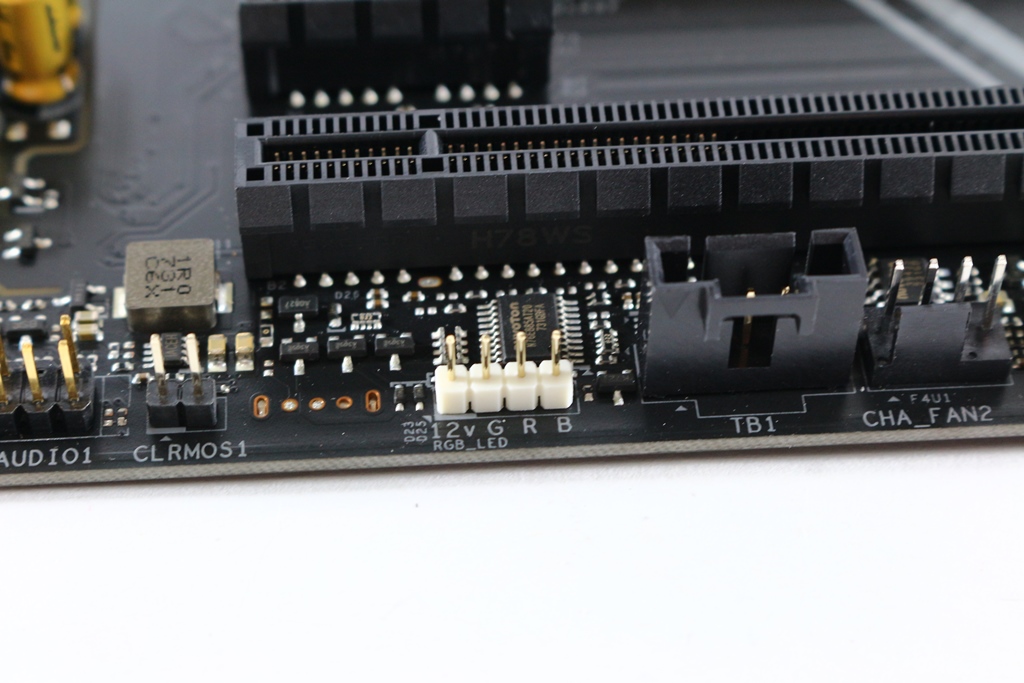
▼前置Audio插Pin
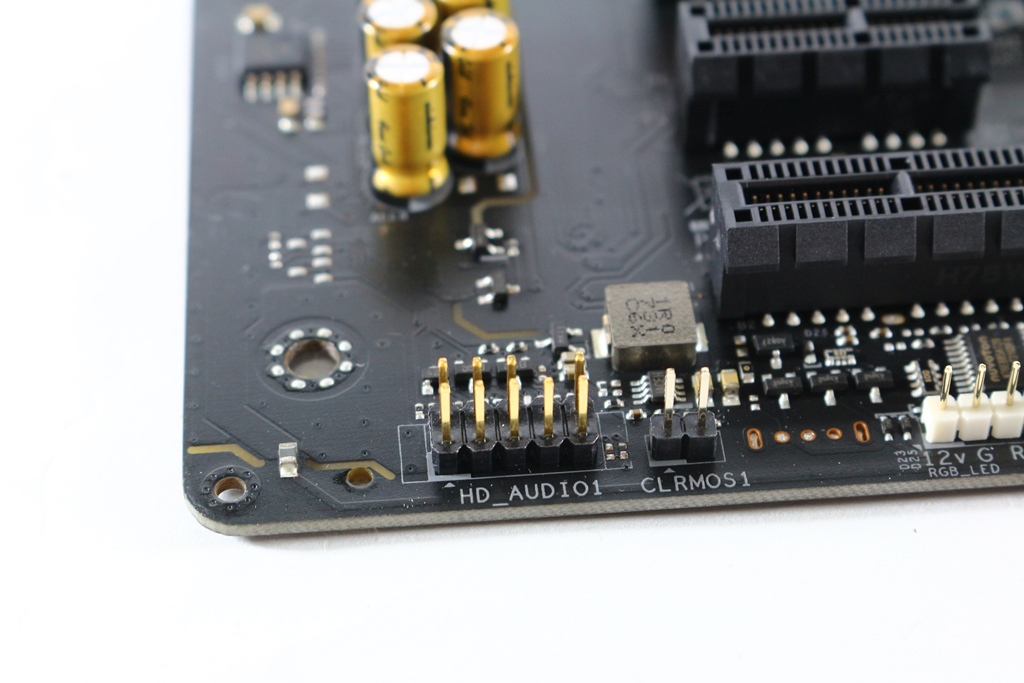
▼RGB LED控制插Pin
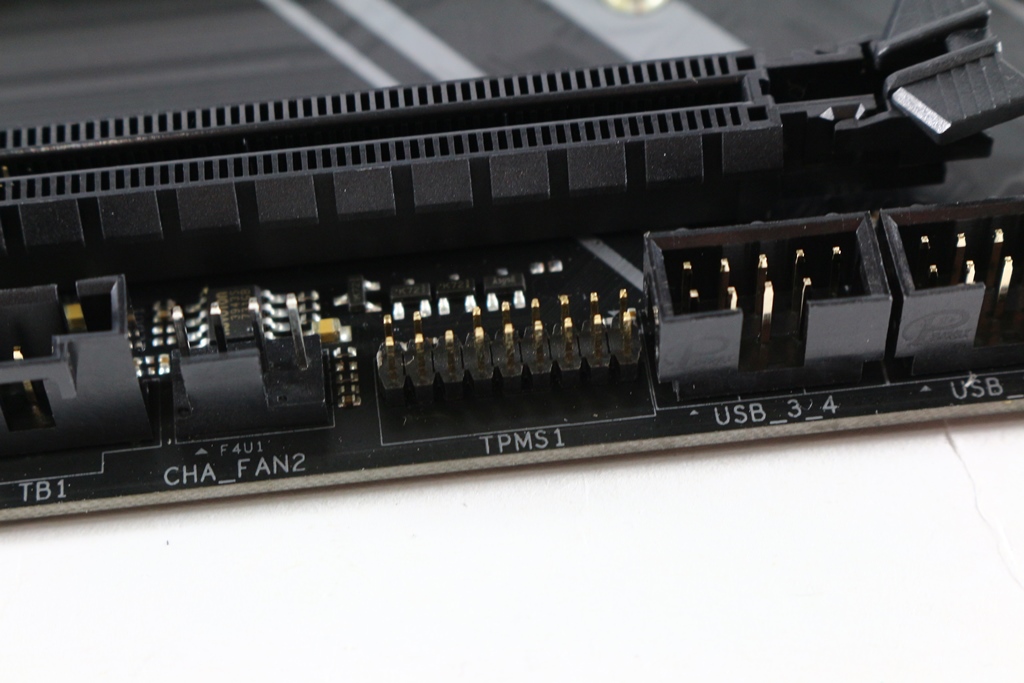
▼TPM模组插Pin
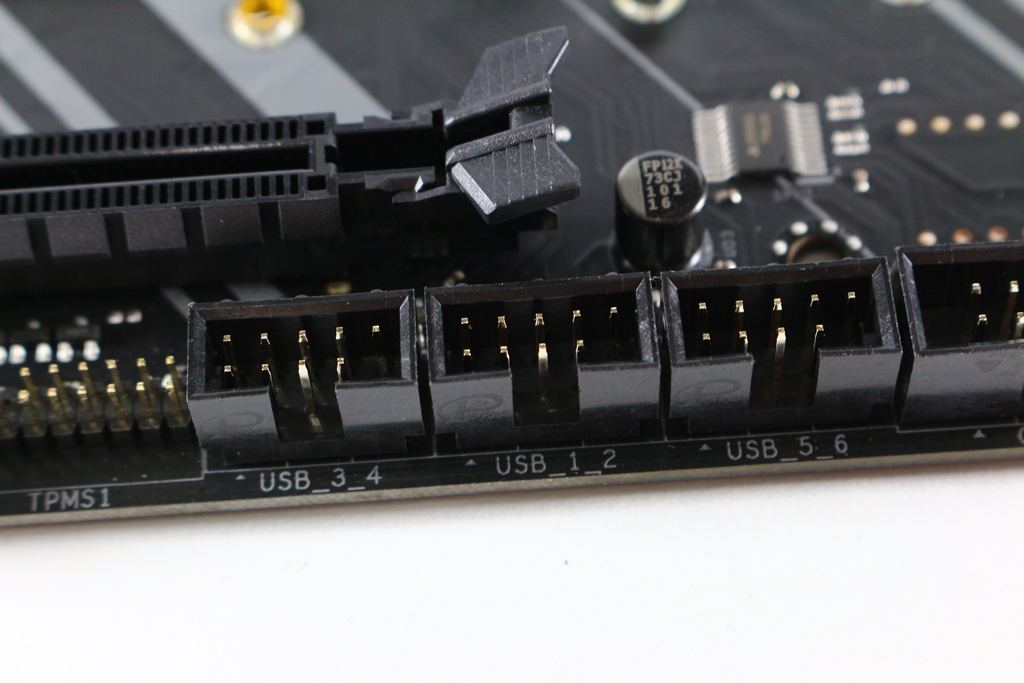
▼六组前置USB 2.0插Pin
▼Com Port插Pin
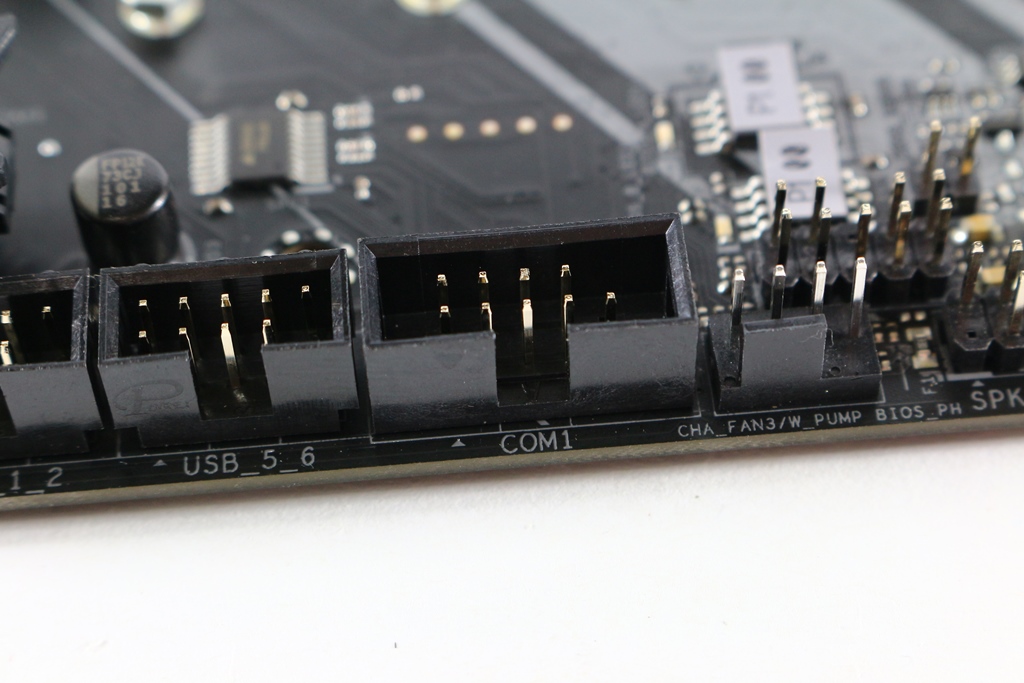
▼前置面板插Pin
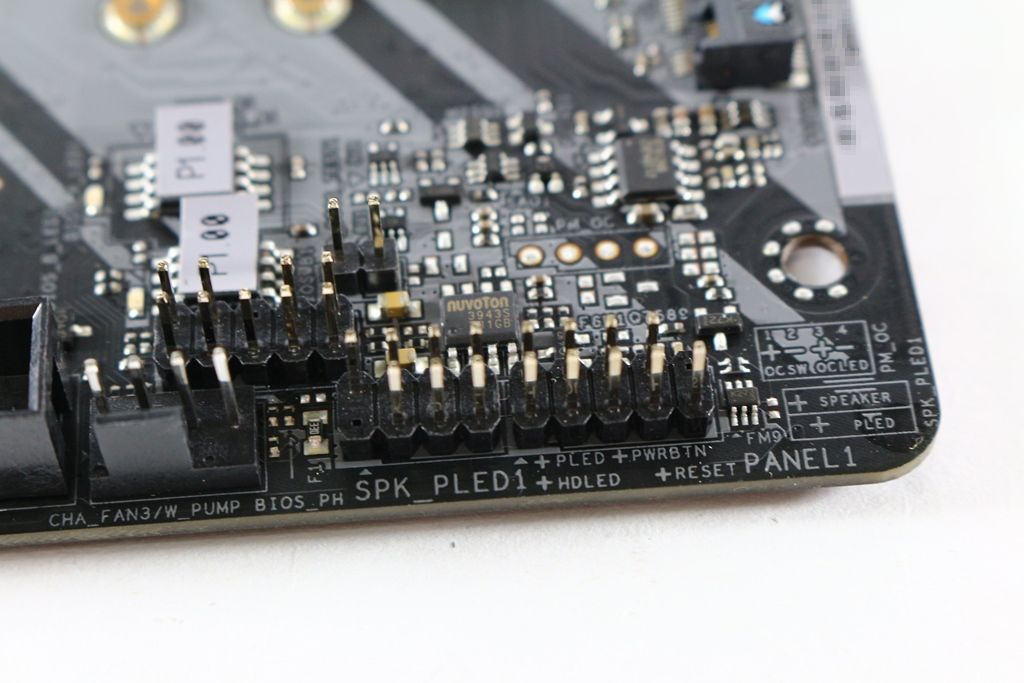
▼四组前置USB 3.0插Pin与前面板USB 3.1 Type-C接头
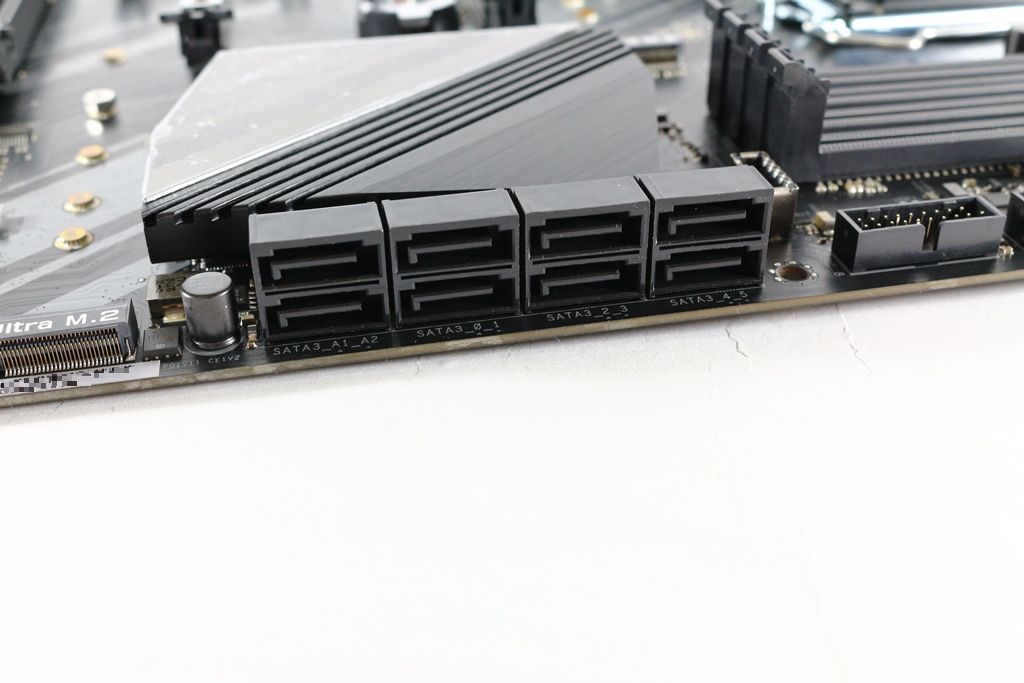
▼SATA部分为八组SATA 6Gb/s
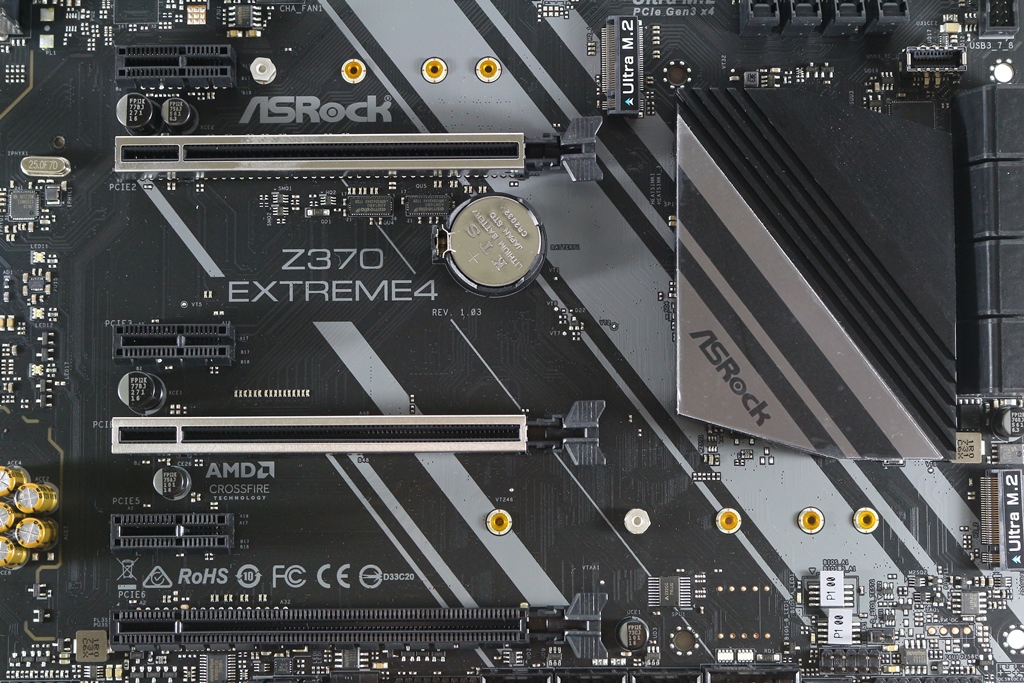
▼PCIe扩充槽一览
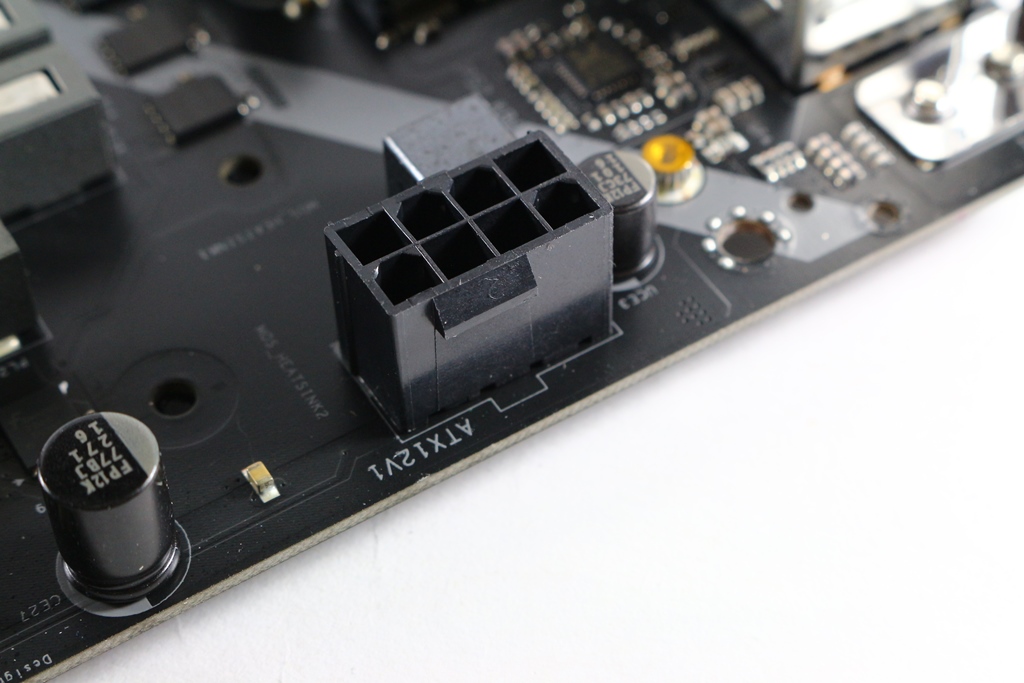
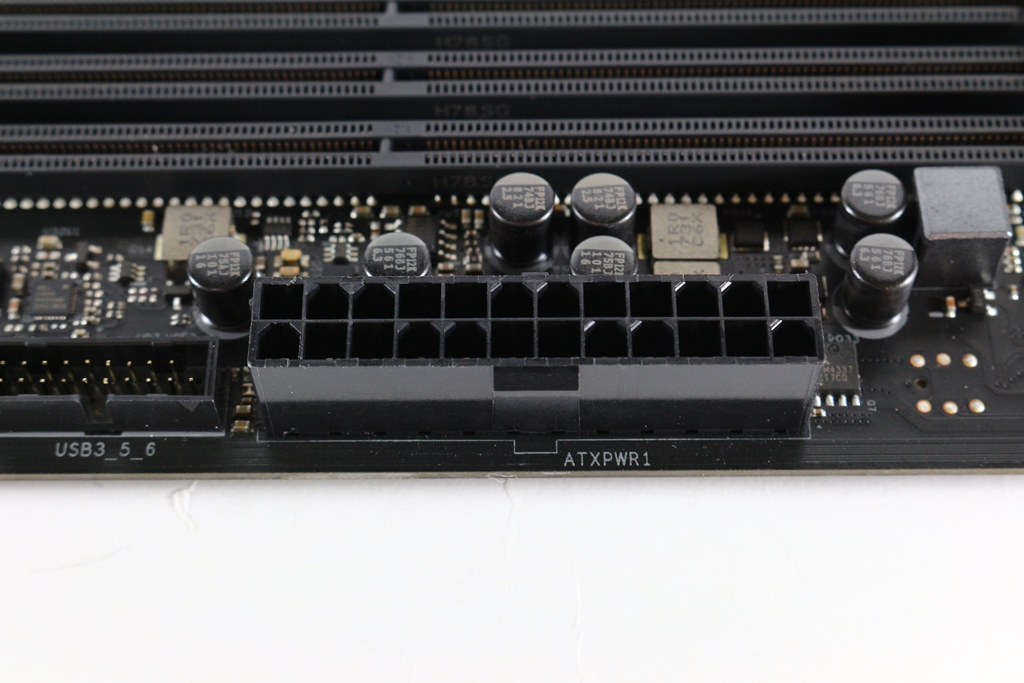
▼主机板为20+4 Pin电源供电
▼Z370 PCH散热片
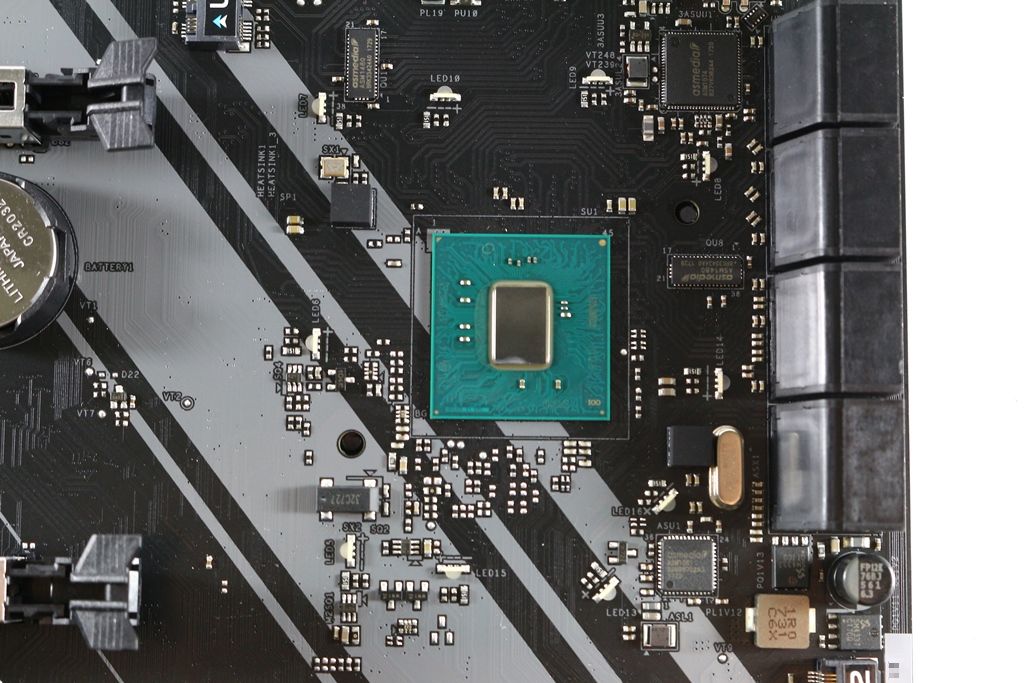
▼Z370 PCH

▼Z370 PCH边缘有多颗发光LED
 BIOS设定简单介绍
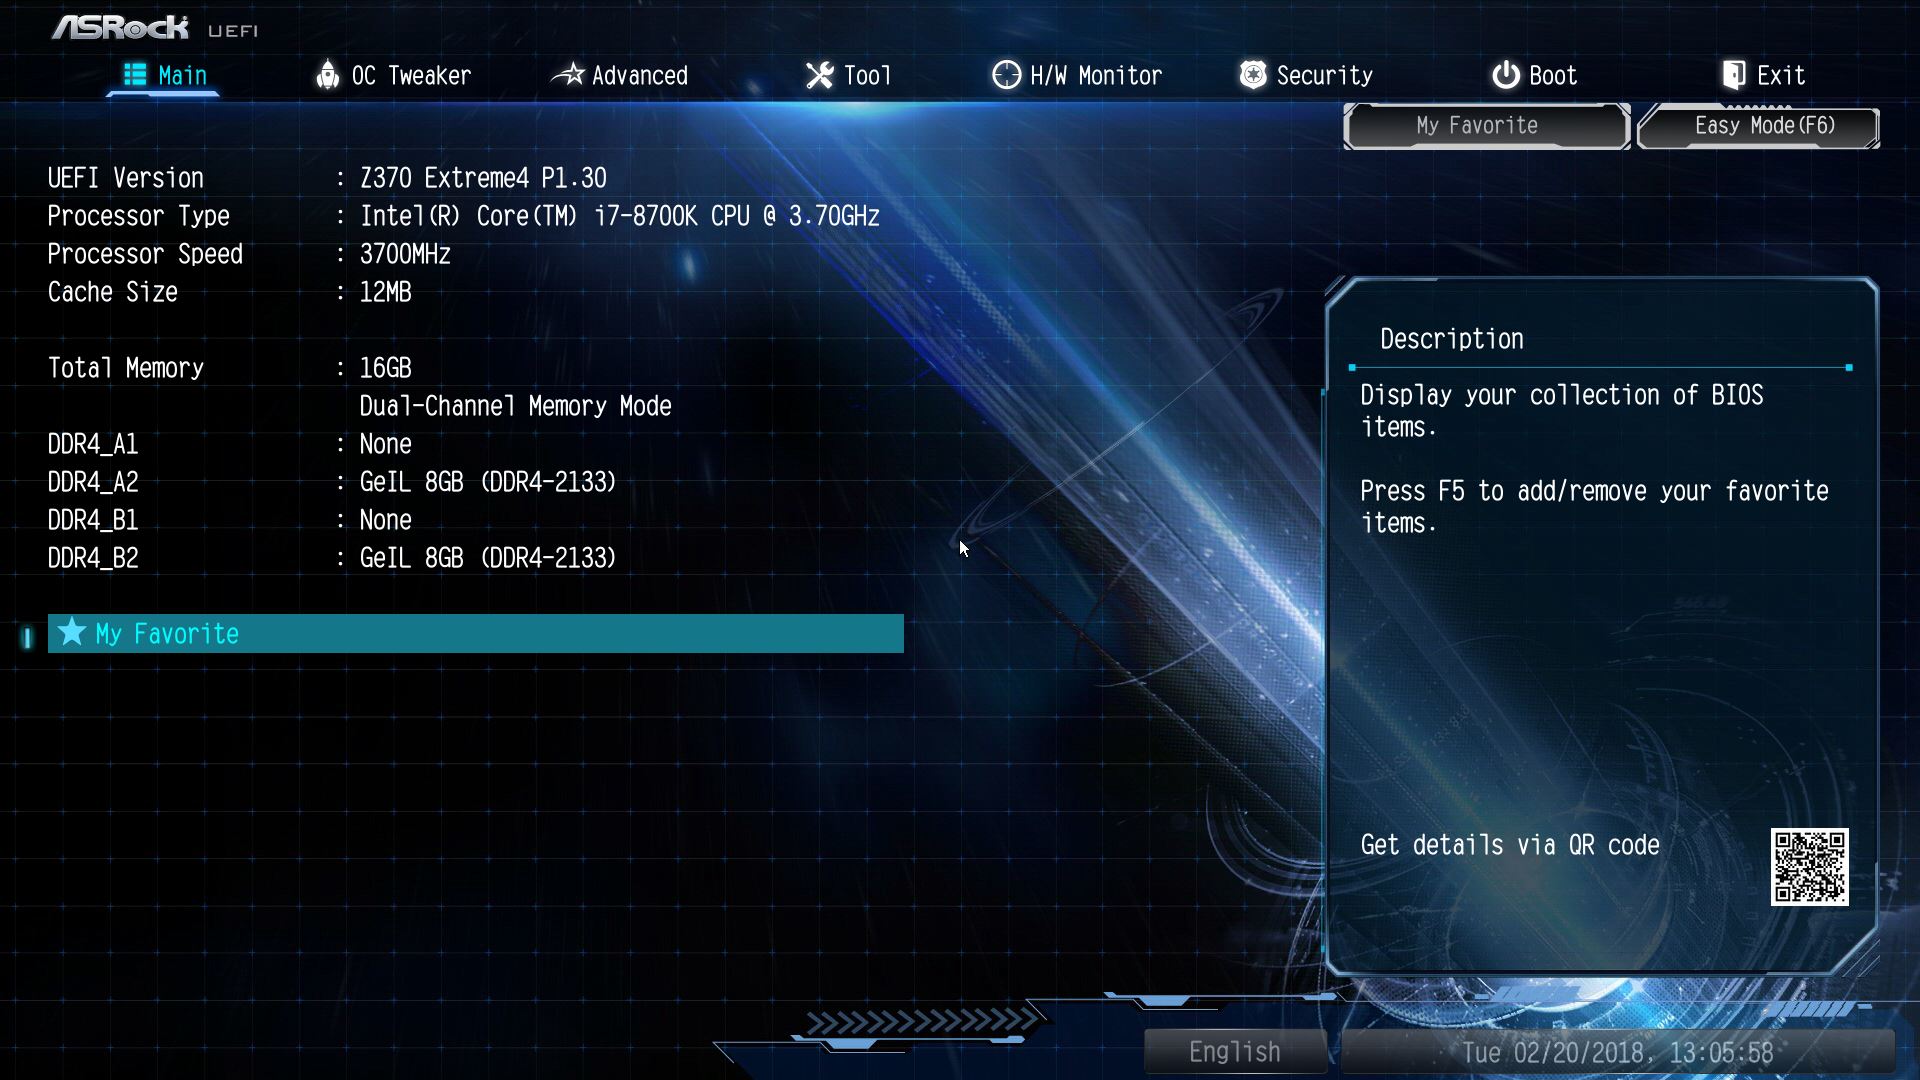
▼BIOS预设为Easy模式可看到整个主机板状态总览
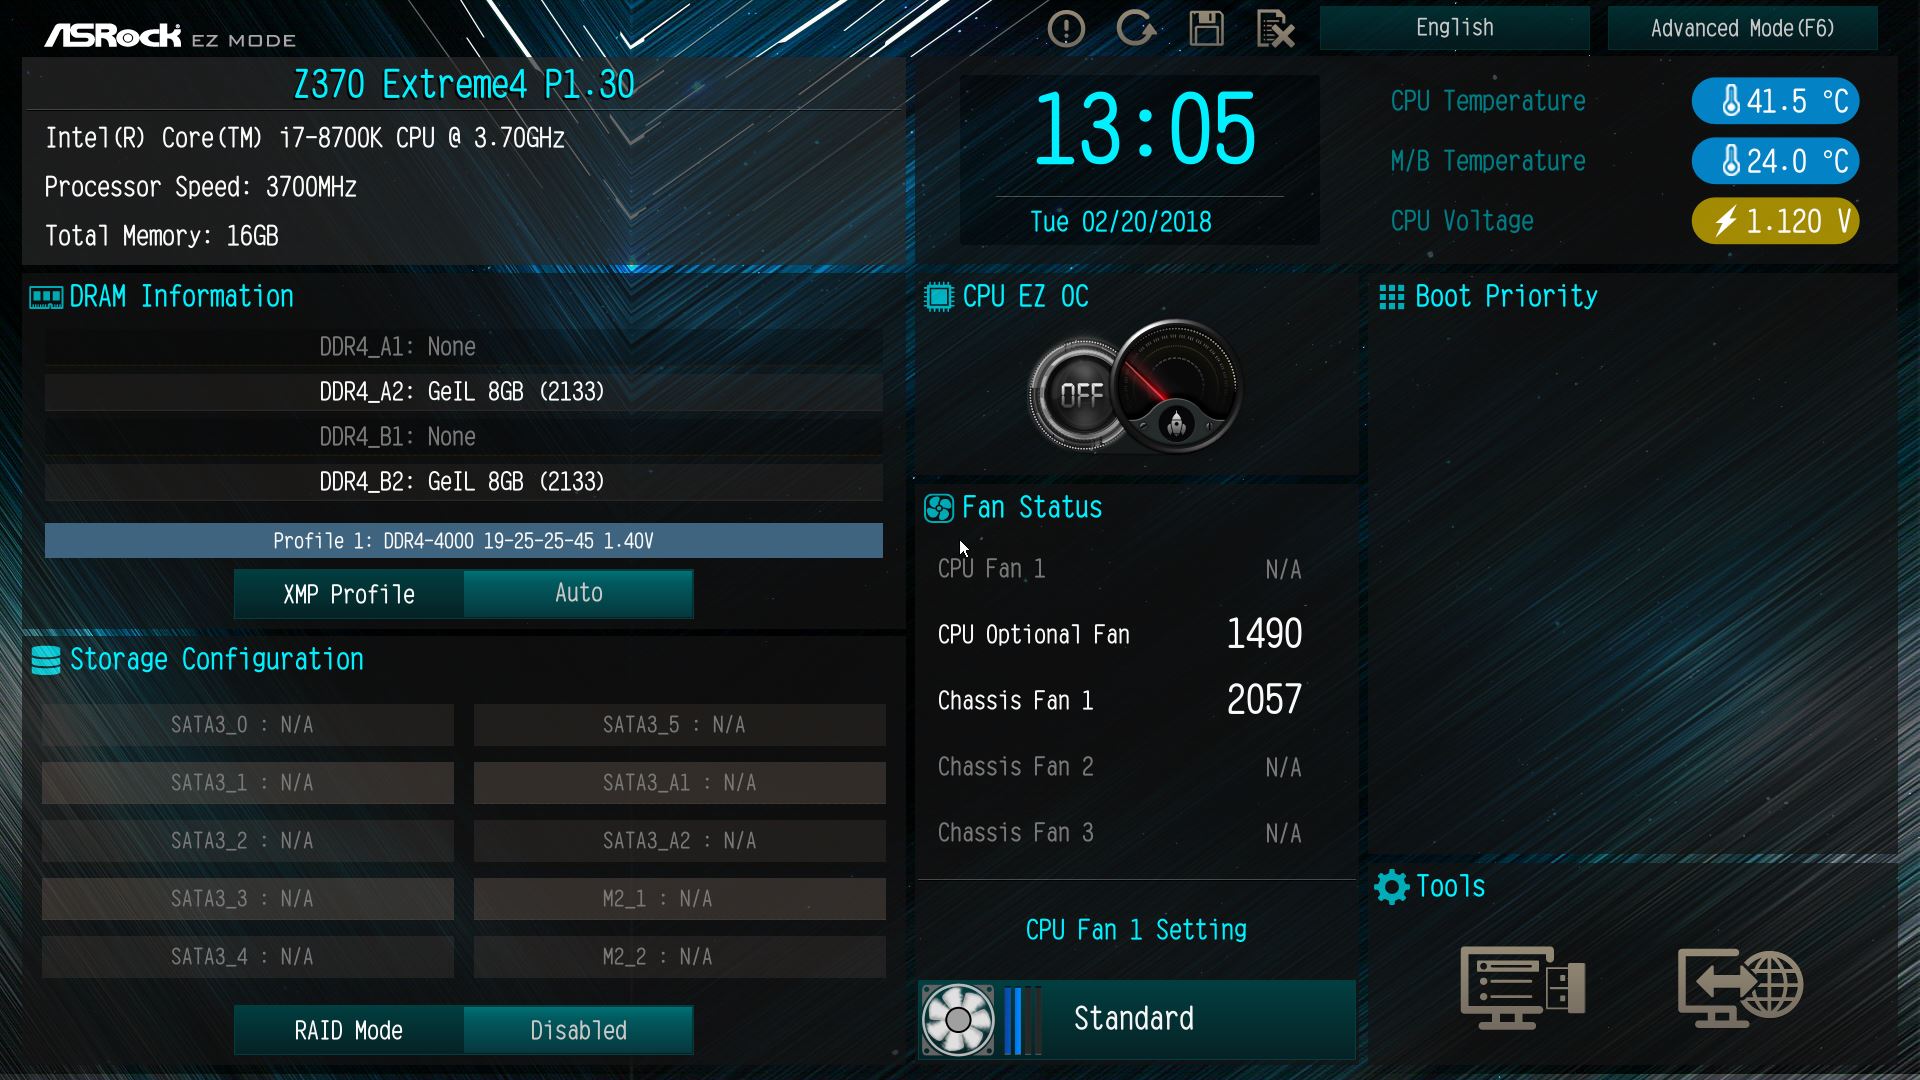
▼第一面为基本系统状态显示,CPU型号、工作时脉,记忆体工作时脉与容量
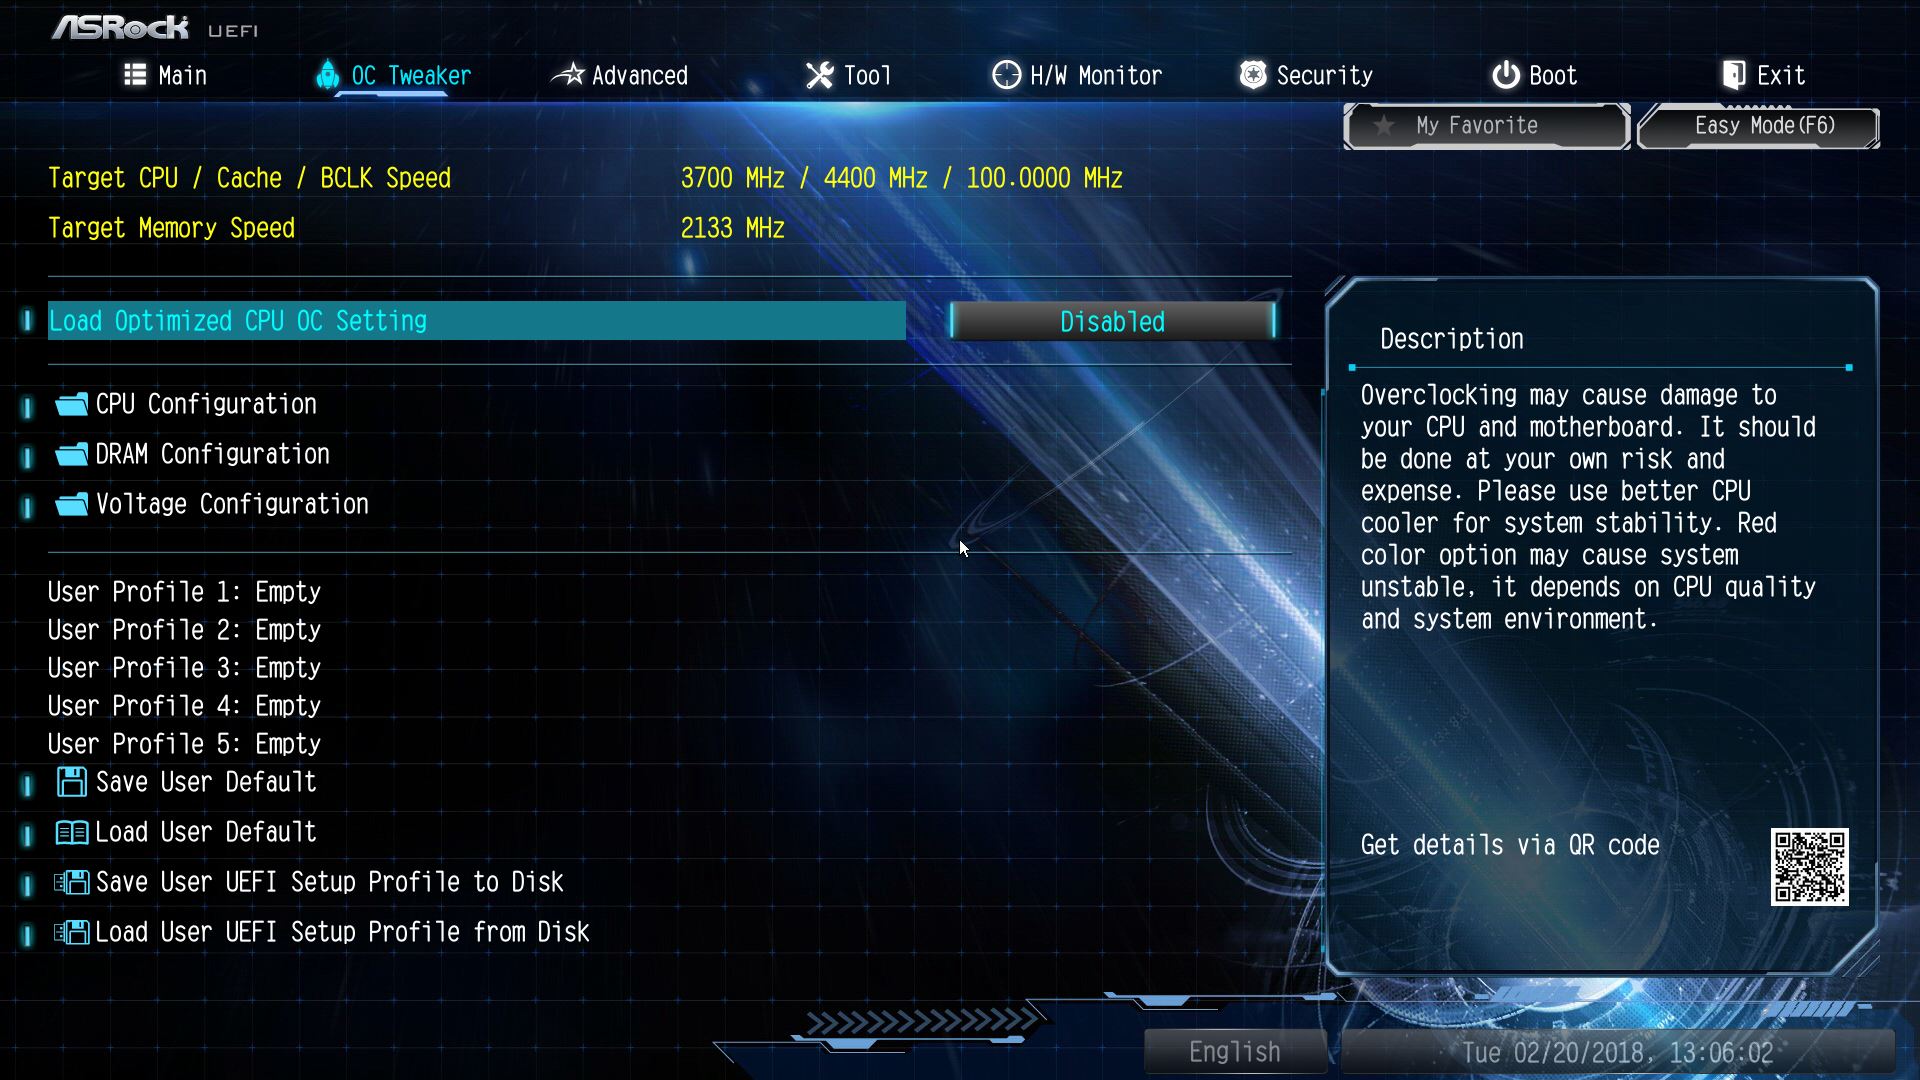
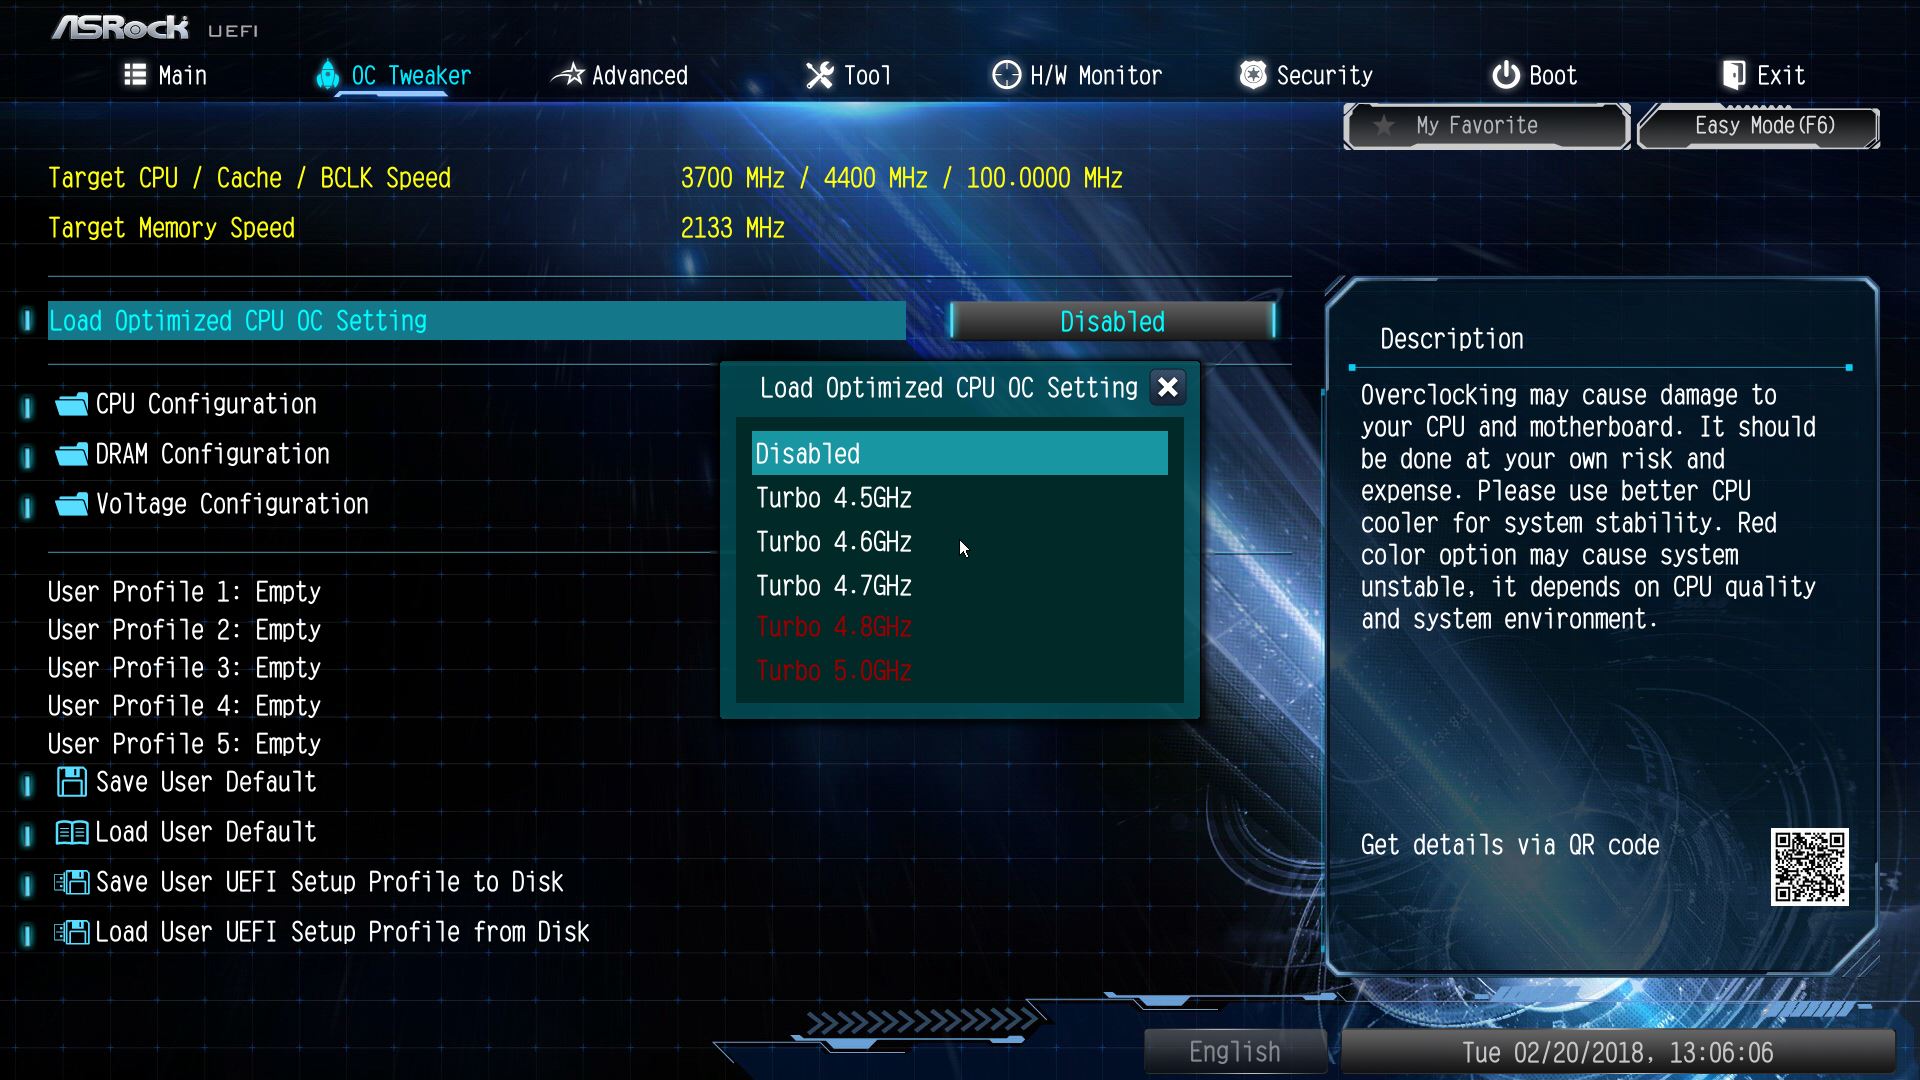
▼超频调校页面可设定所有超频选项功能,并有官方所调整的超频设定值可以使用
▼官方所调整的超频设定值有4.5GHz、4.6GHz、4.7GHz、4.8GHz与5.0GHz可选择
▼CPU超频选项一览
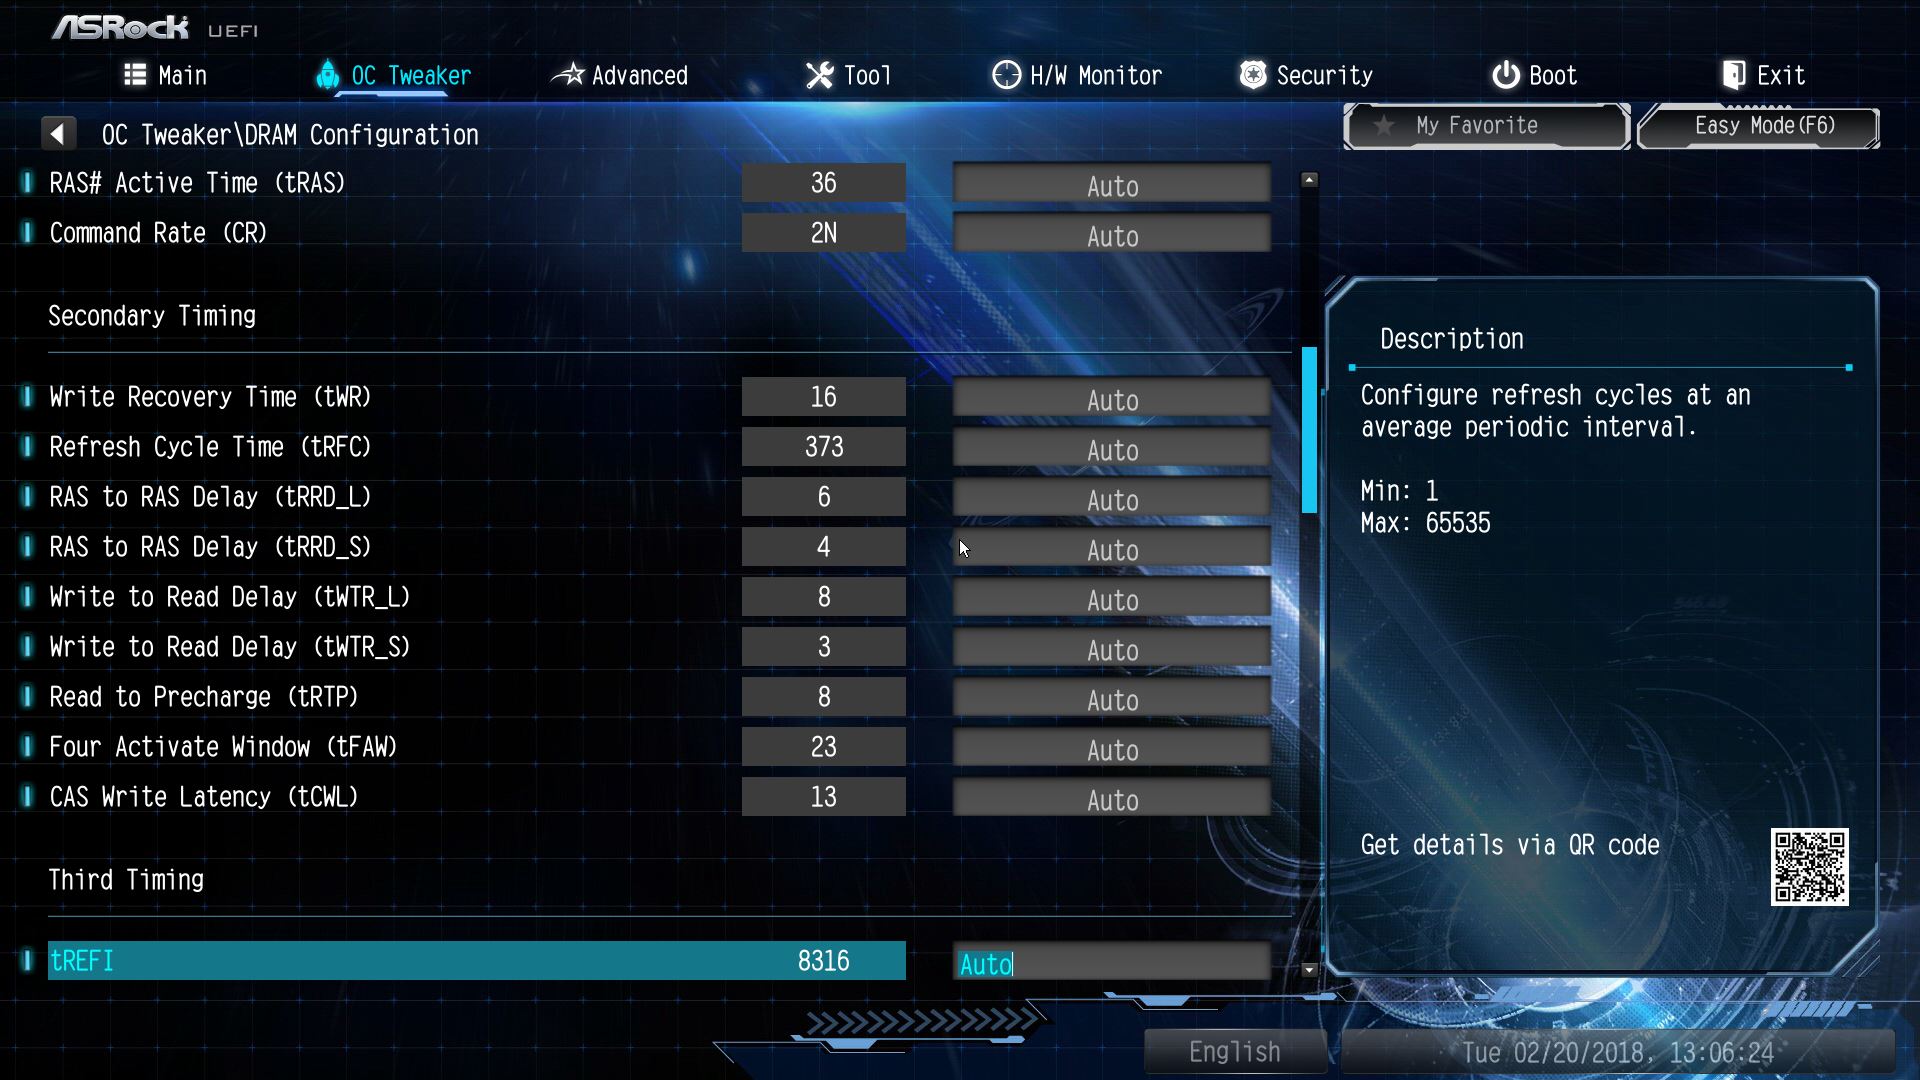
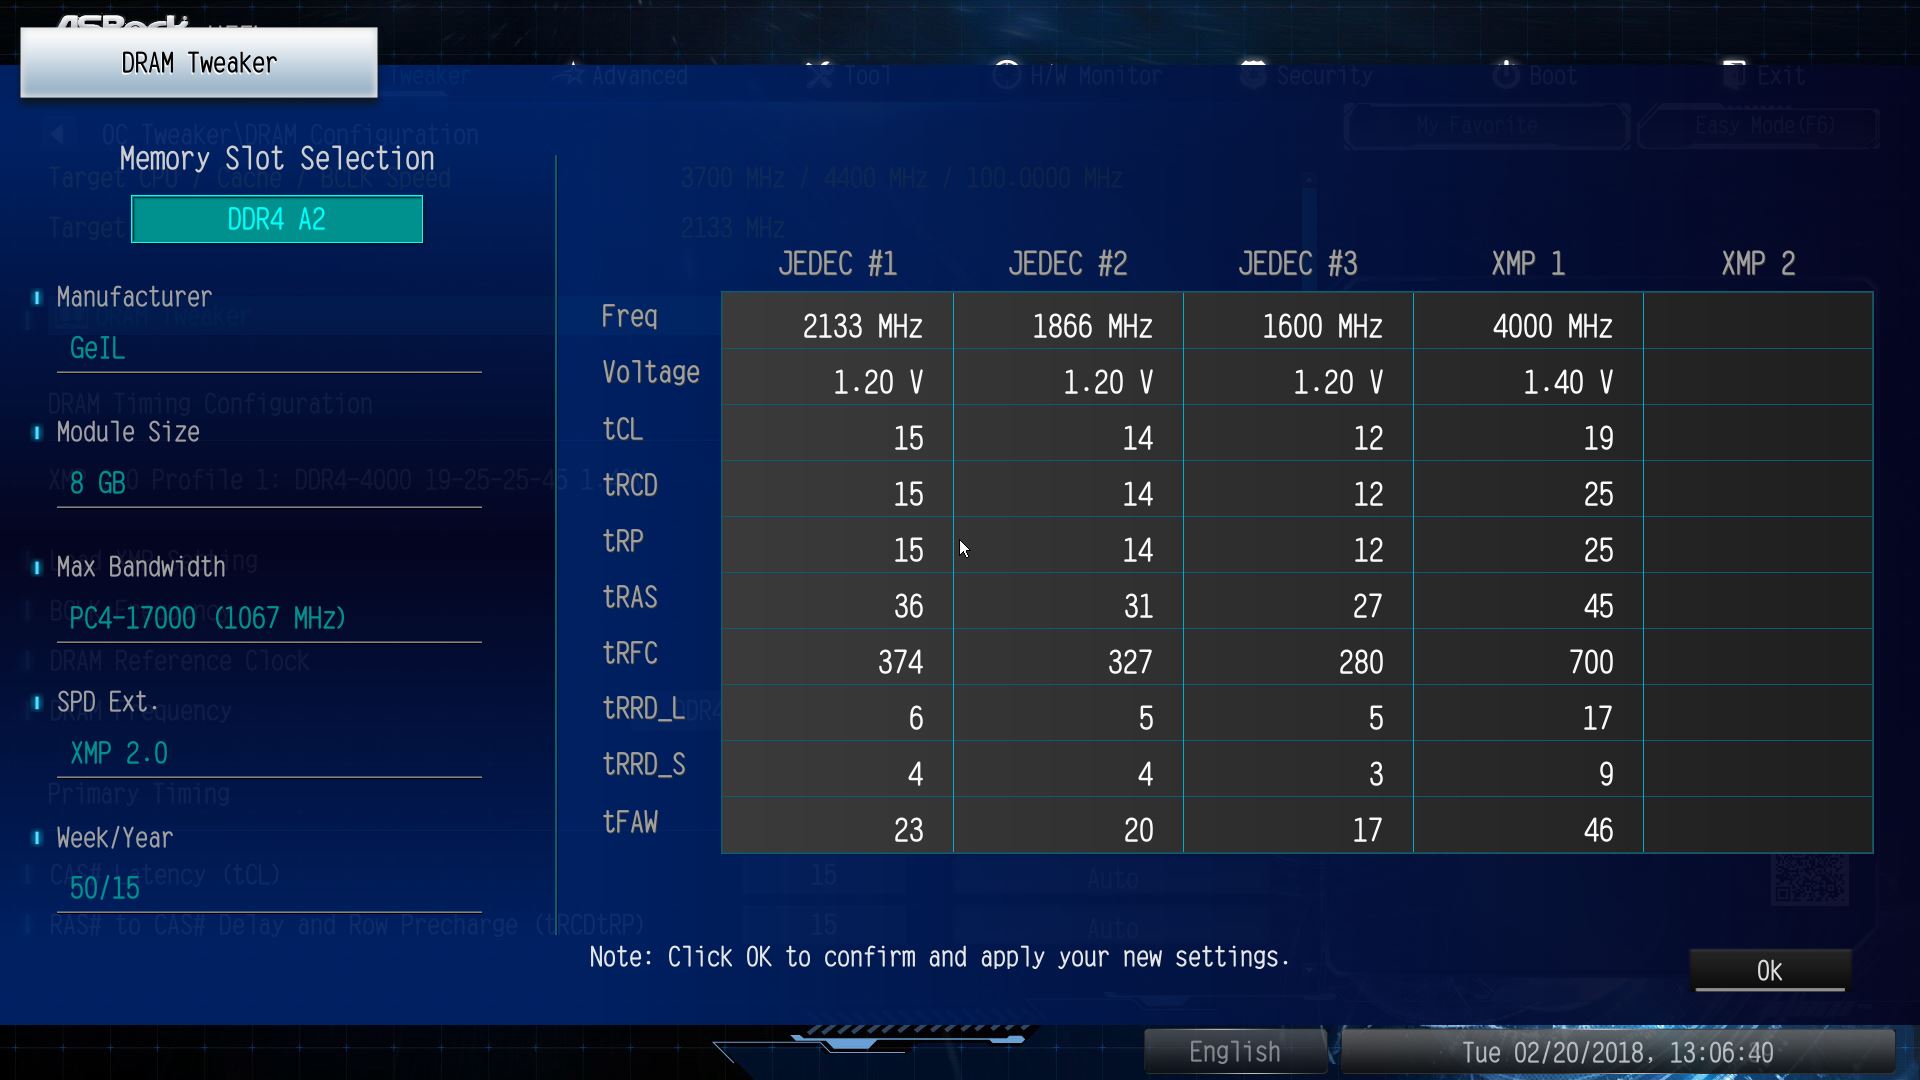
▼记忆体超频选项一览
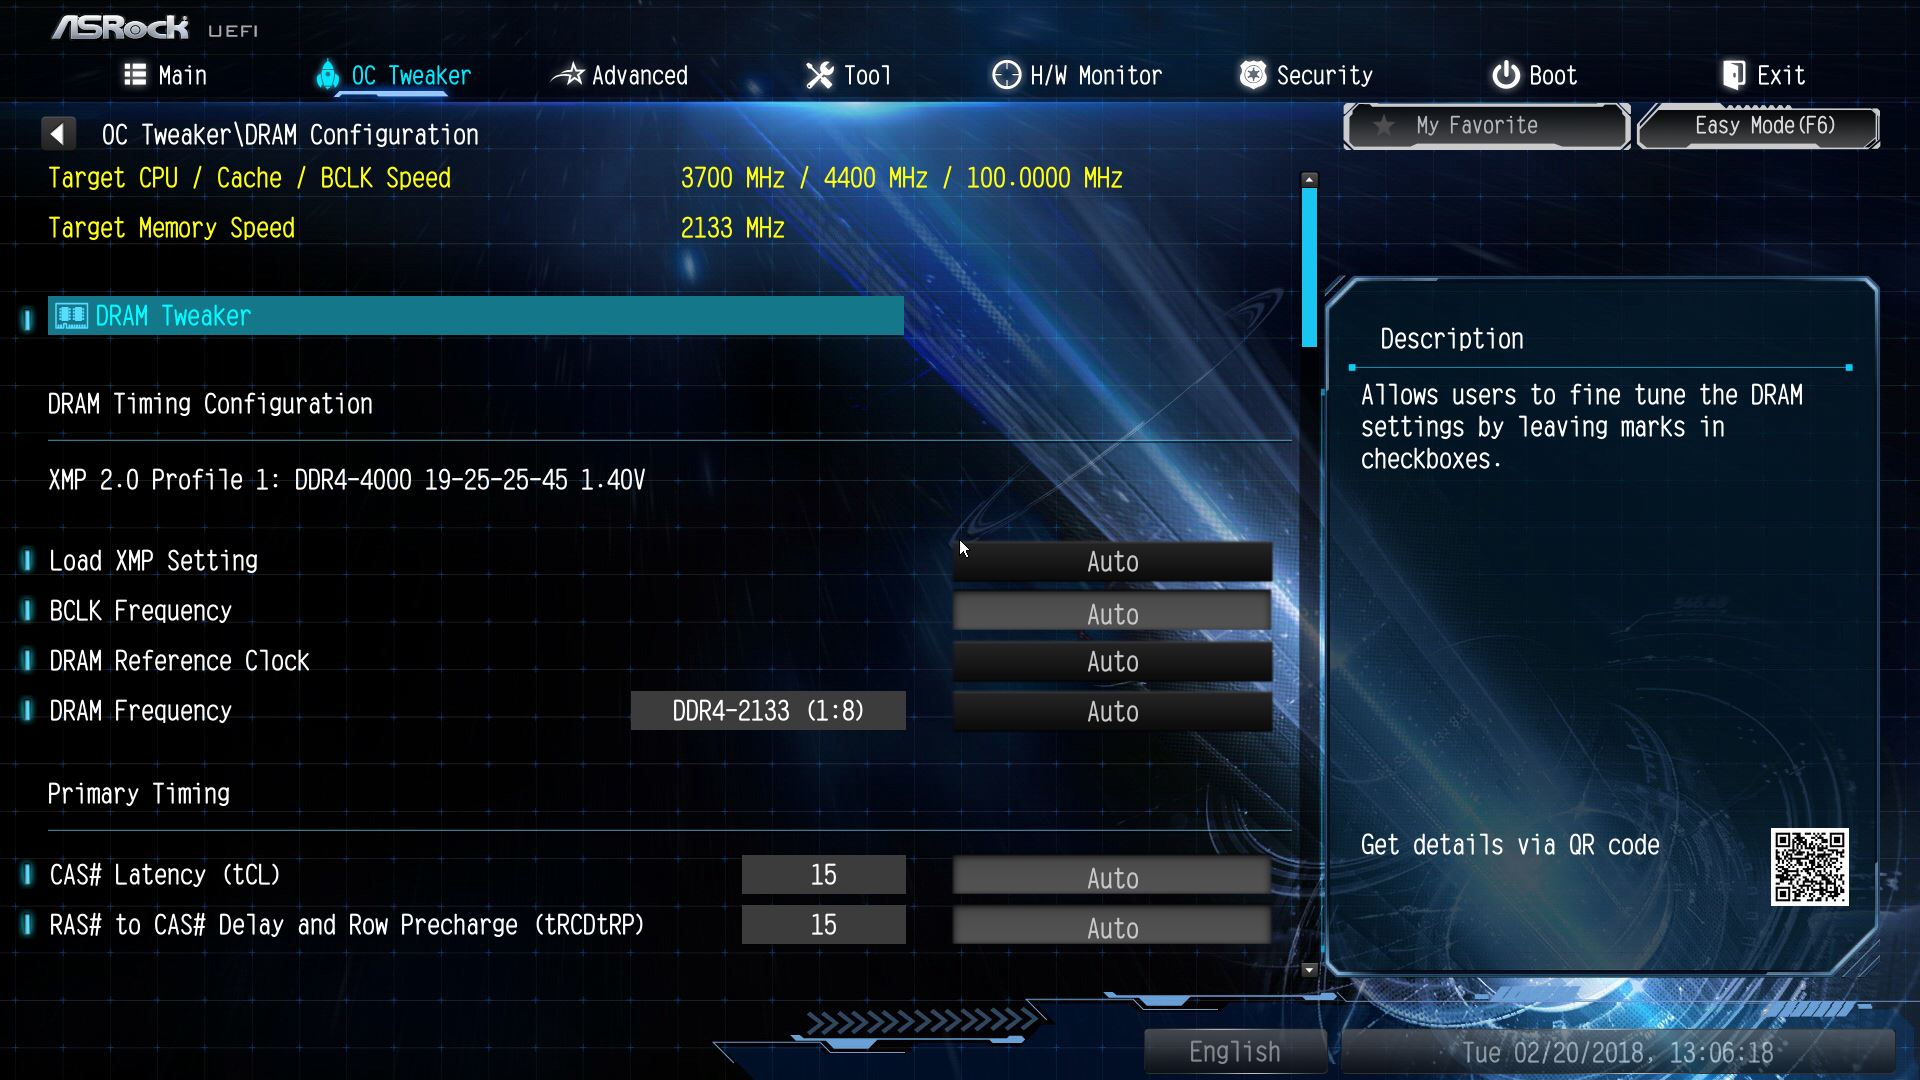
▼可以直接查看记忆体内SPD资讯
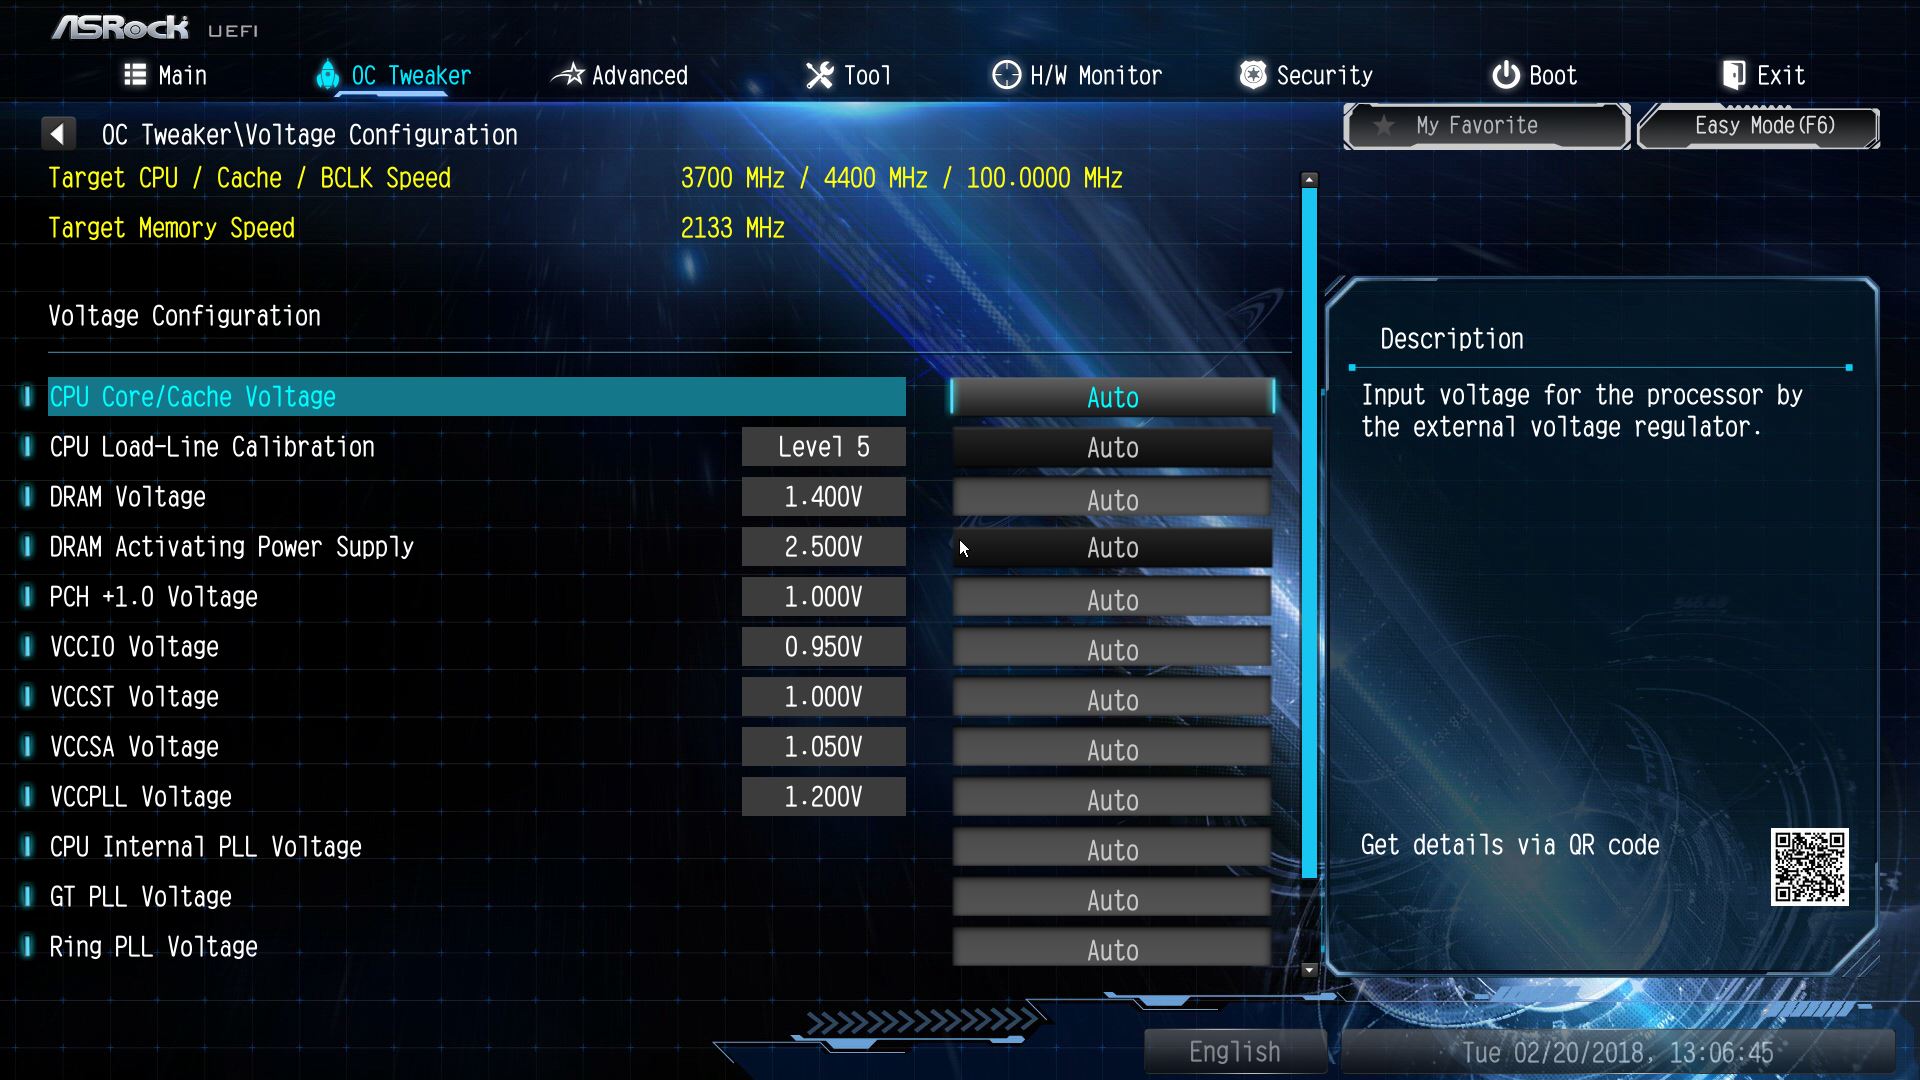
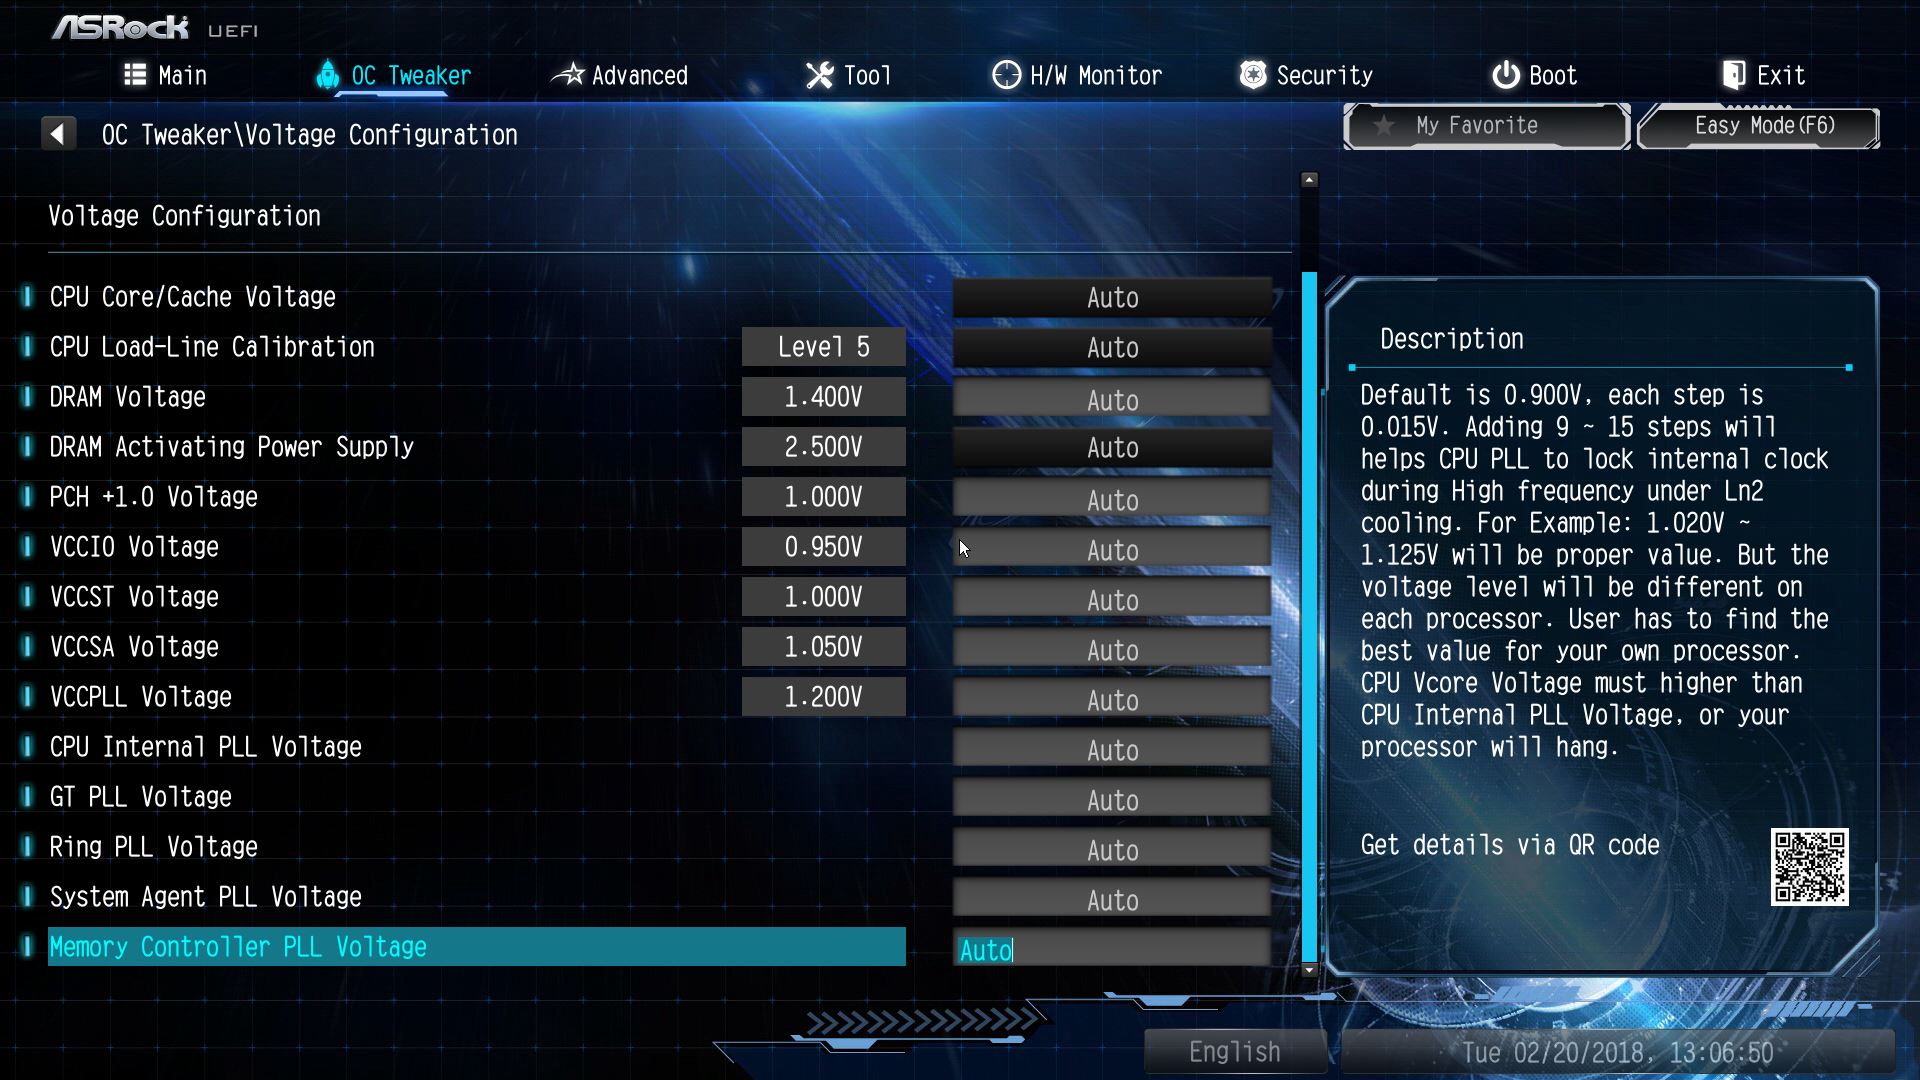
▼电压调整选项一览
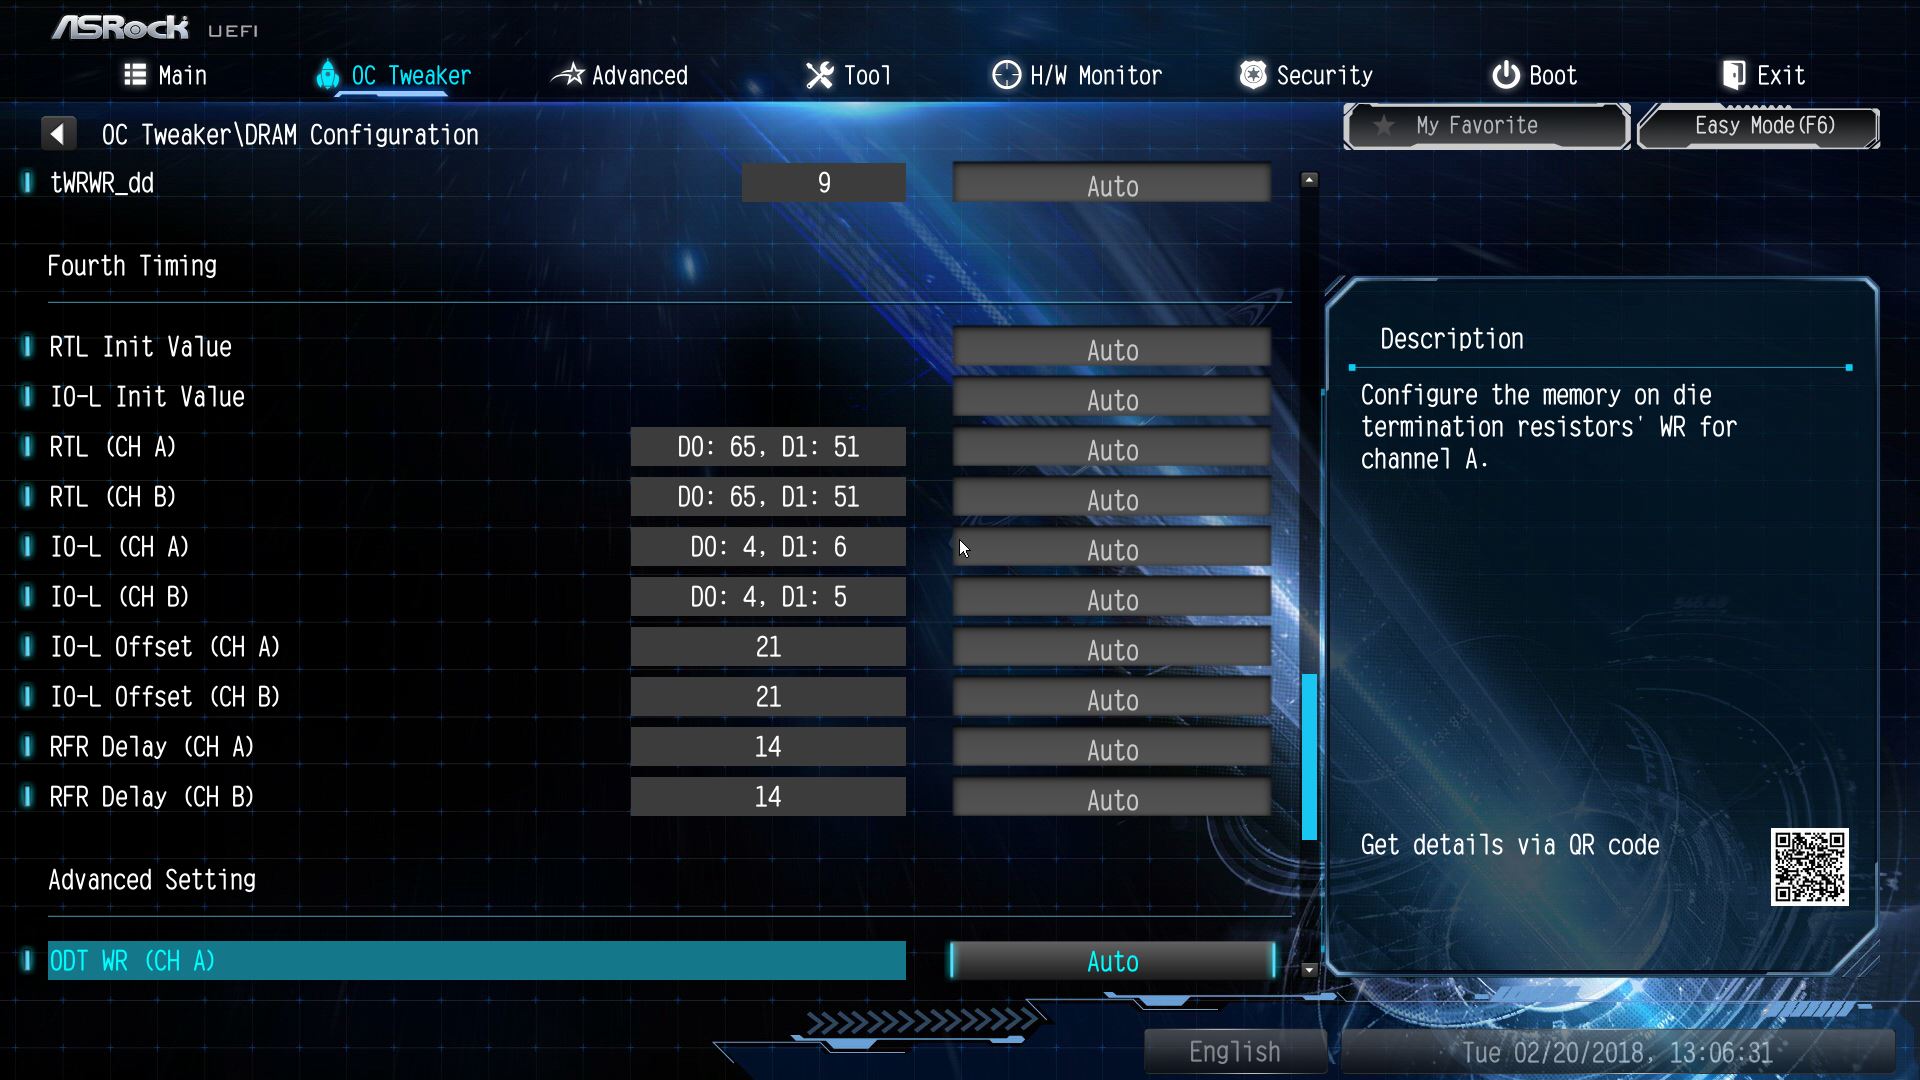
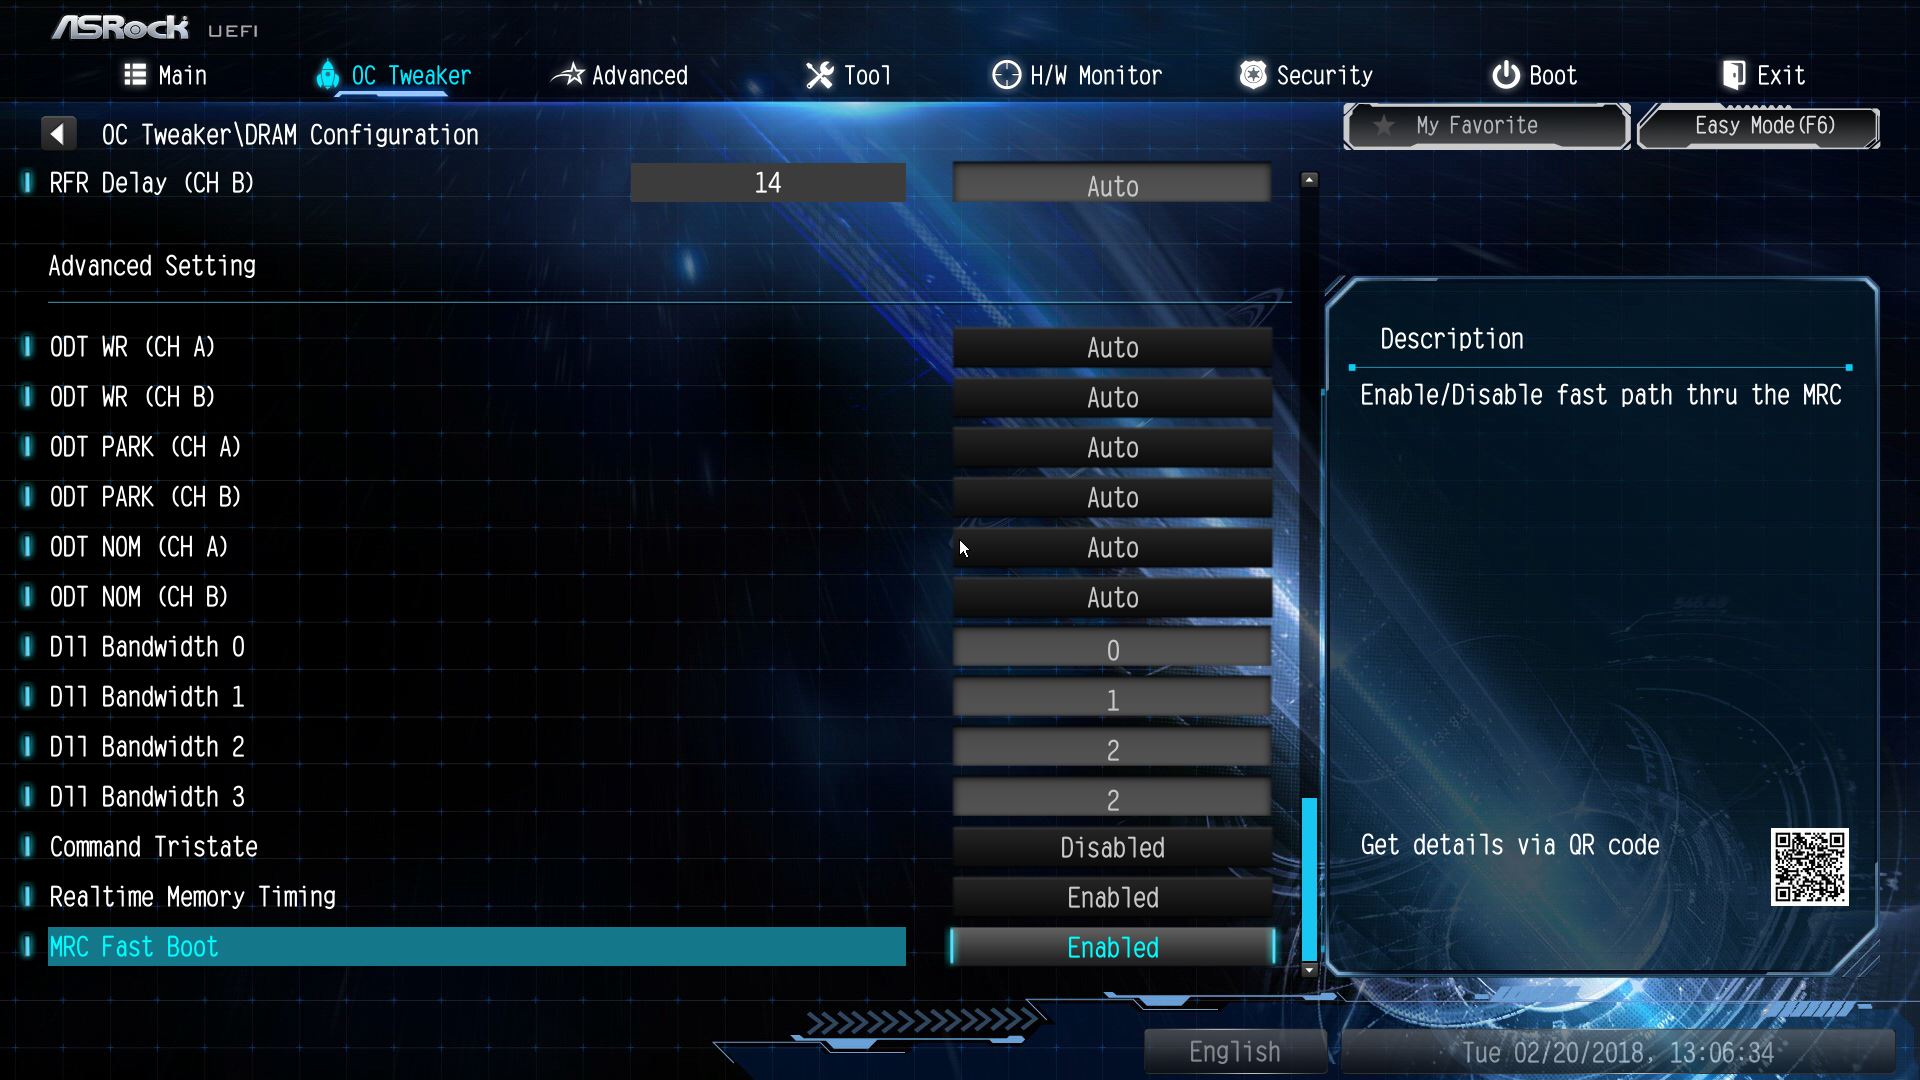
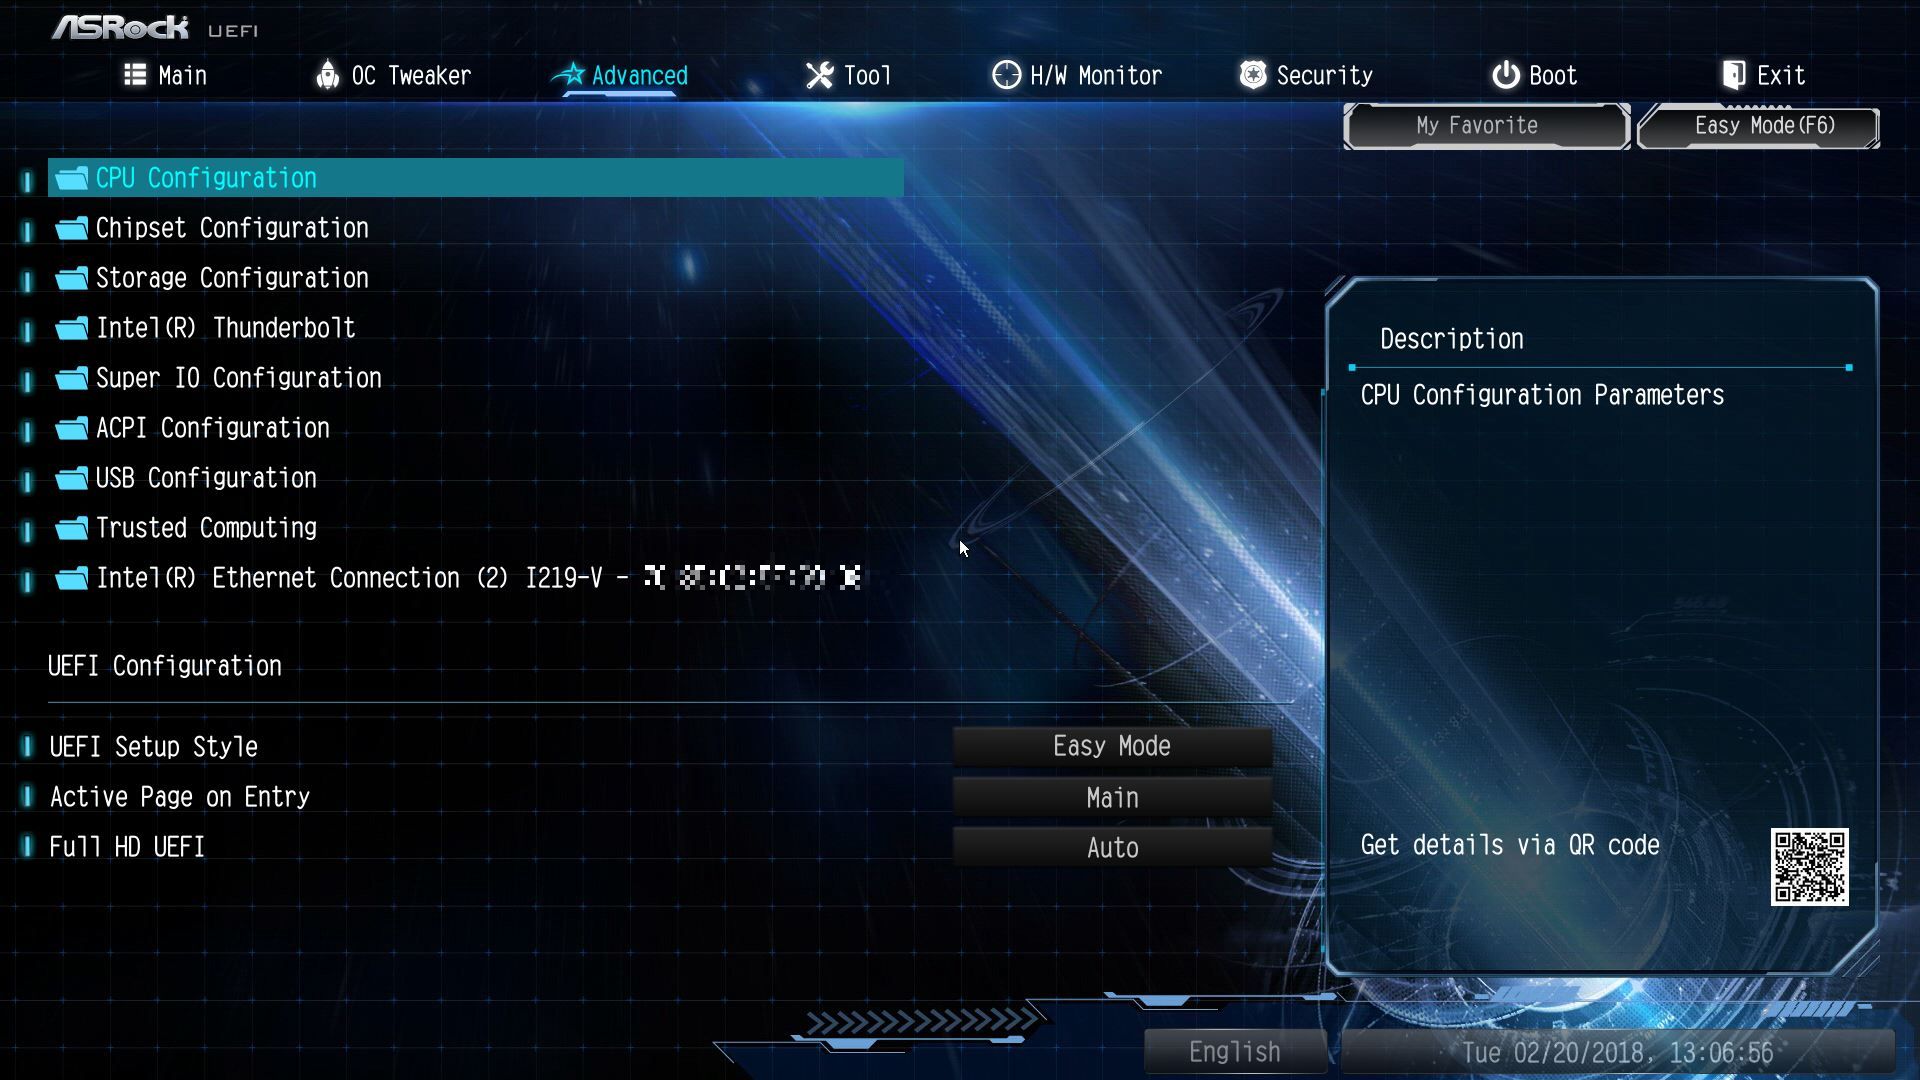
▼进阶页面可设定个装置详细设定选项
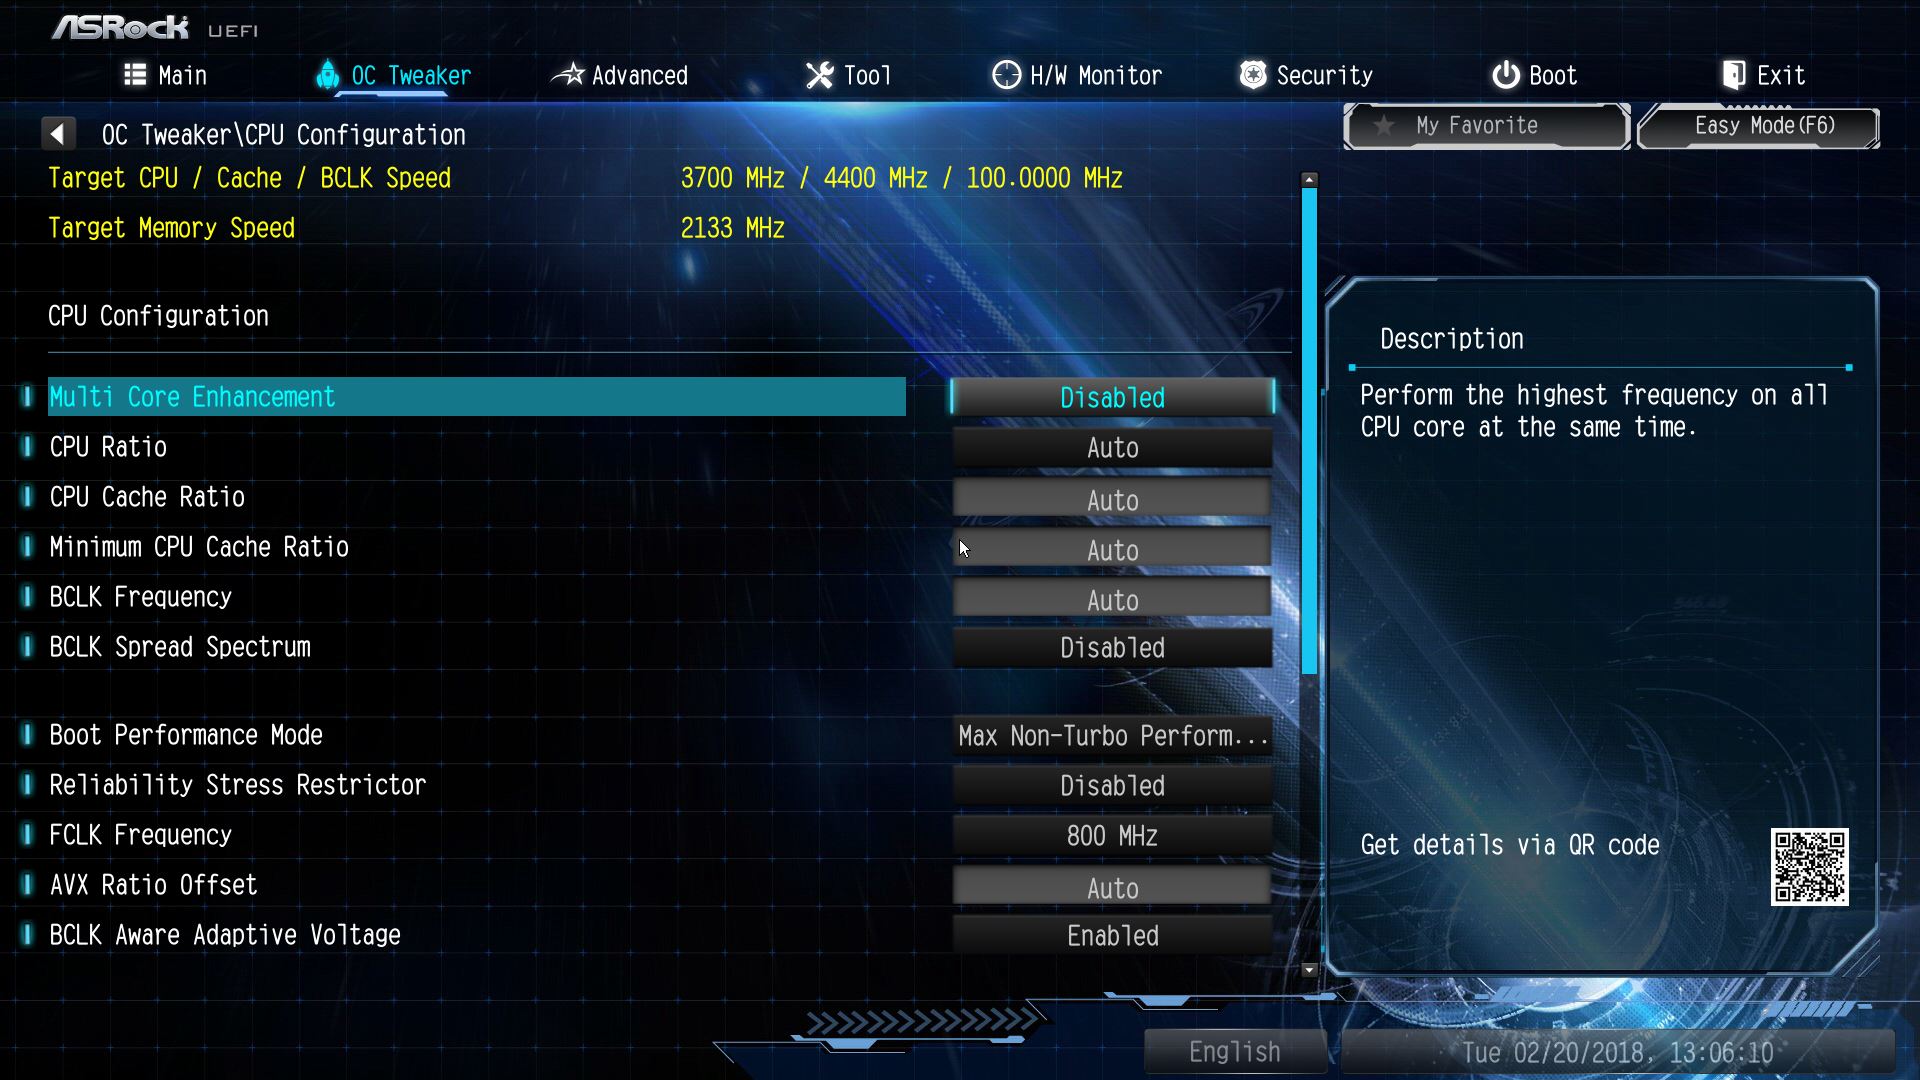
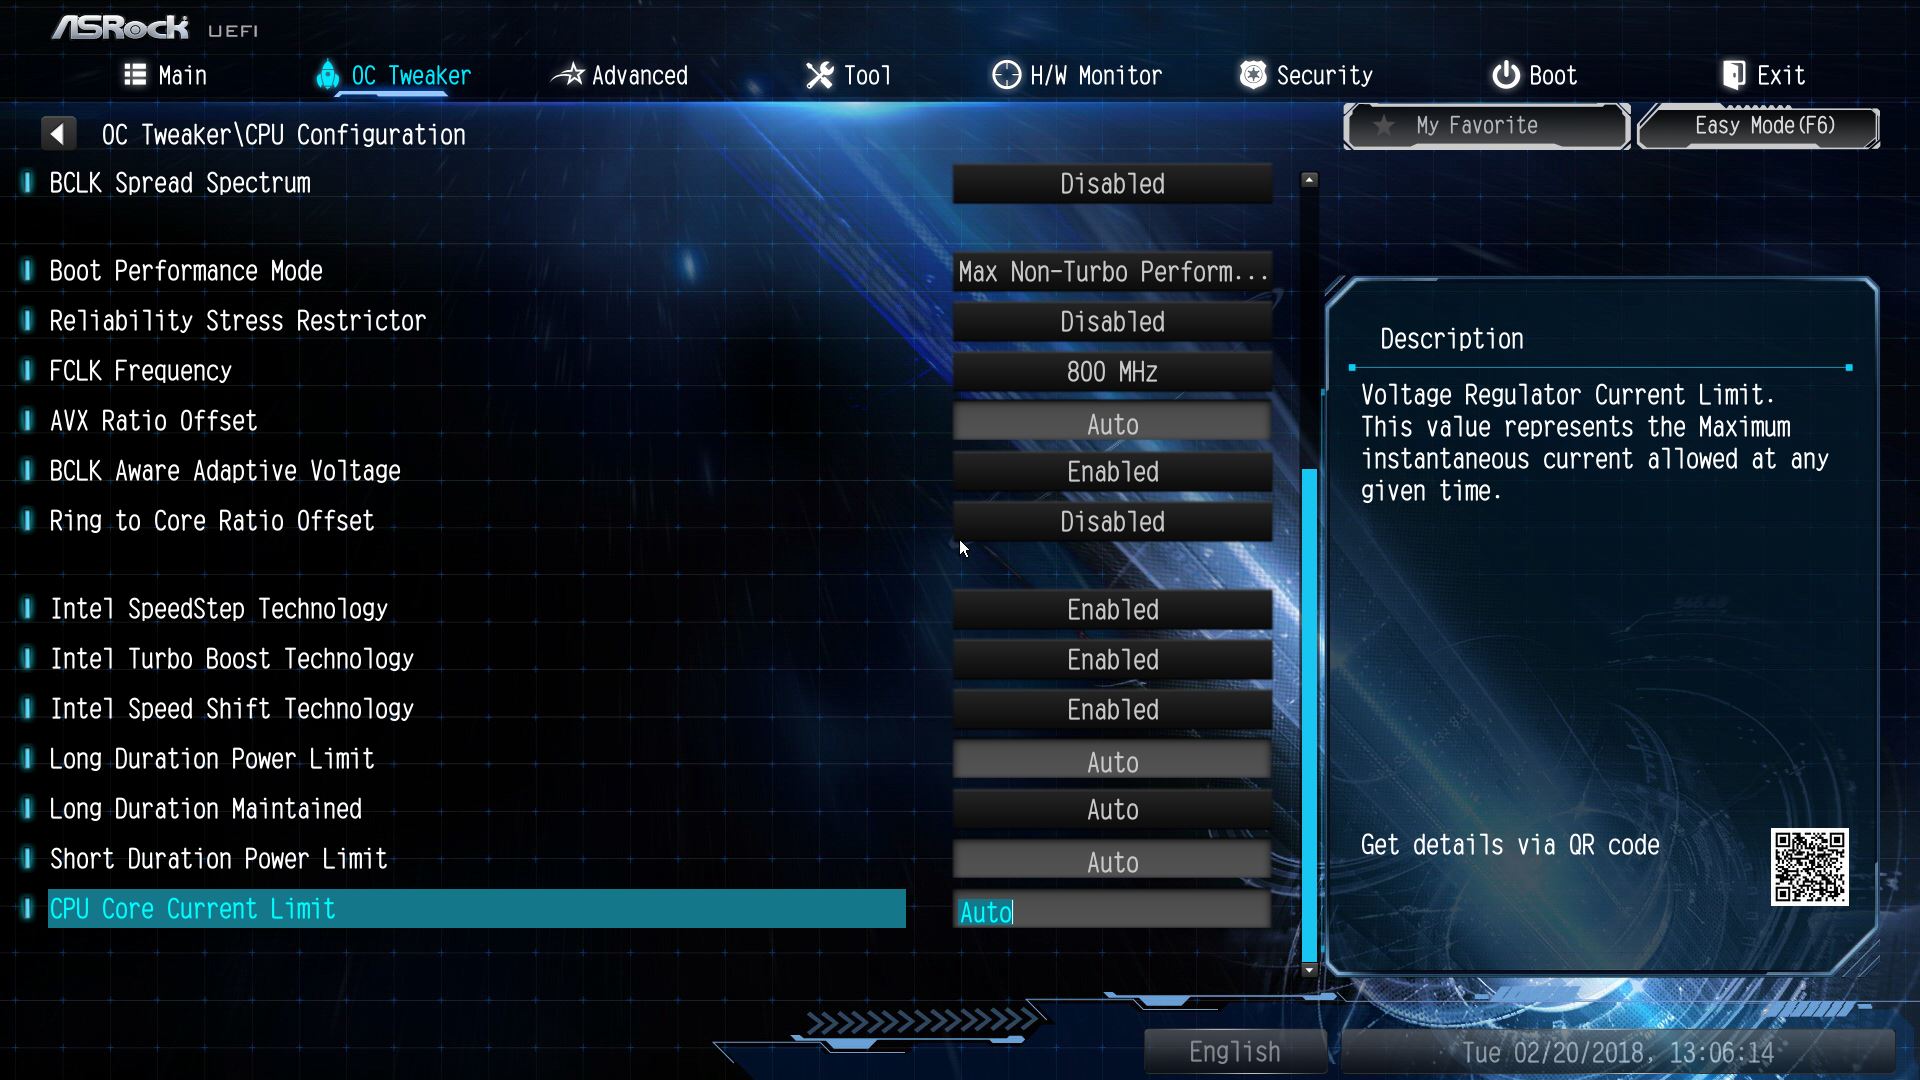
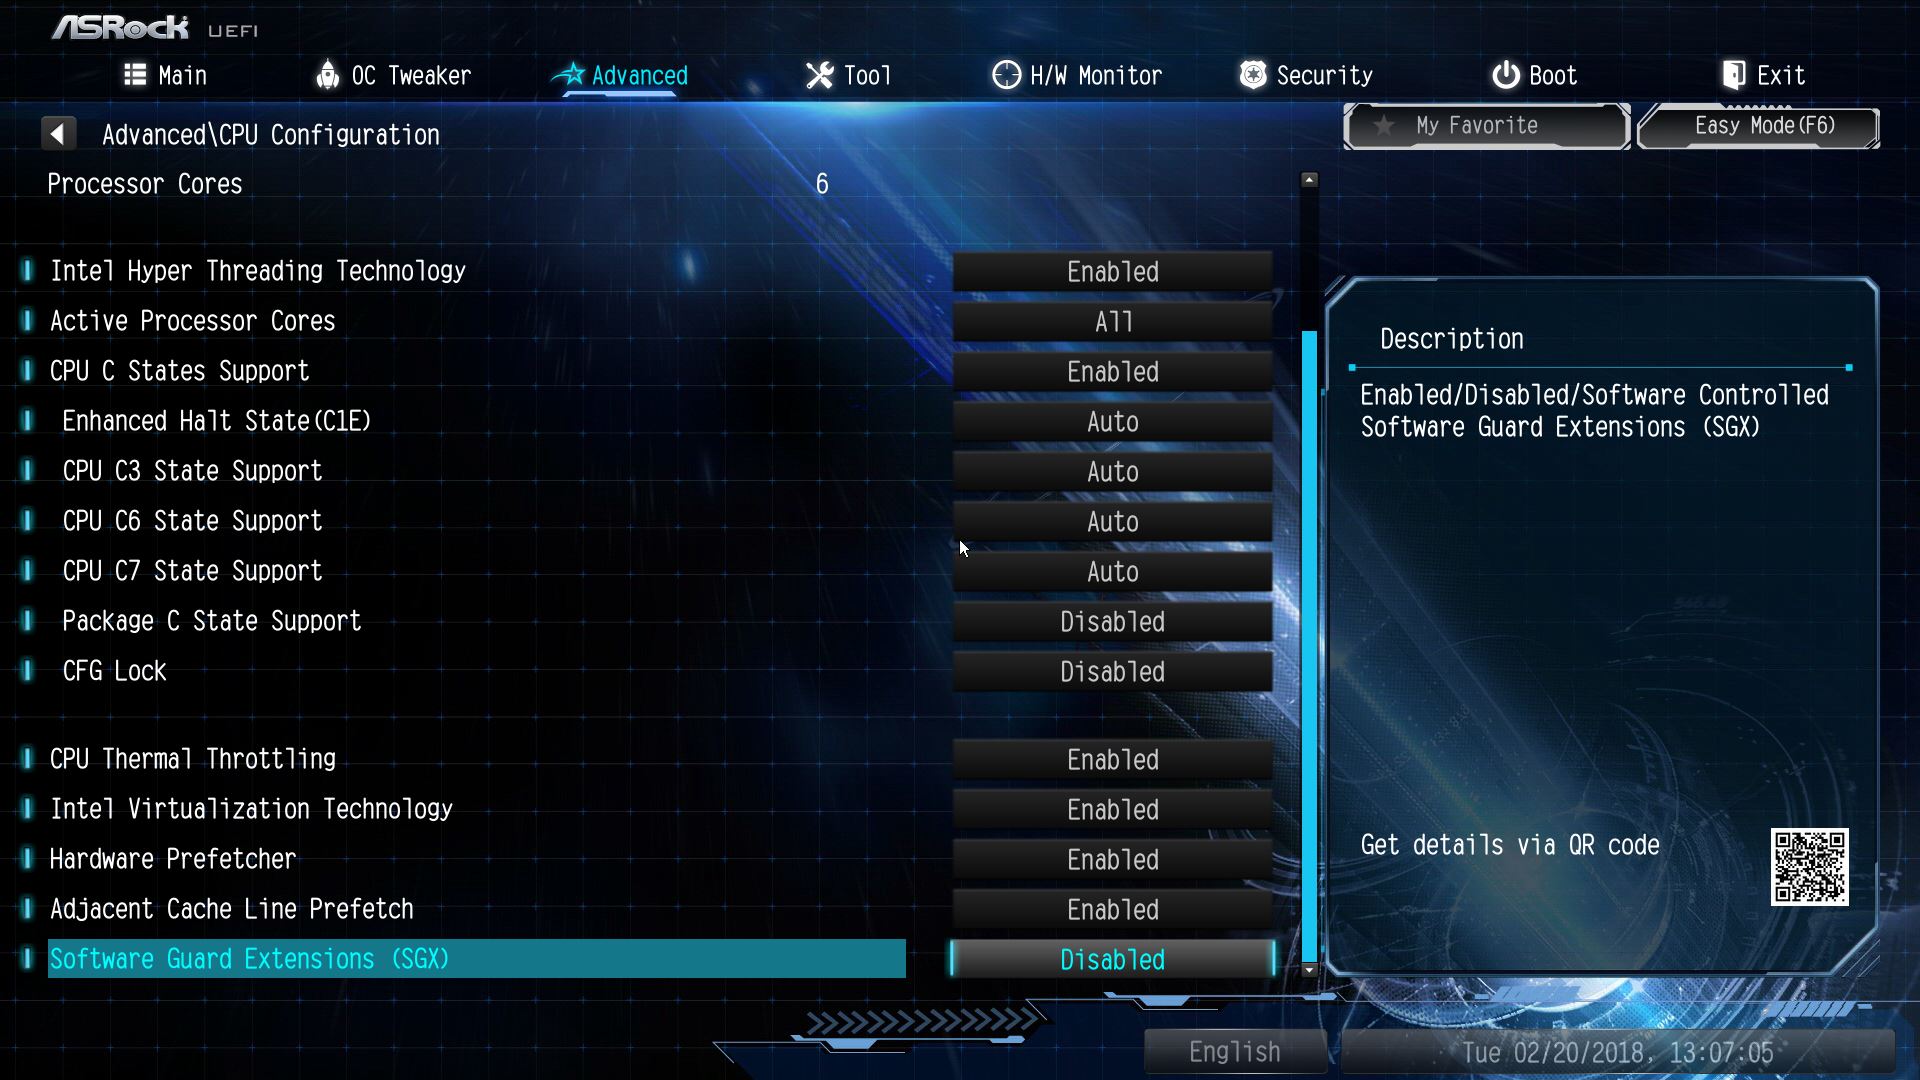
▼CPU进阶设定选项一览

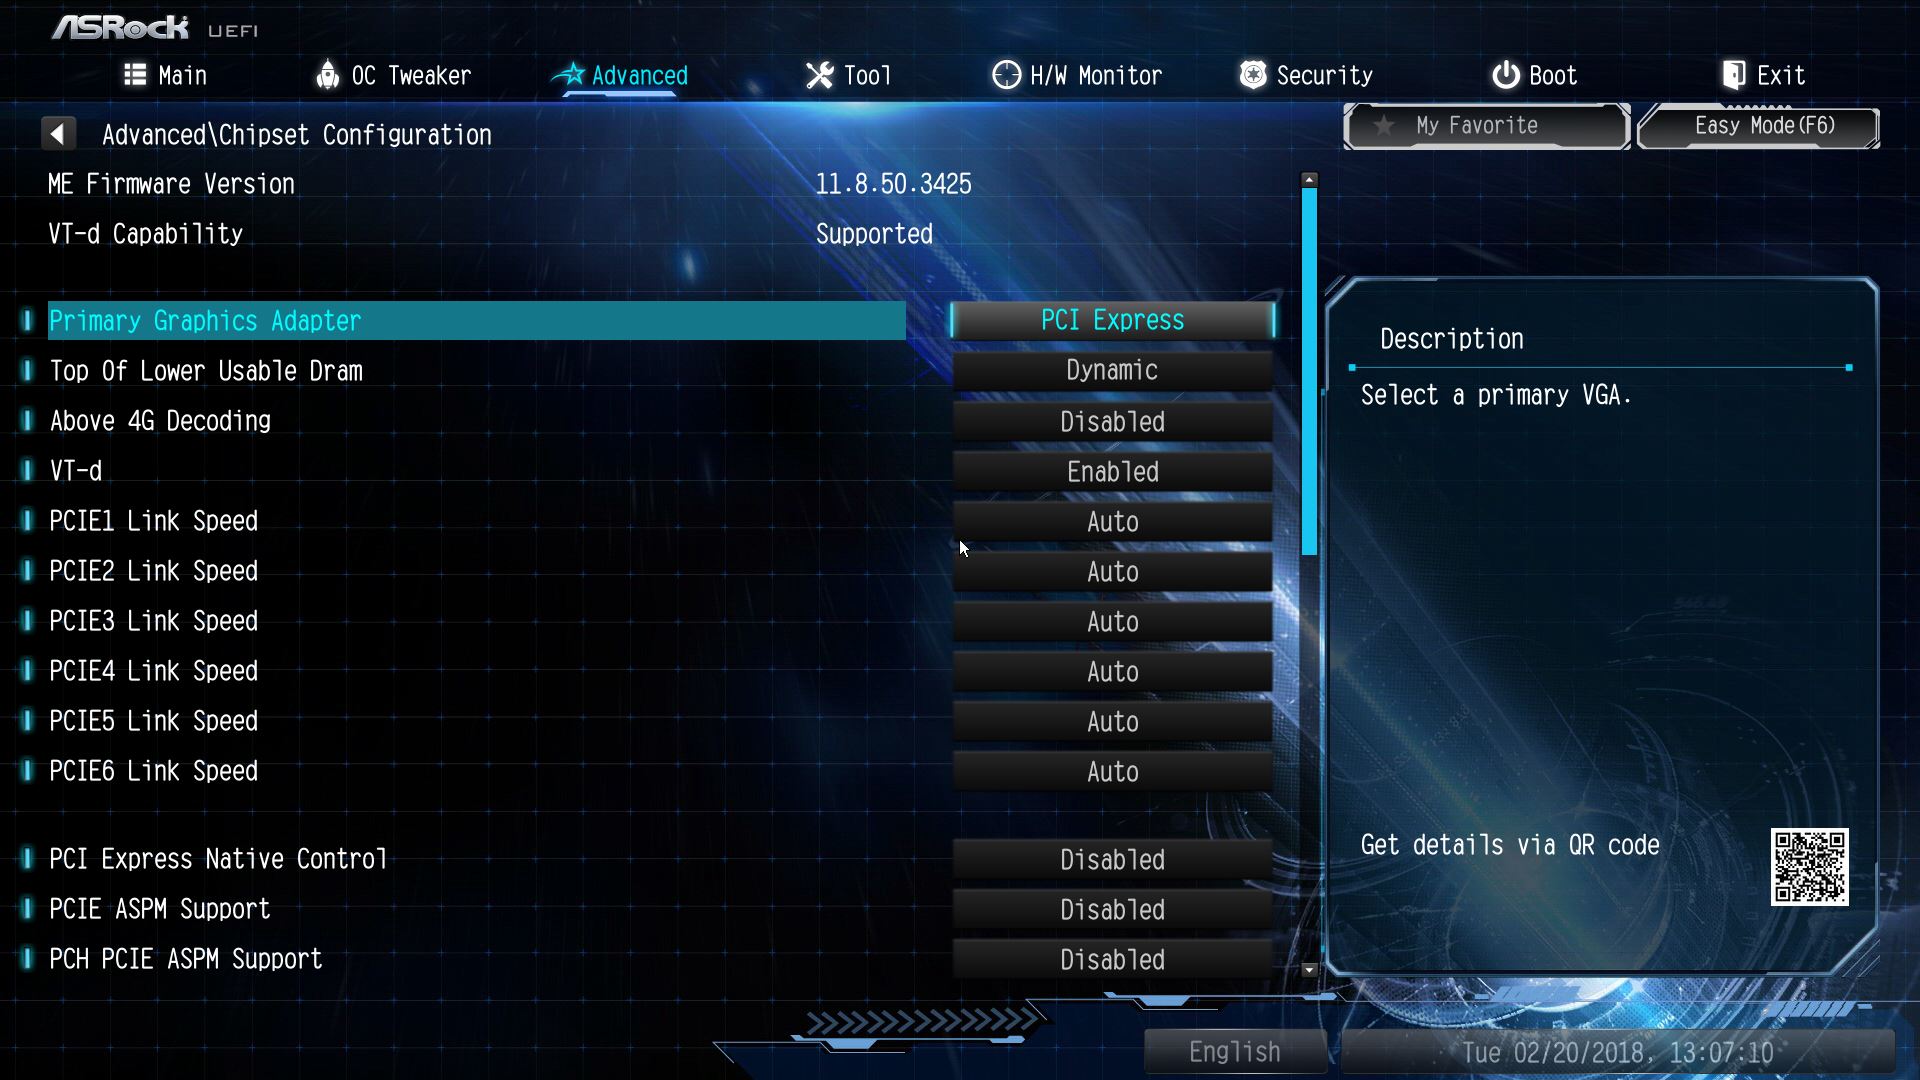
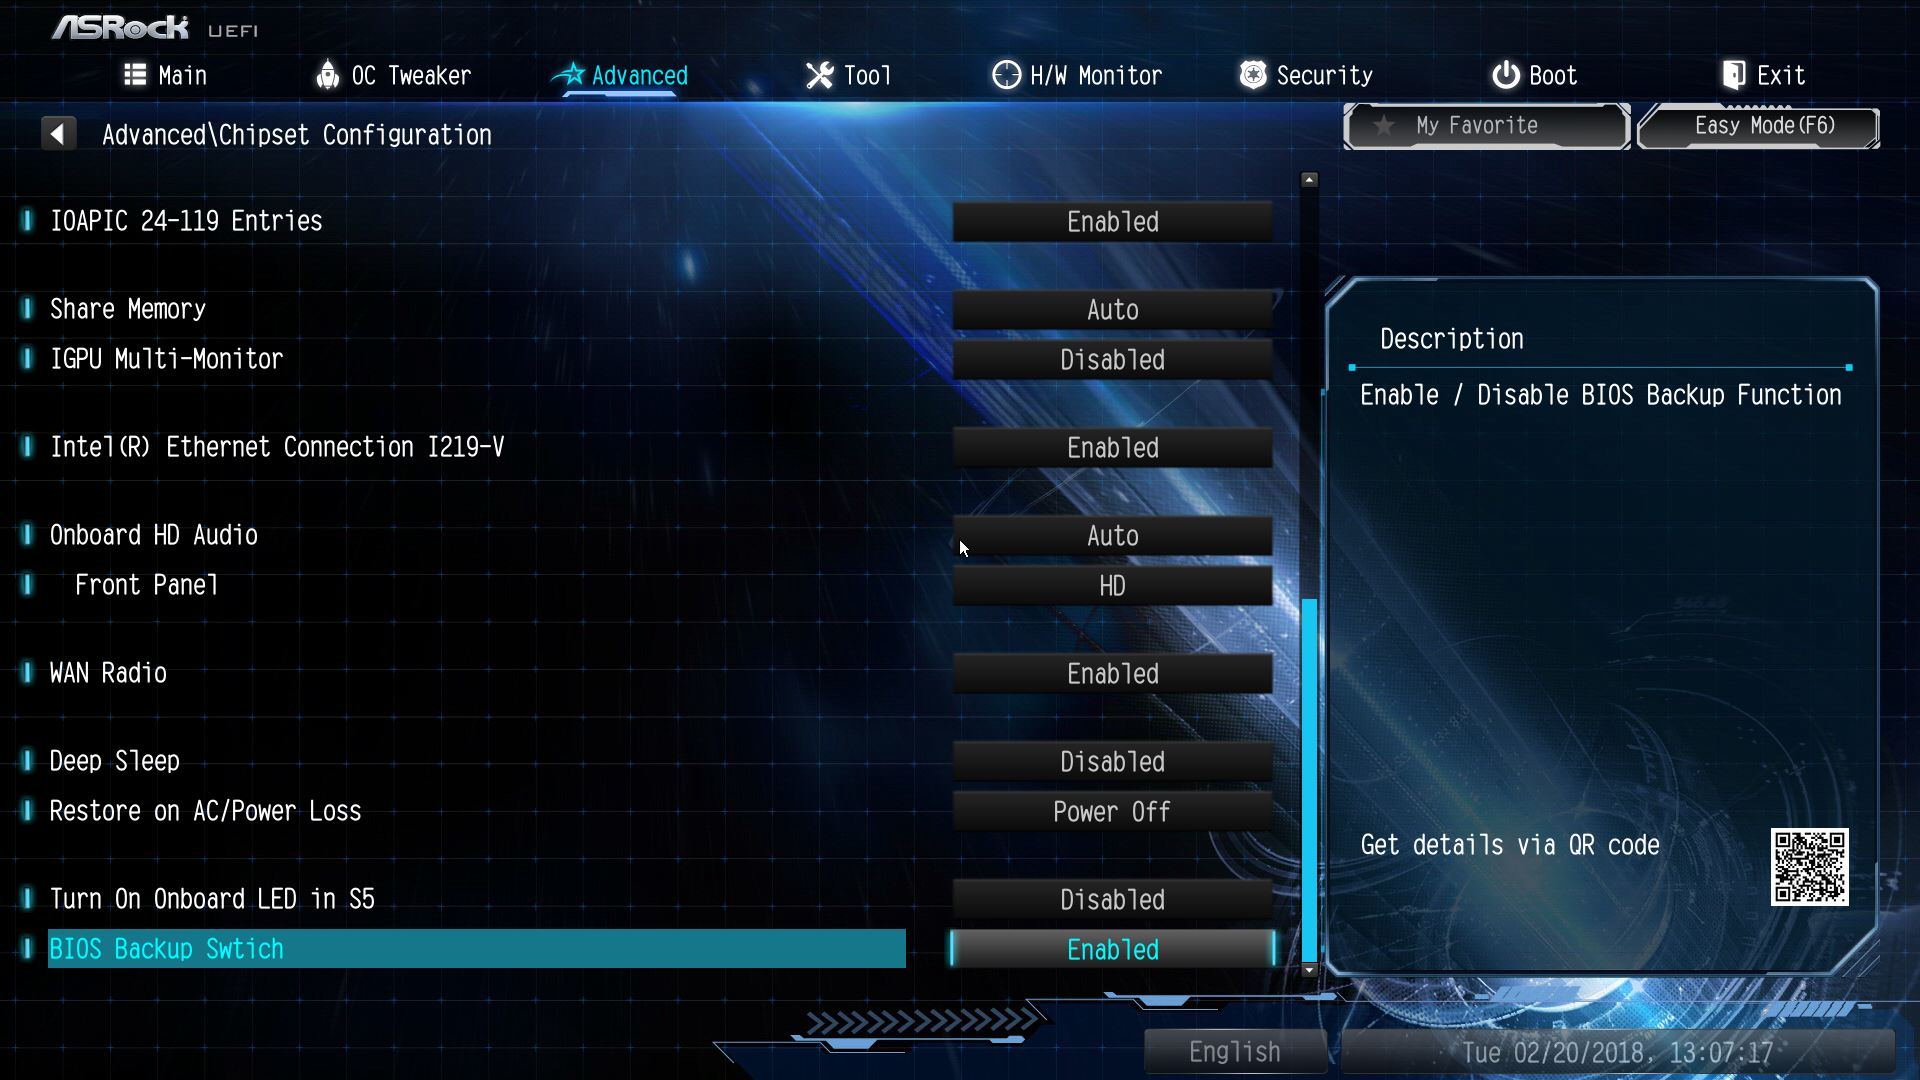
▼晶片组进阶设定选项一览
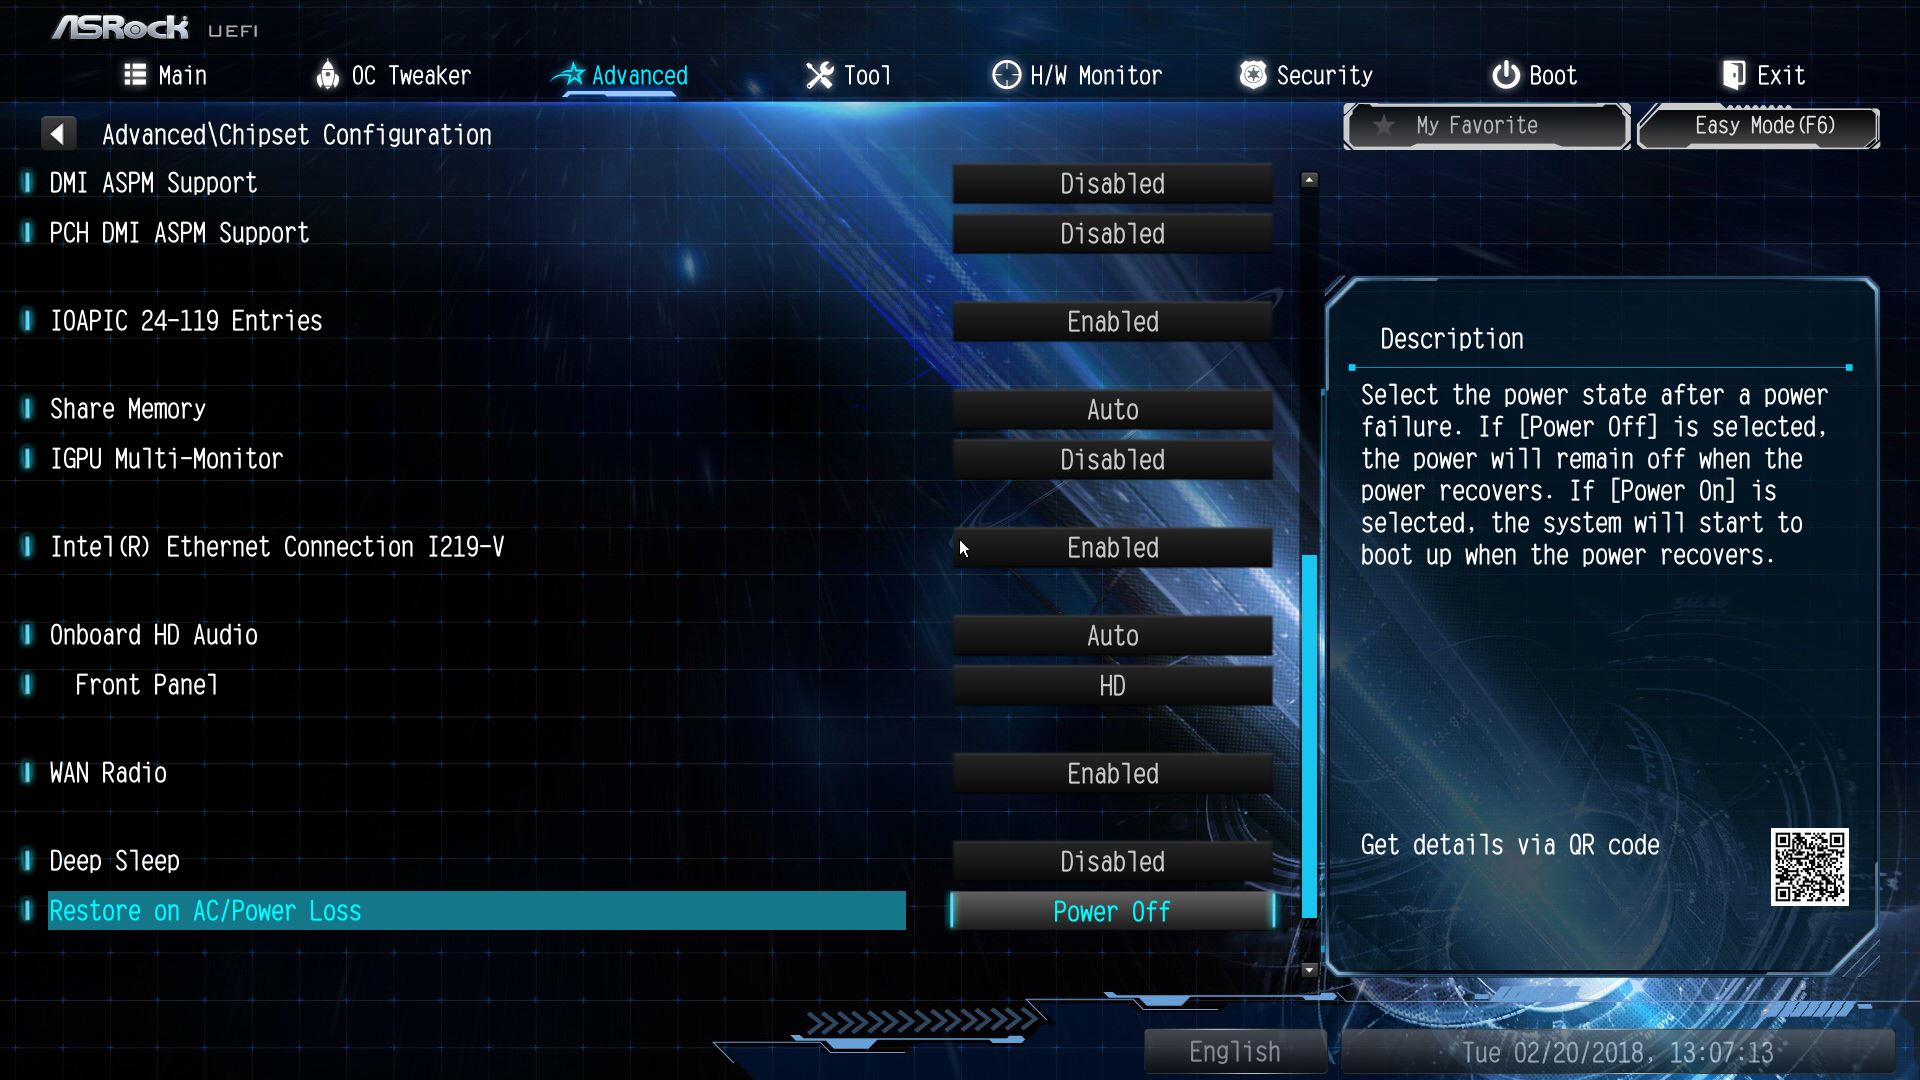
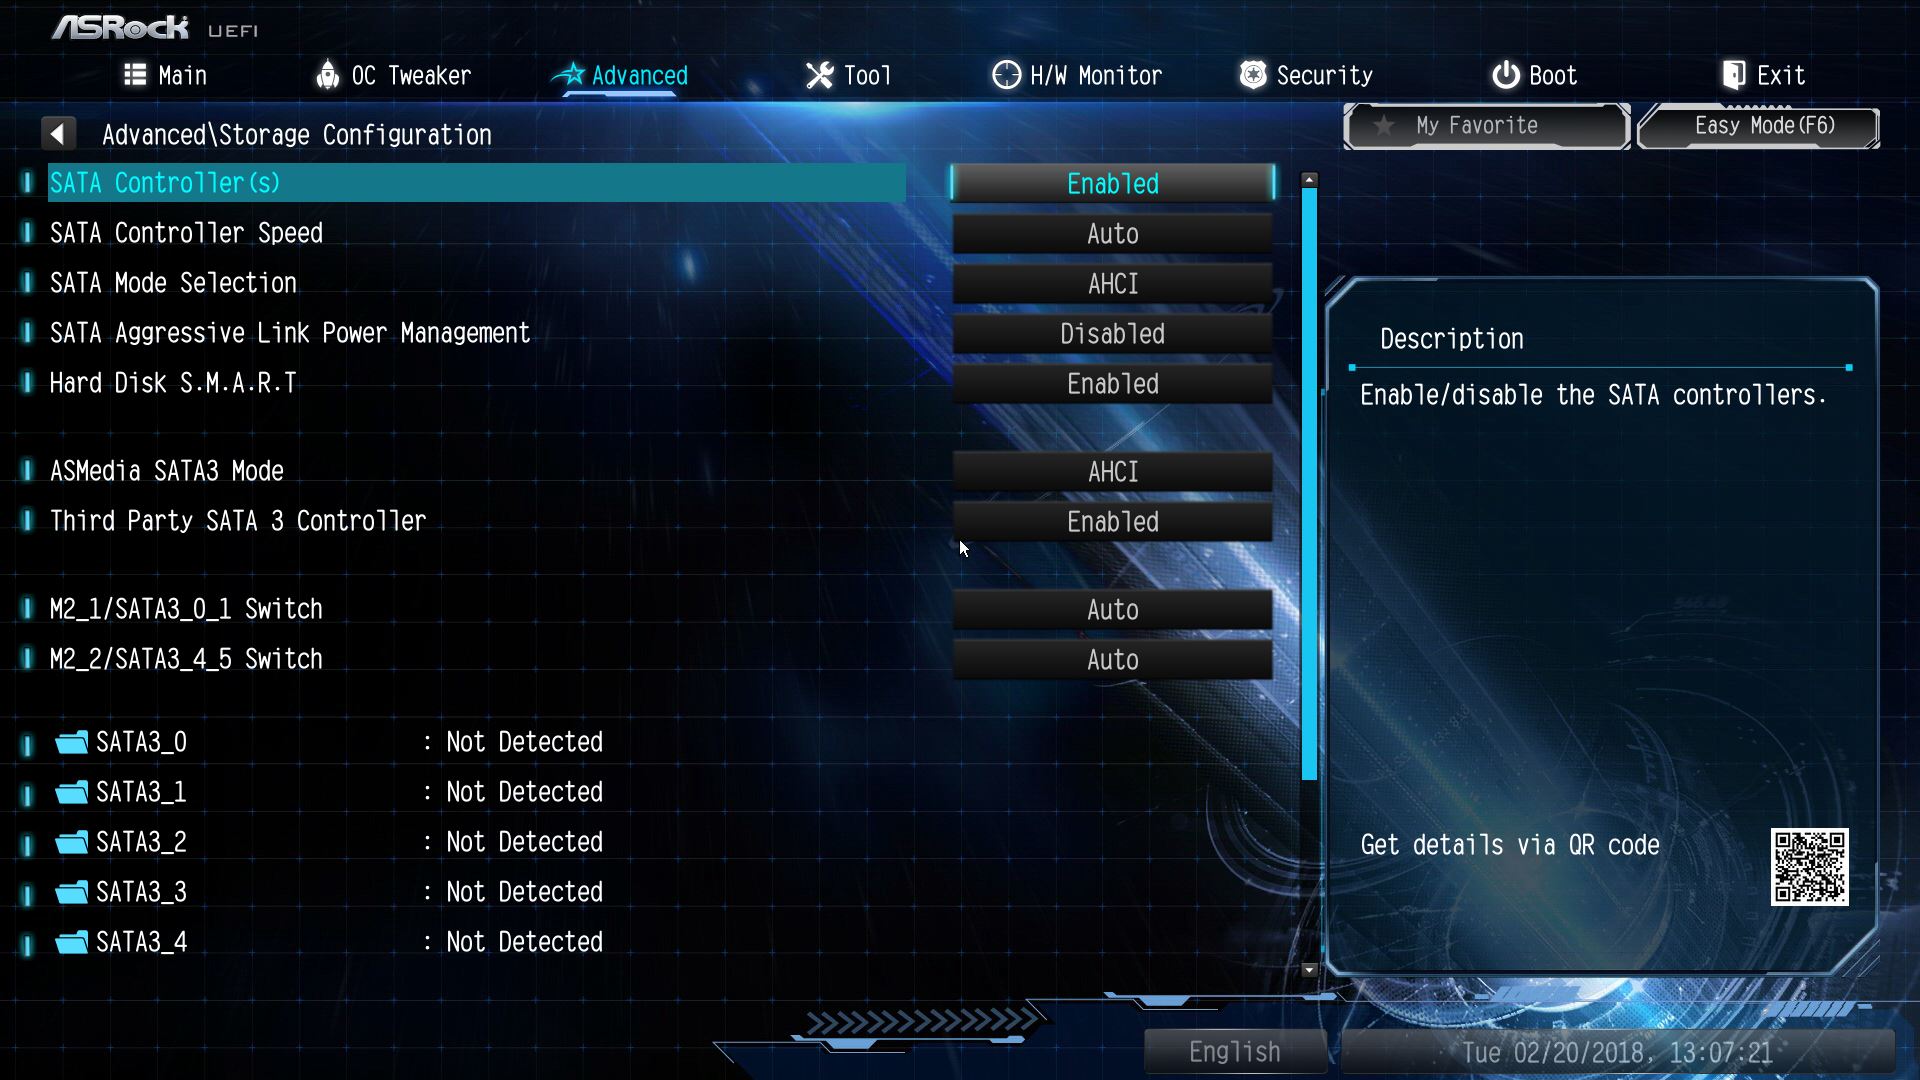
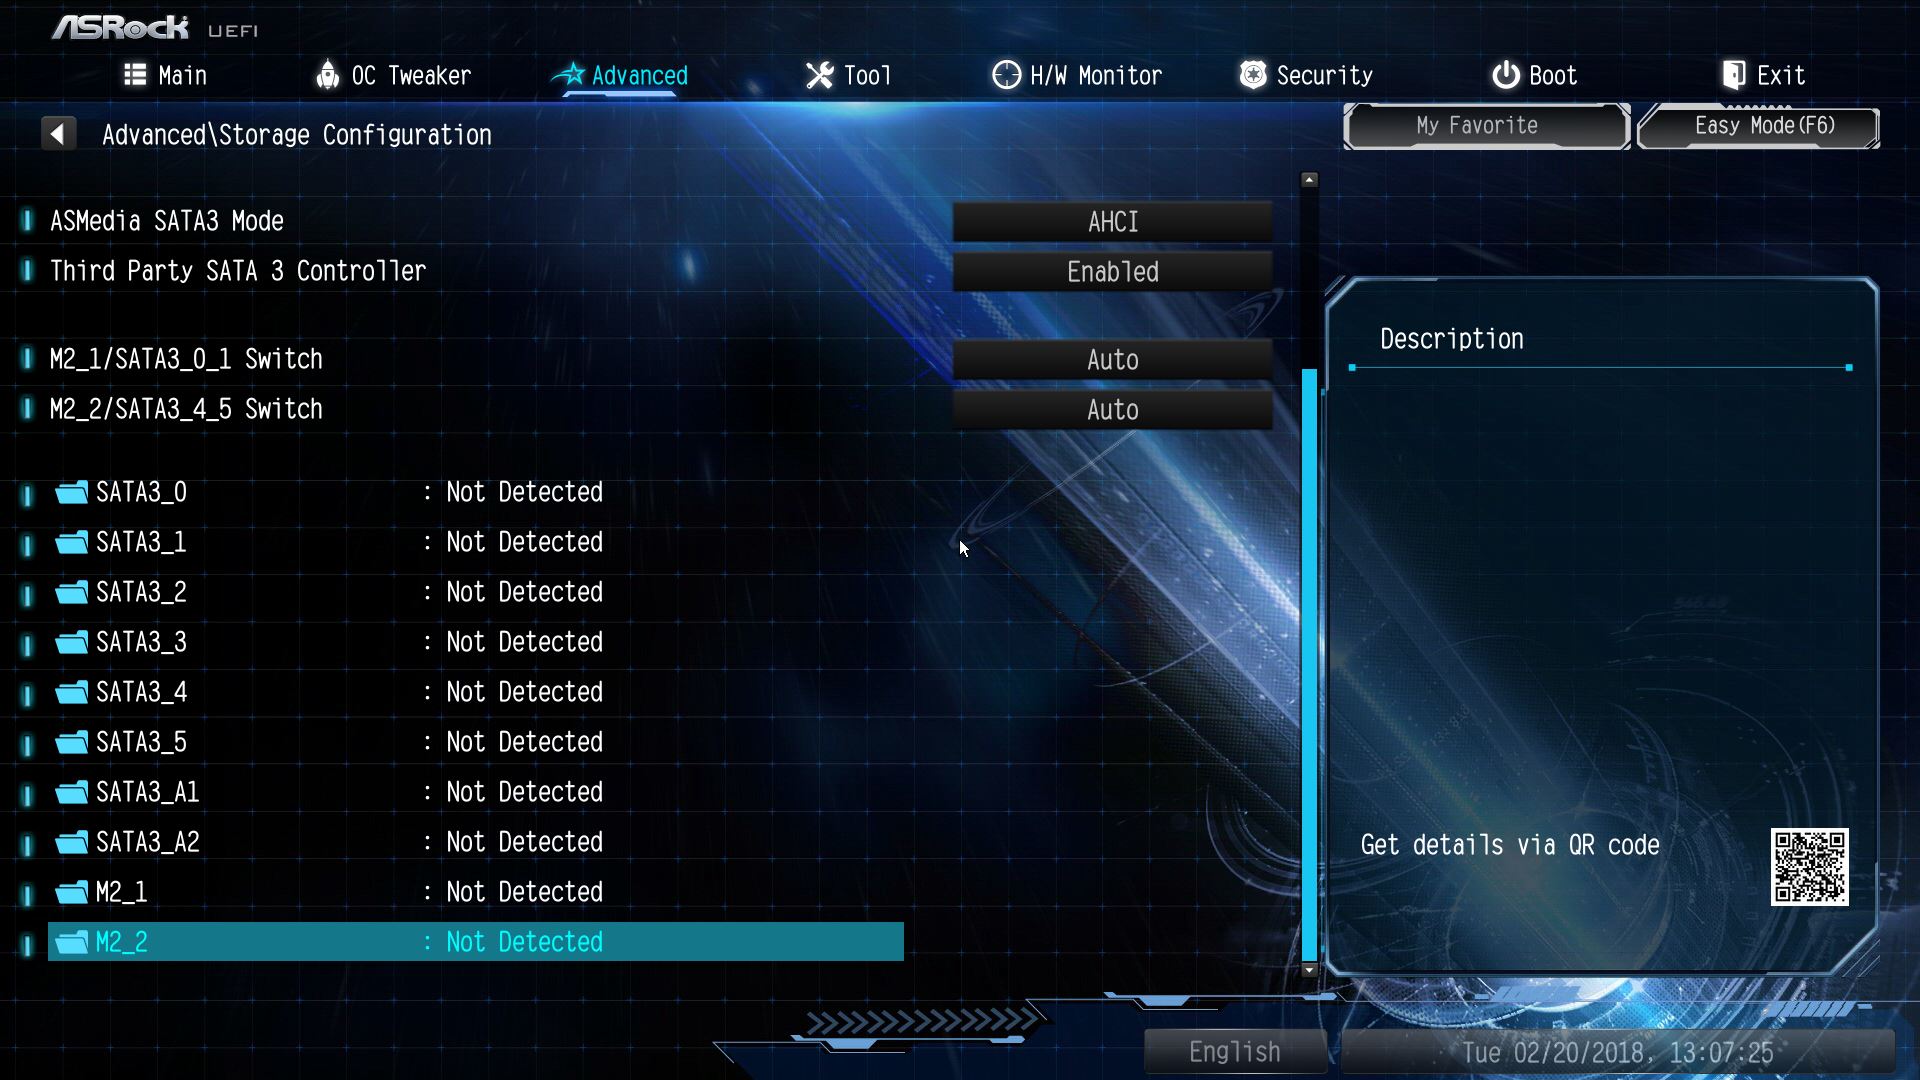
▼SATA进阶设定选项一览
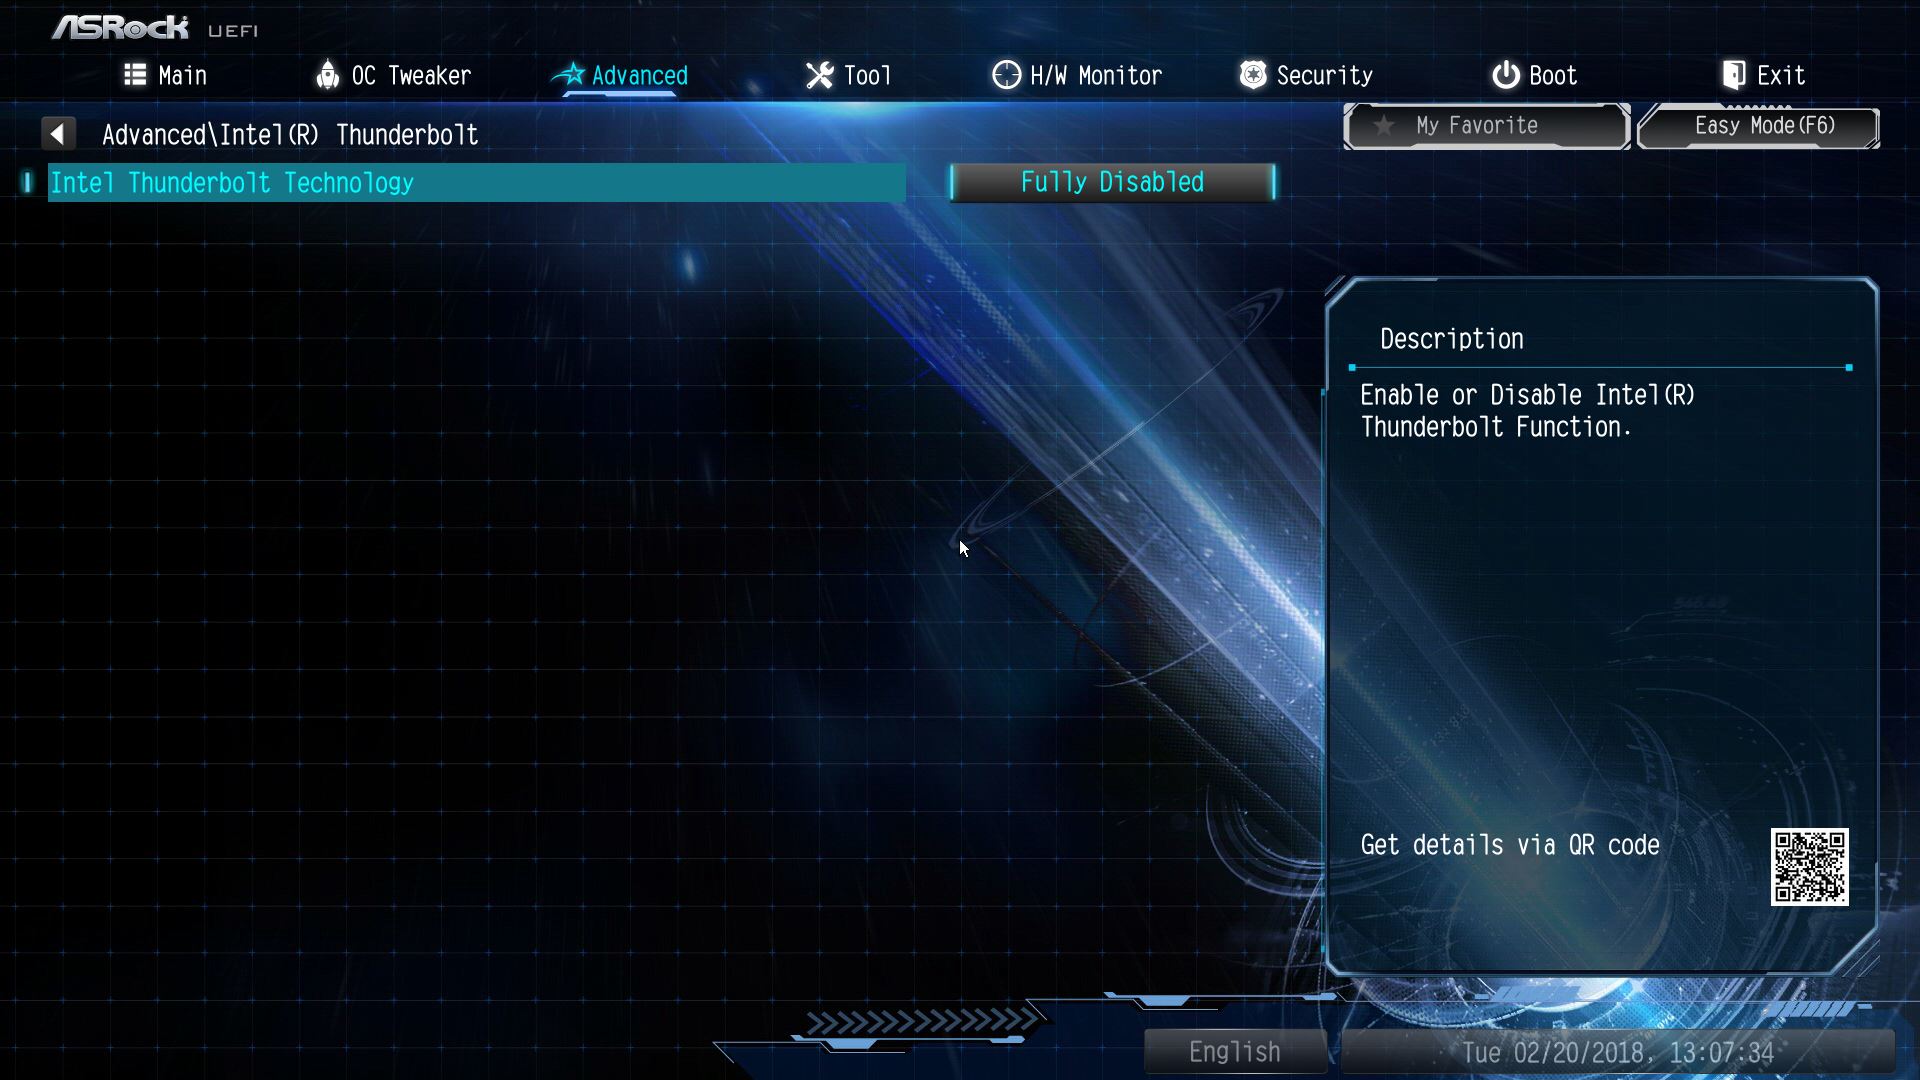
▼Thunderbolt设定选项一览
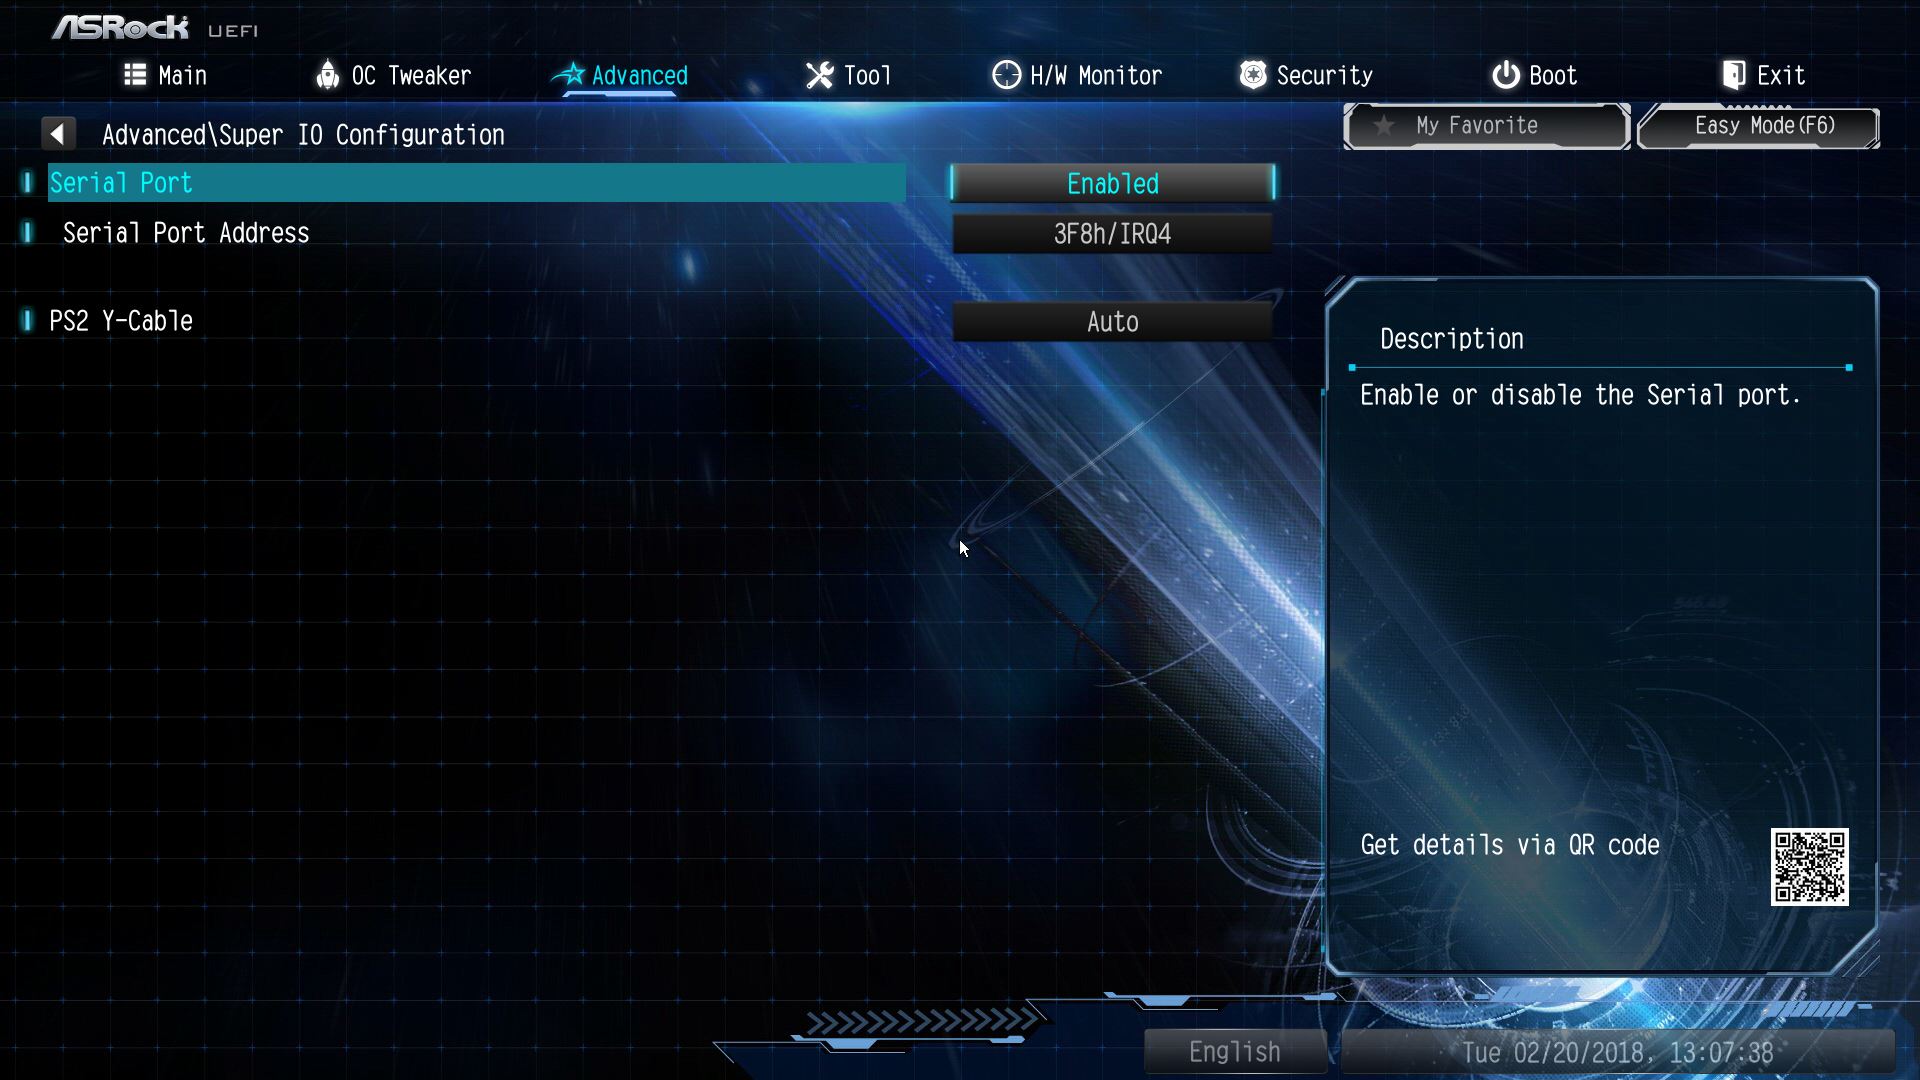
▼Super IO进阶设定选项一览
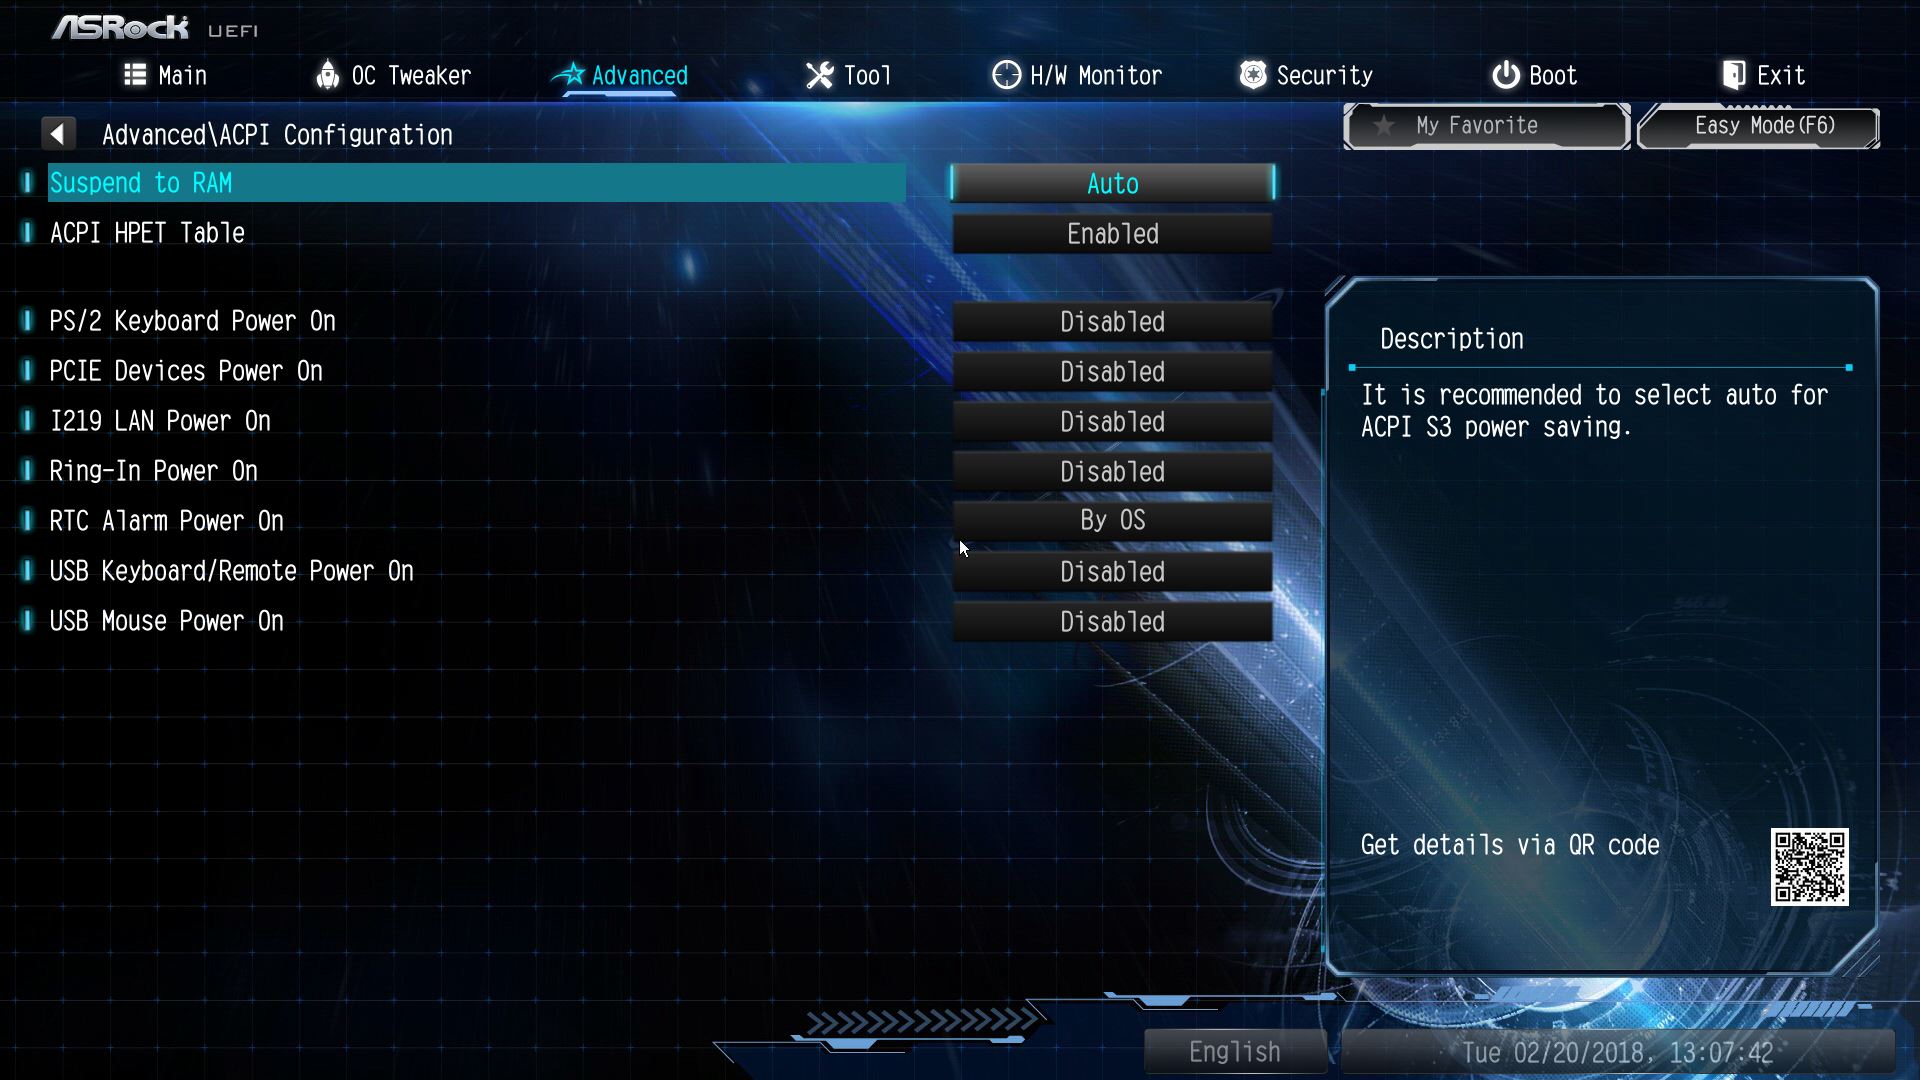
▼ACPI进阶设定选项一览
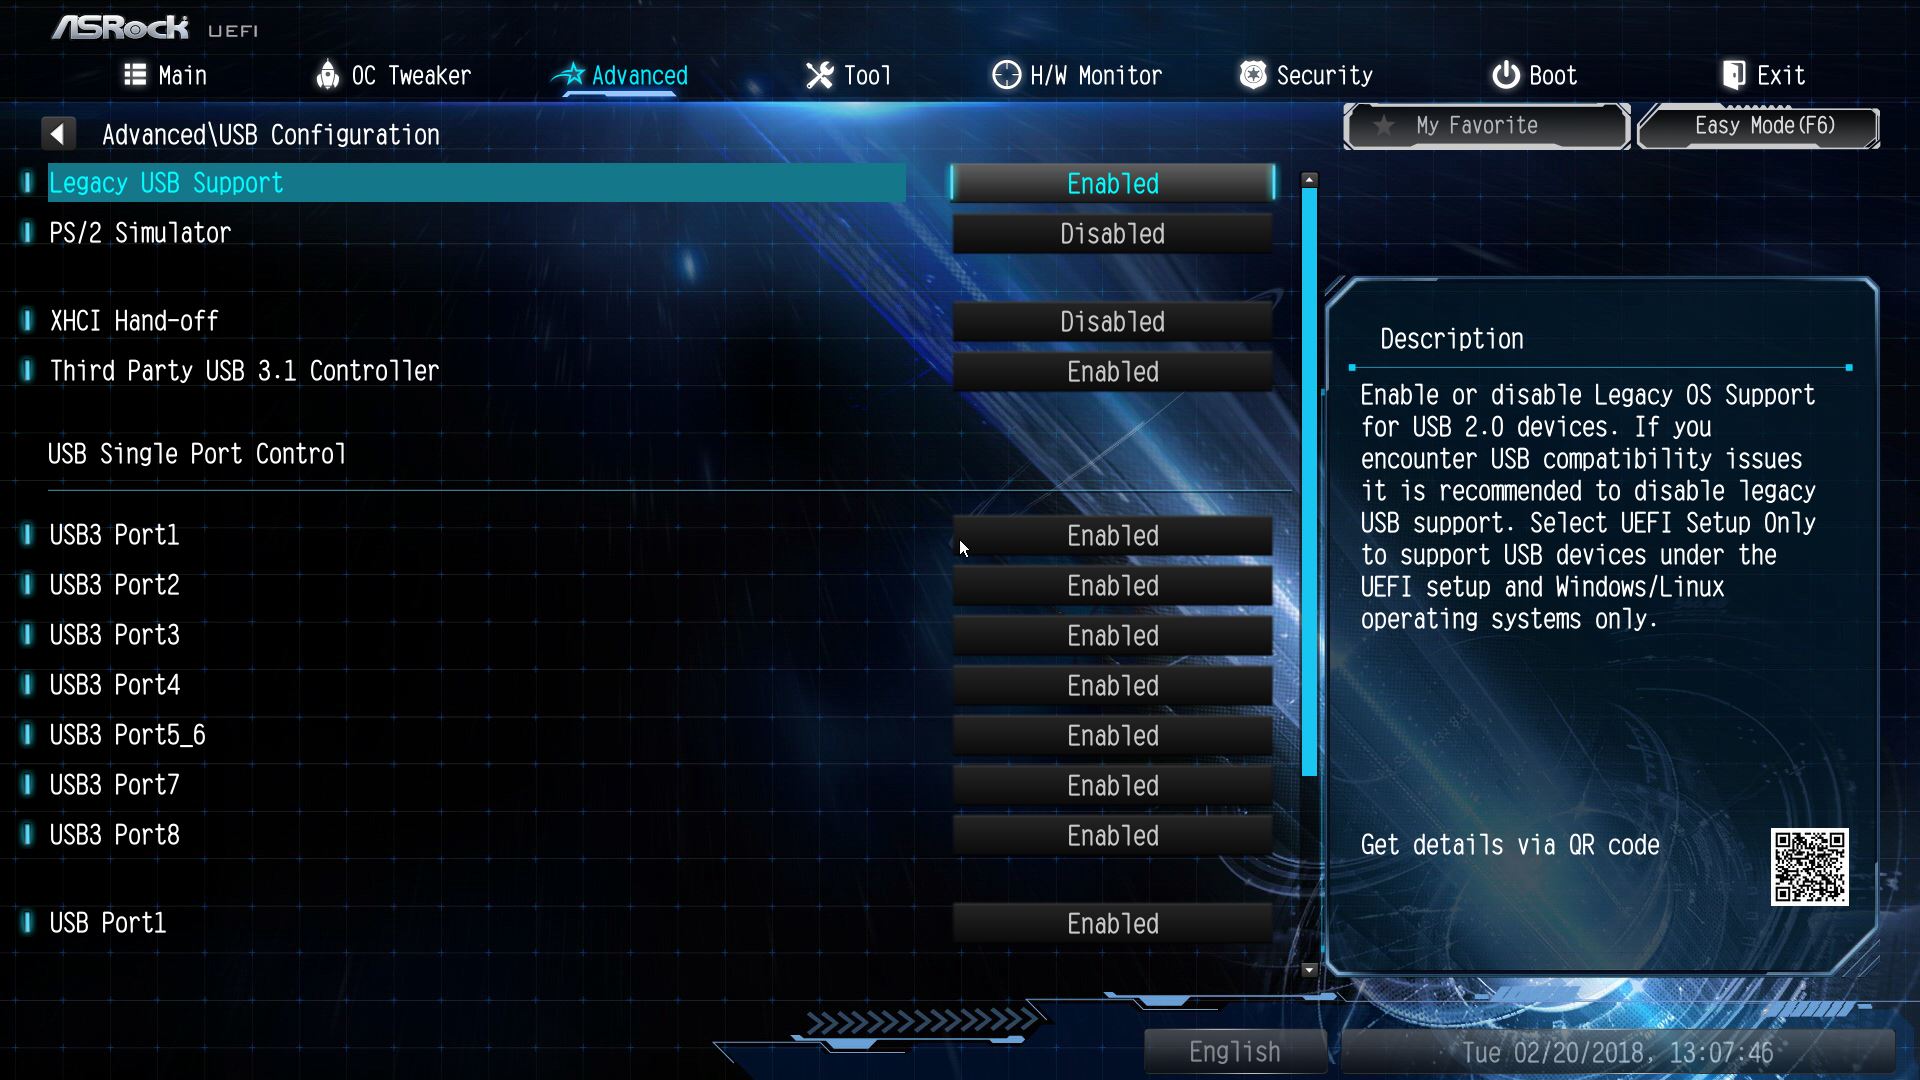
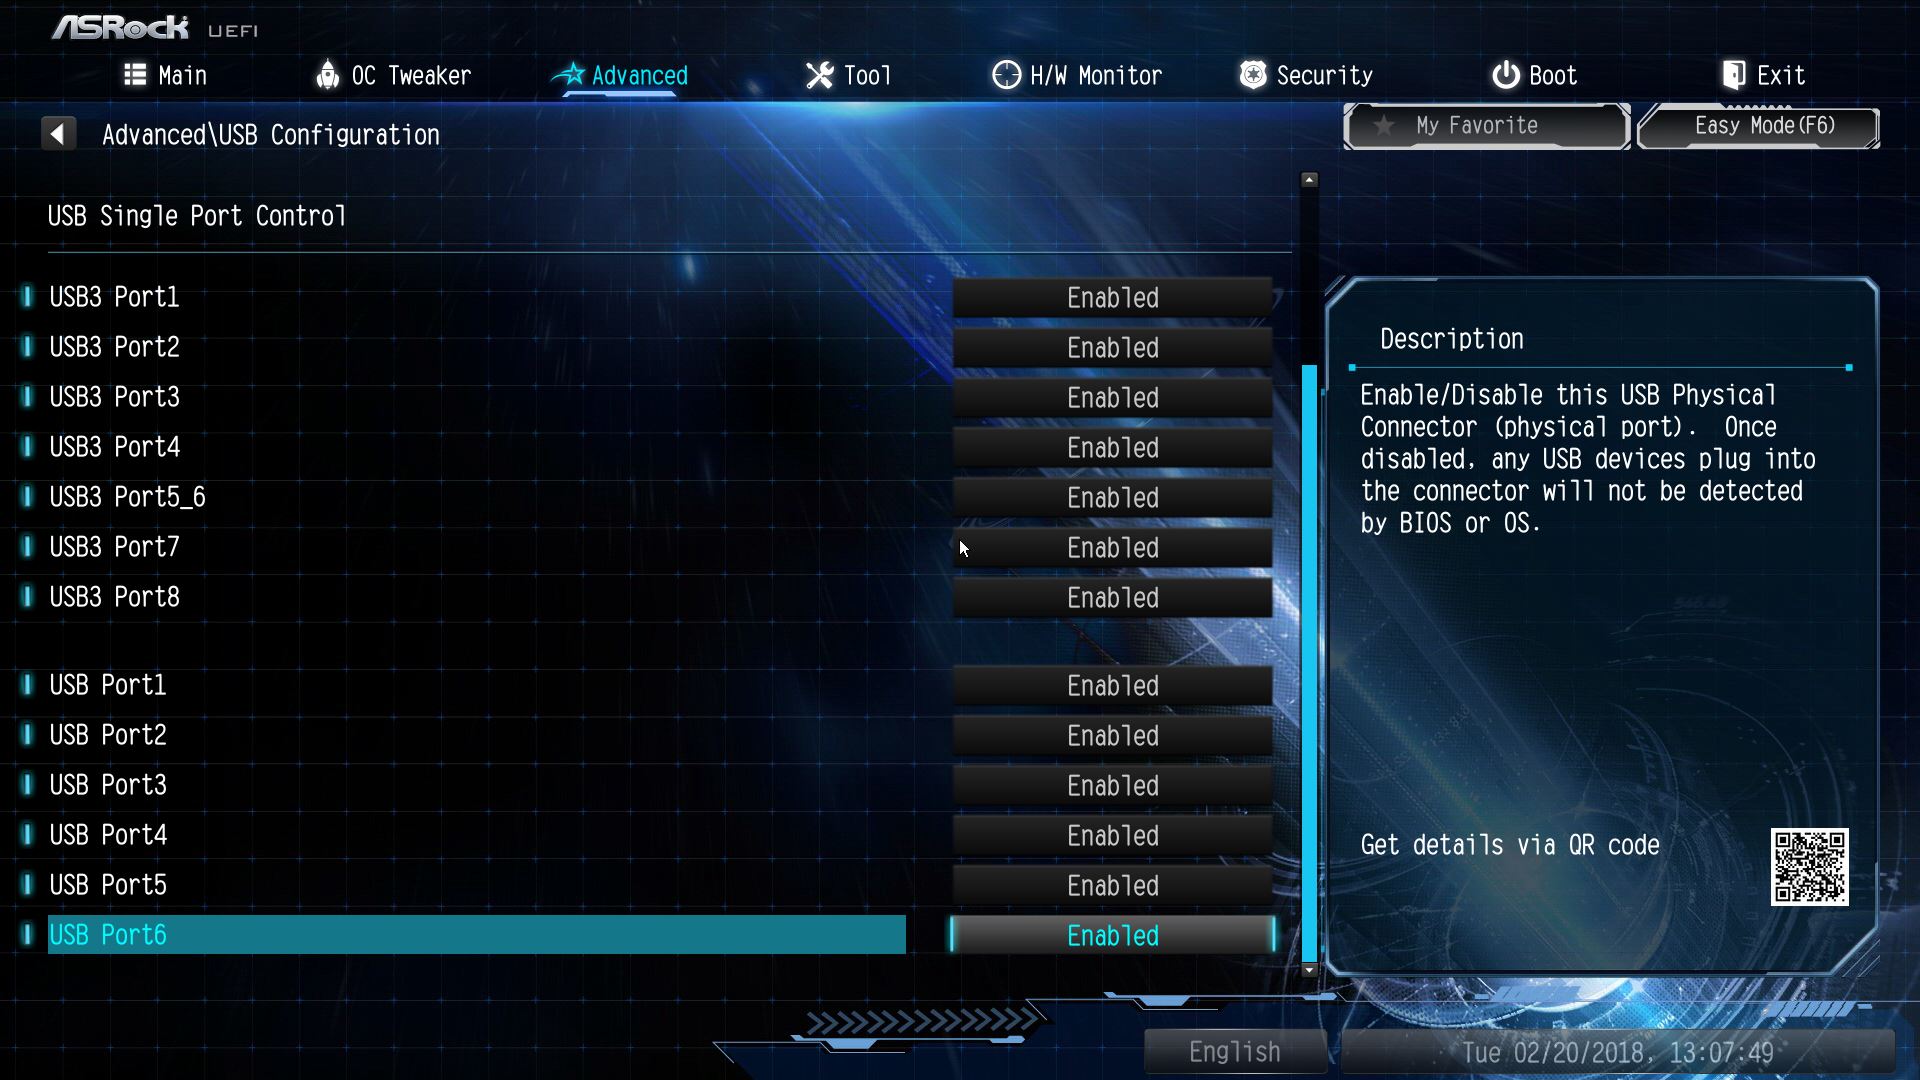
▼USB进阶设定选项一览
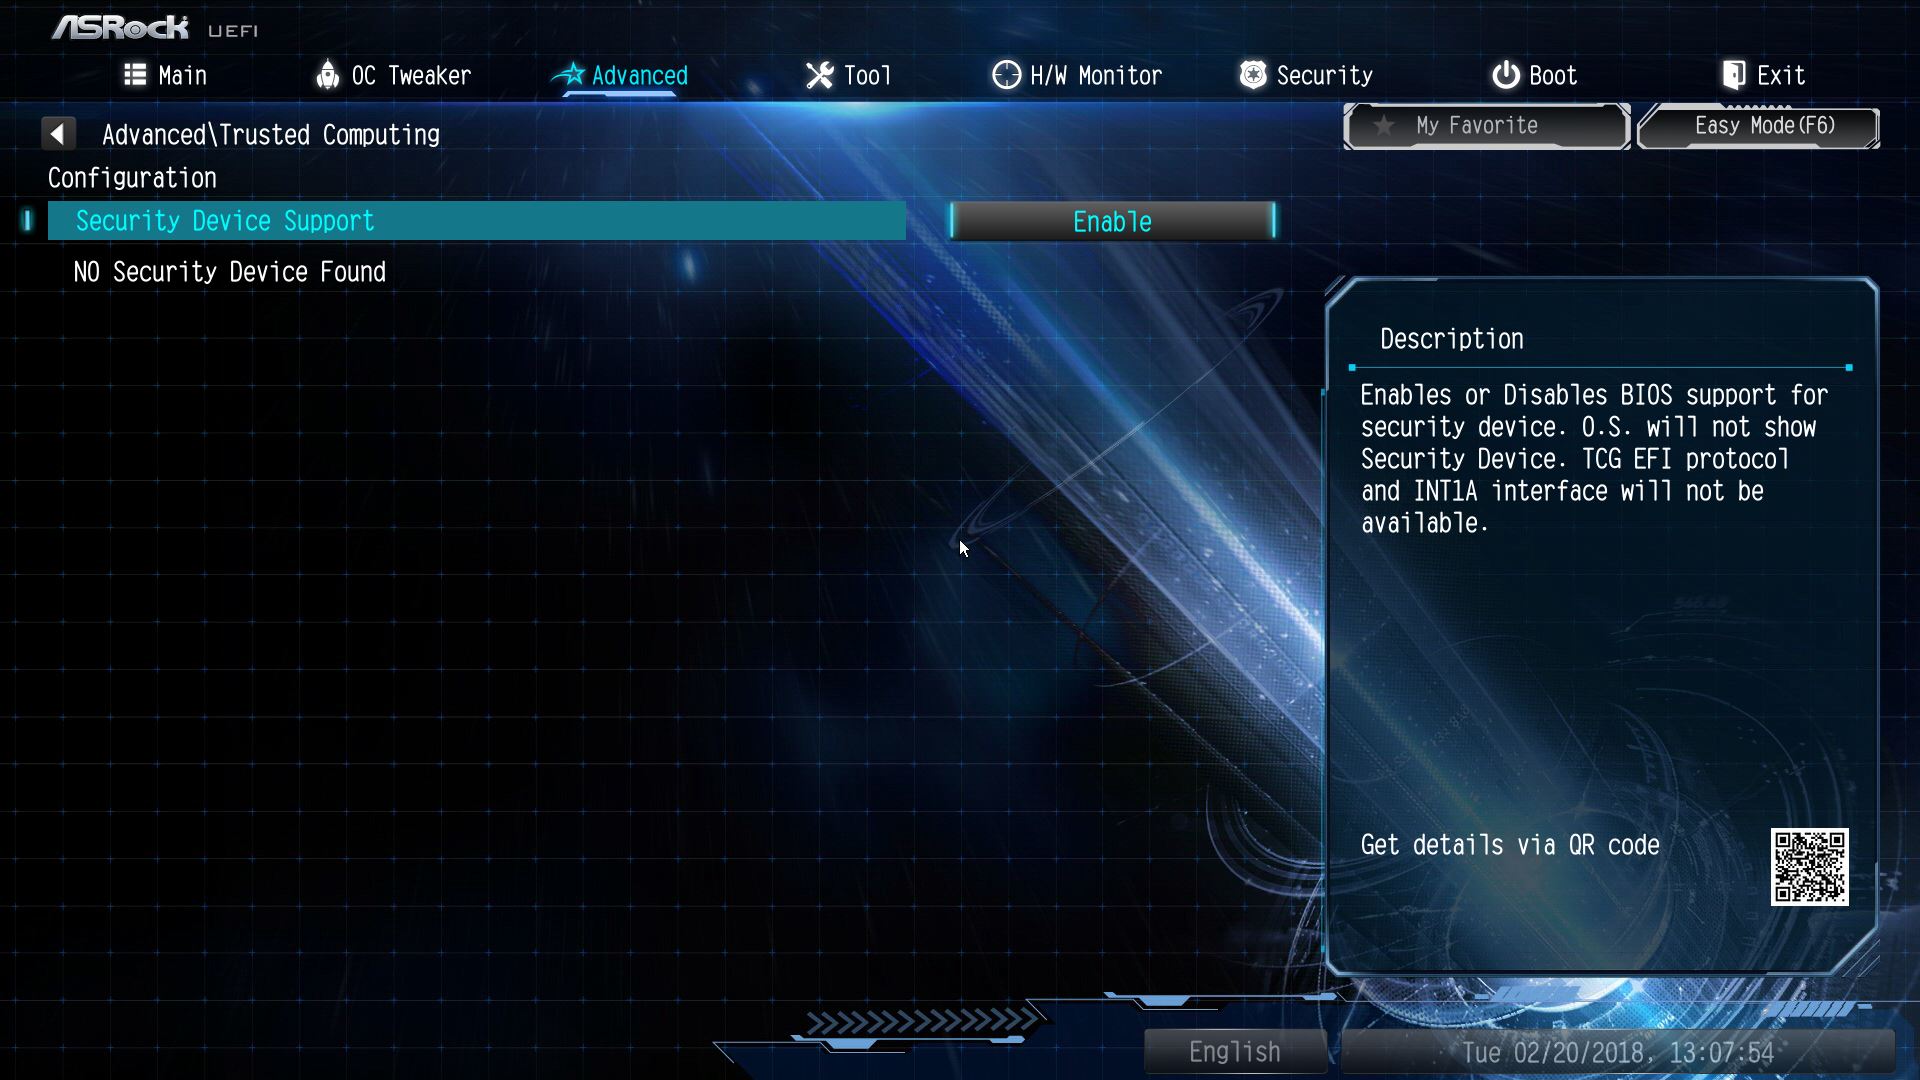
▼安全性设定选项一览
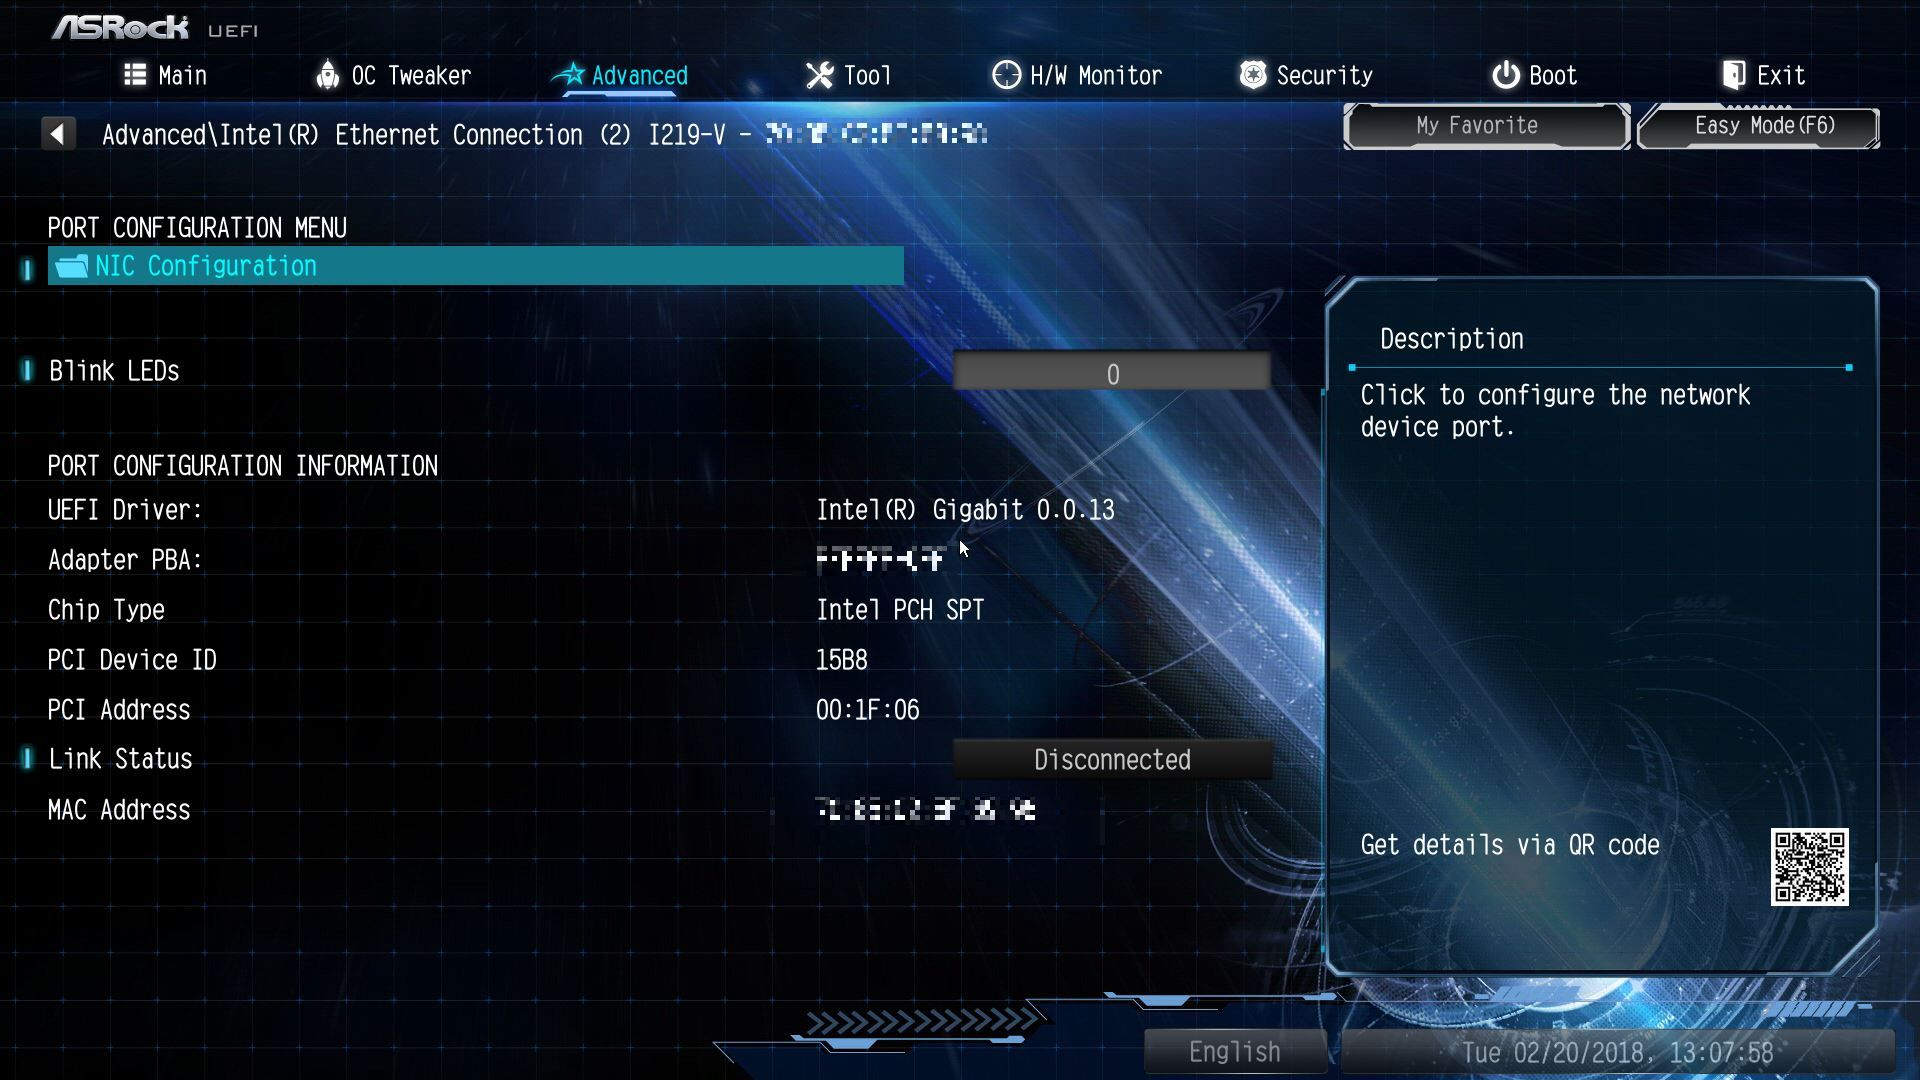
▼网路卡状态选项一览
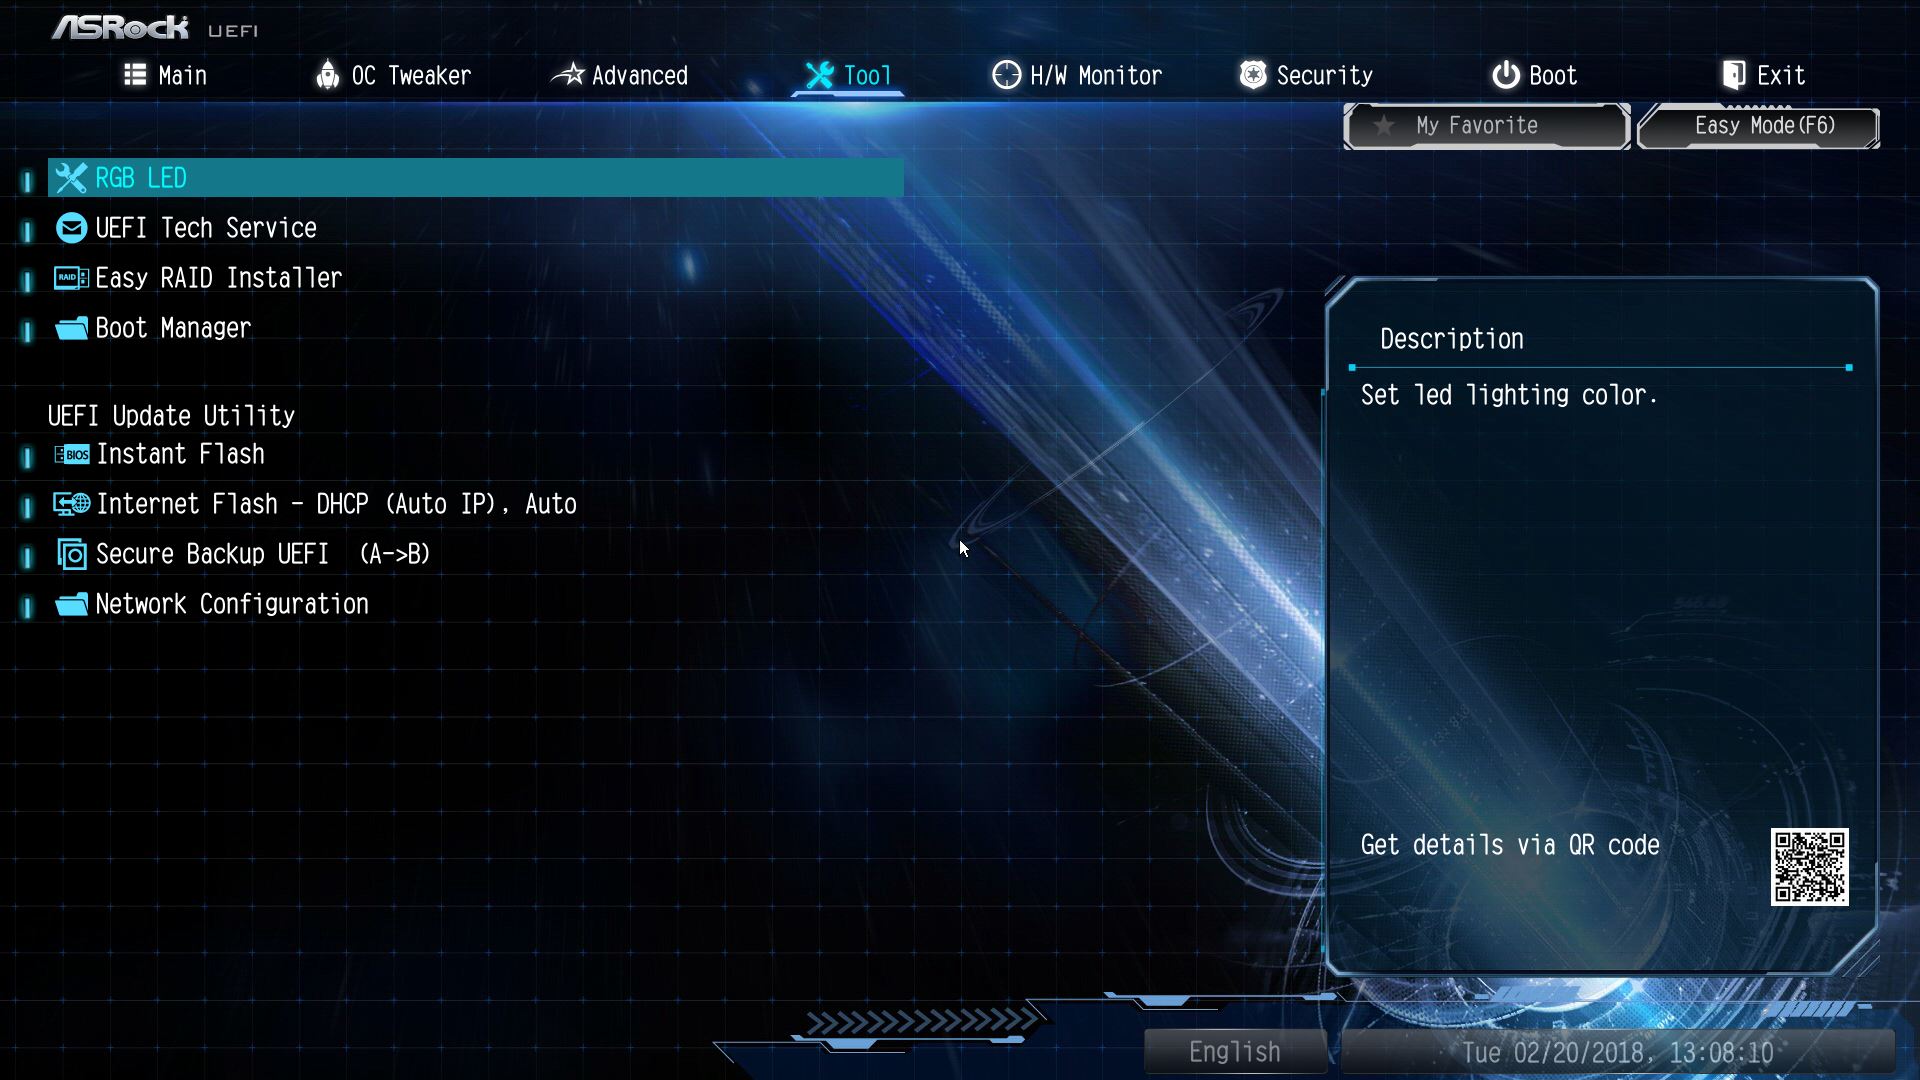
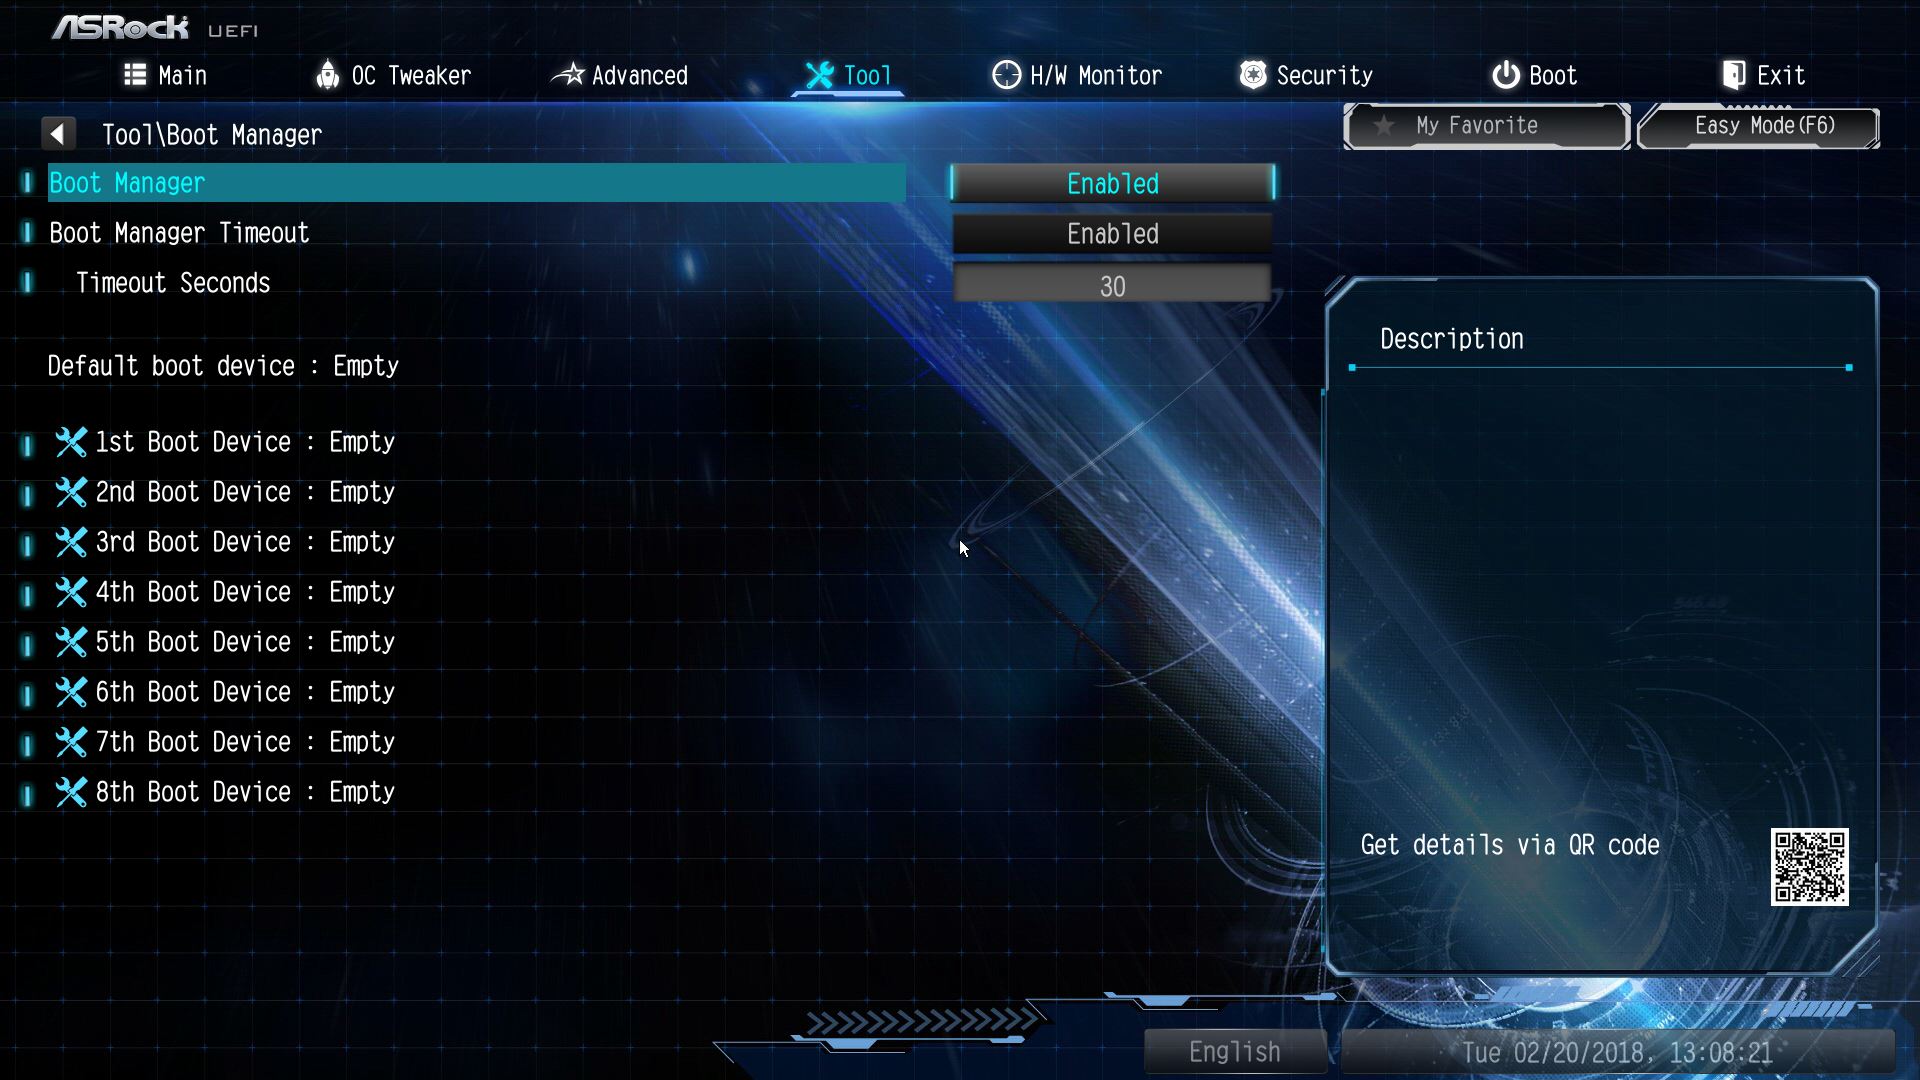
▼工具页面可查看系统总览、RAID设定、RAID驱动安装、Boot设定、BIOS线上更新…等,还可直接设定RGB LED功能
▼RGB LED功能设定,基本上与作业系统内的软体介面相同
▼开机功能表一览
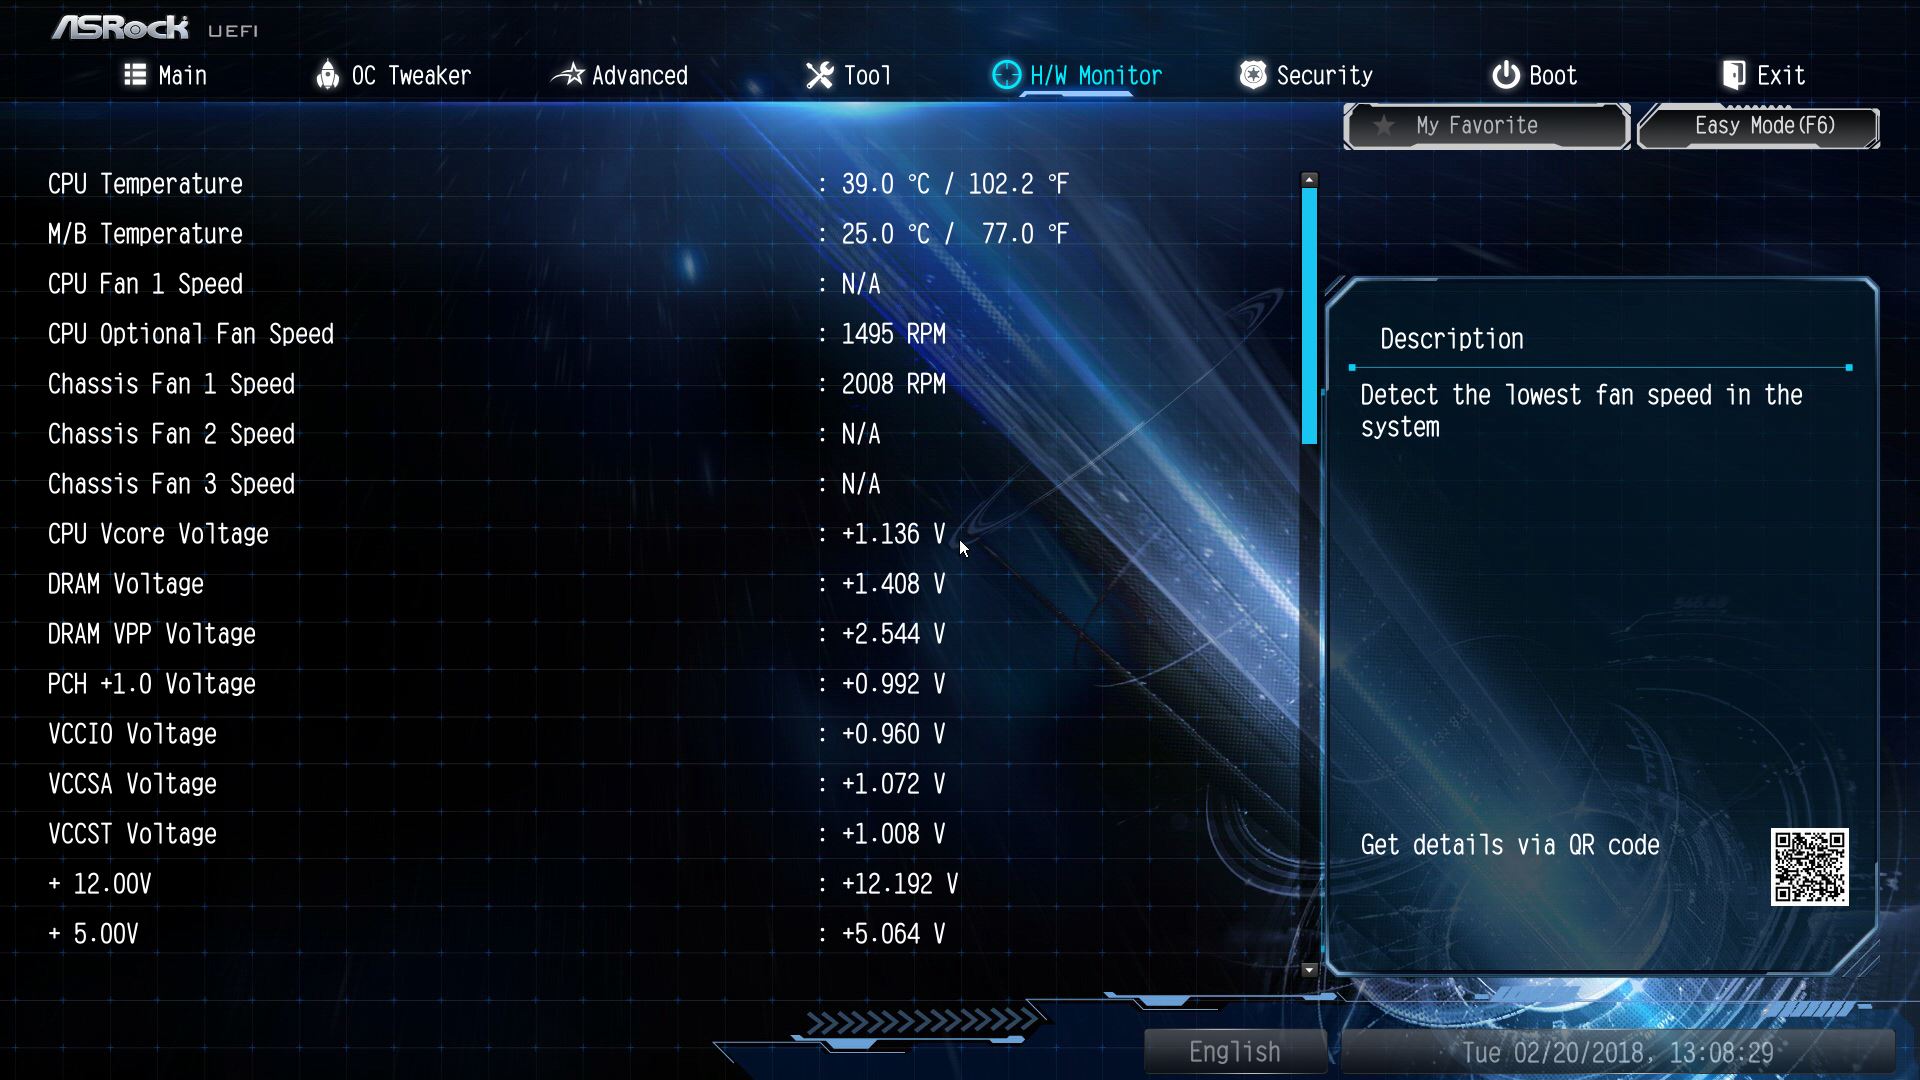
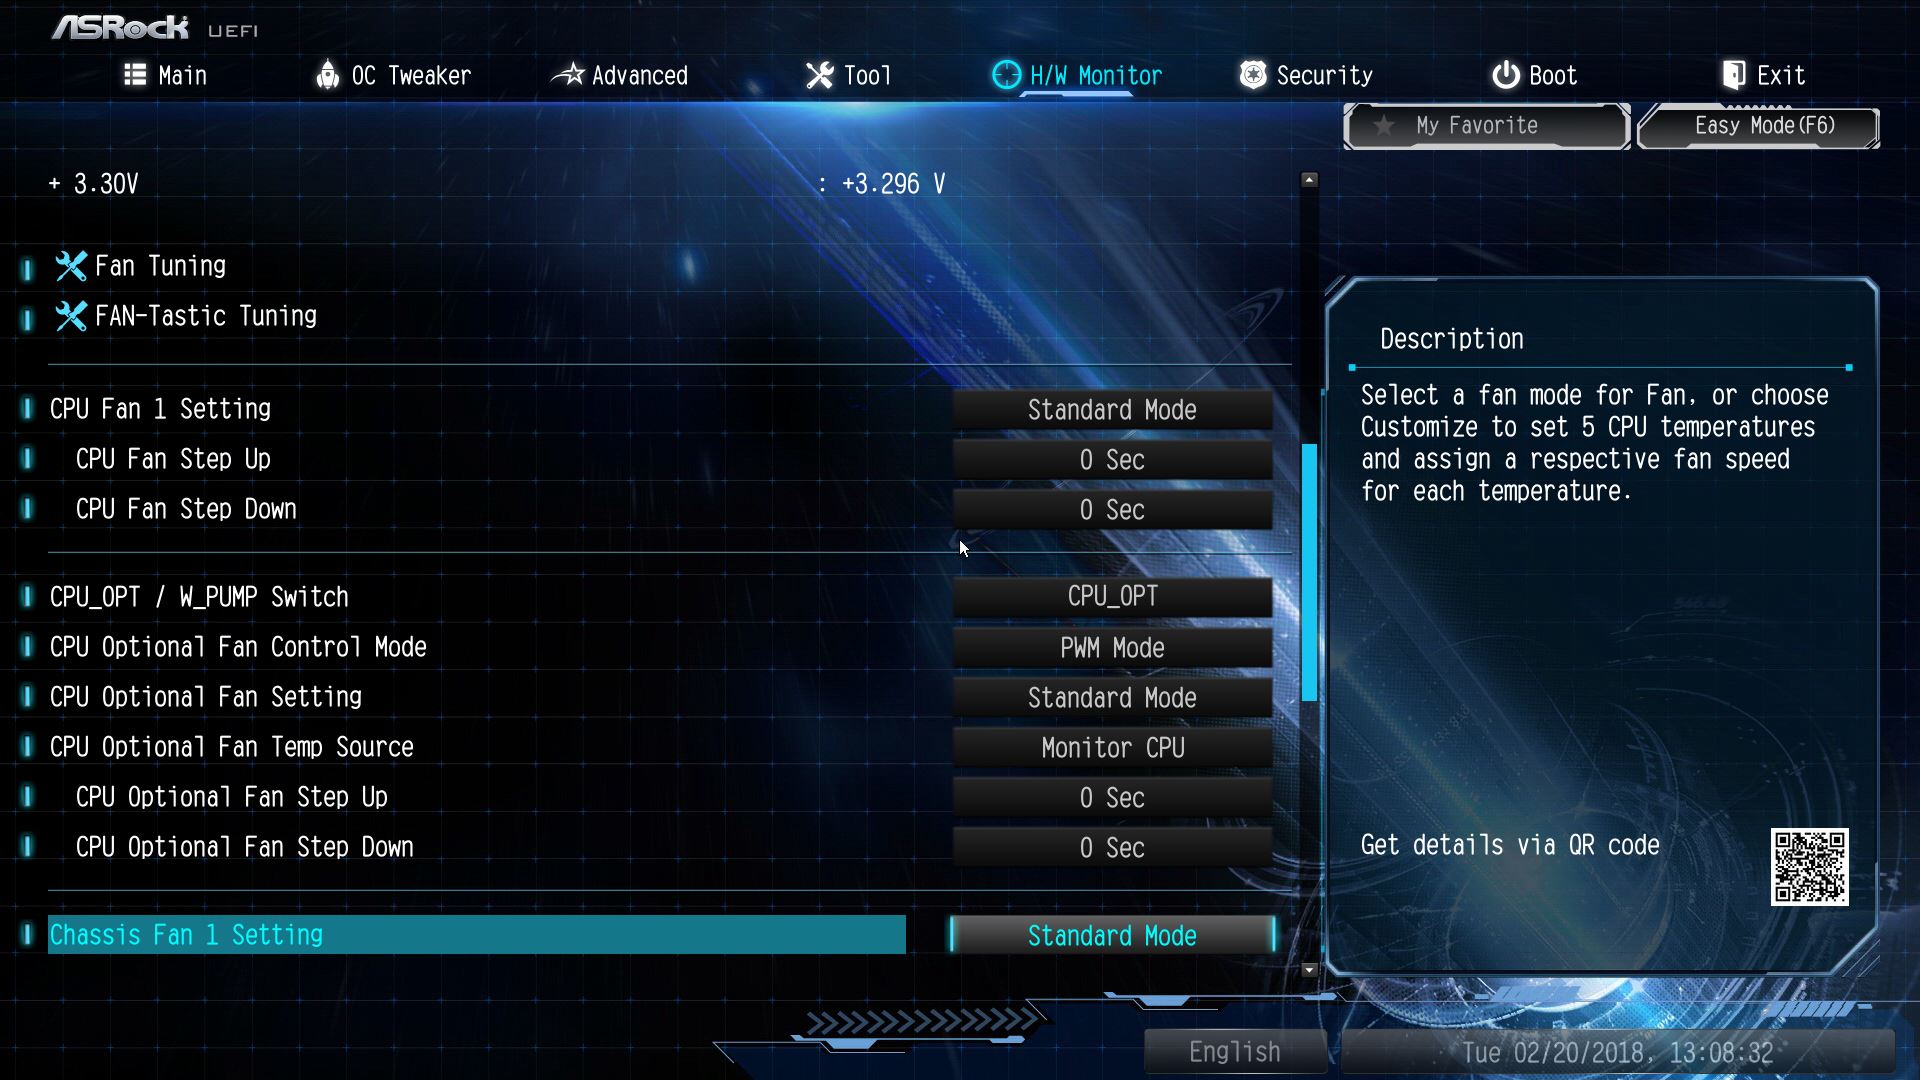
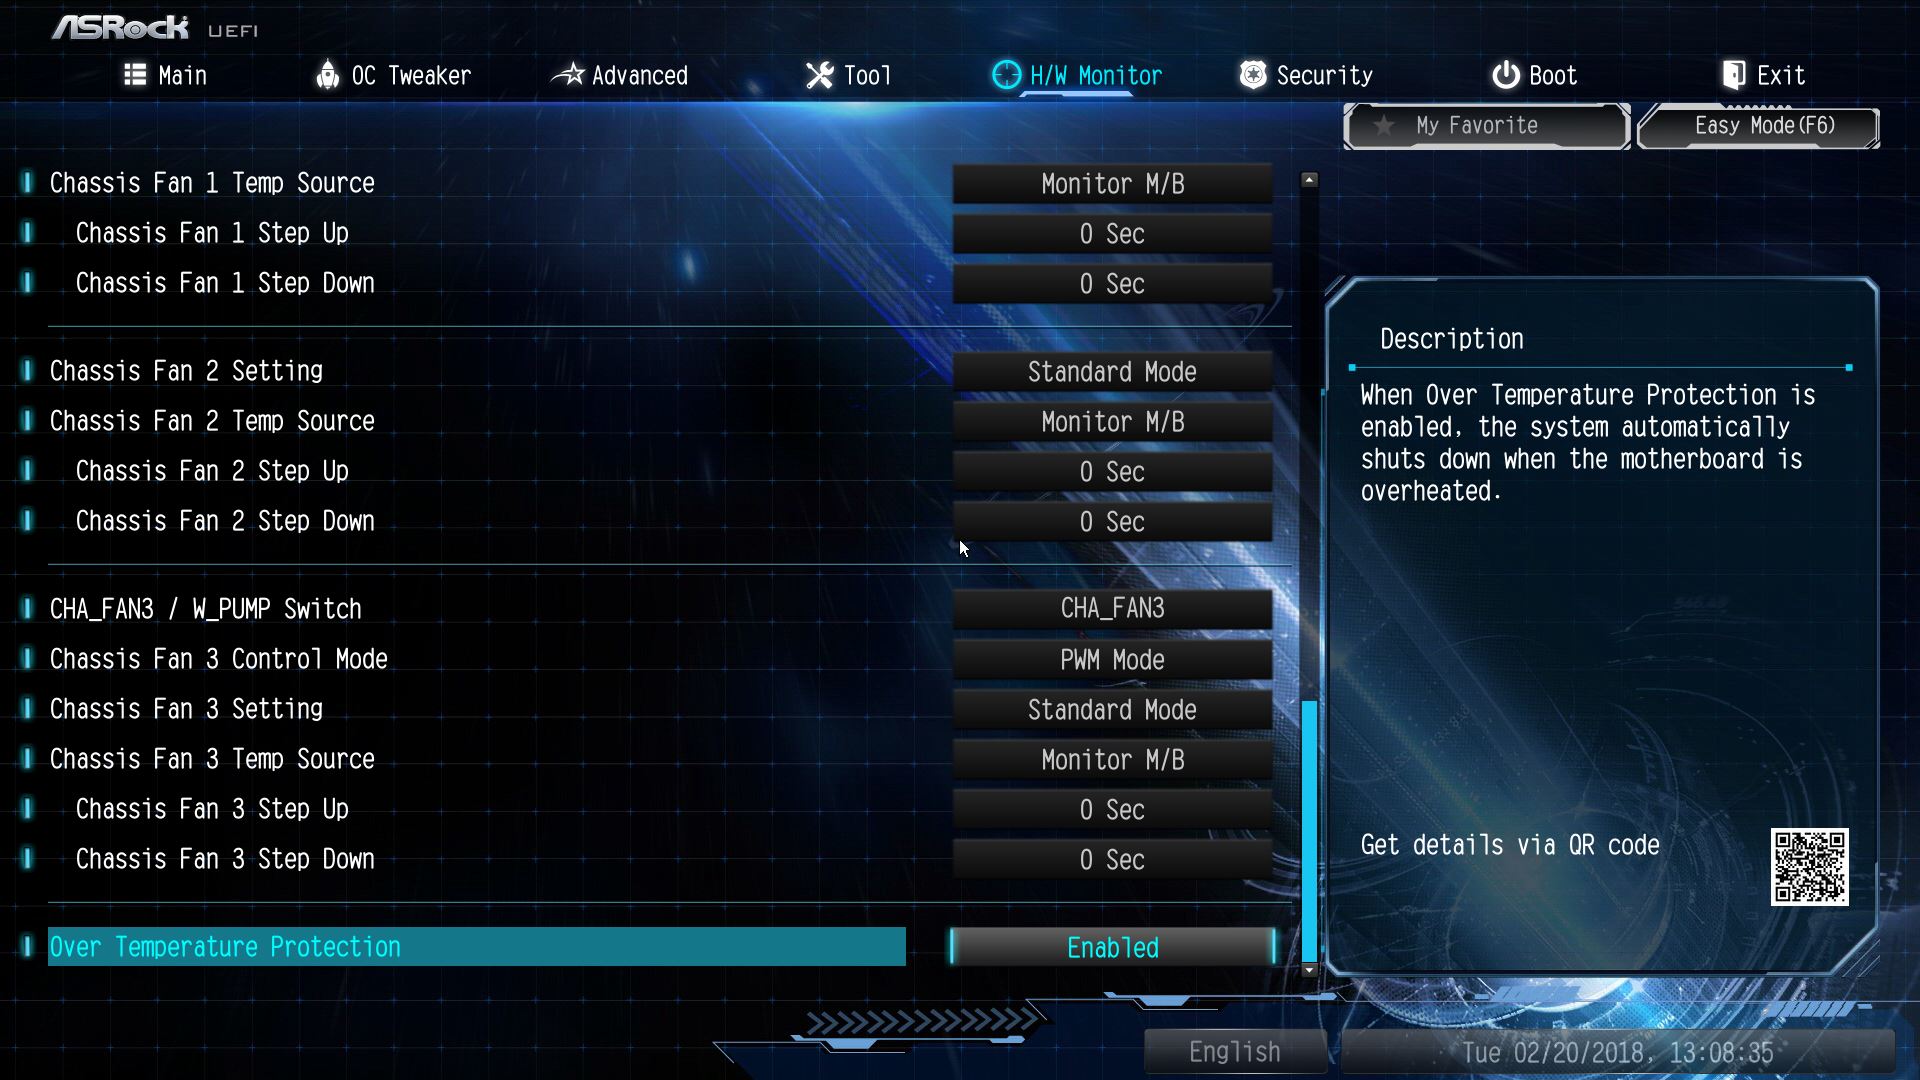
▼硬体监测部分可看到CPU温度、风扇转速与各电源电压状态,并可设定风扇模式
▼安全部分可设定开机密码与其他安全性设定

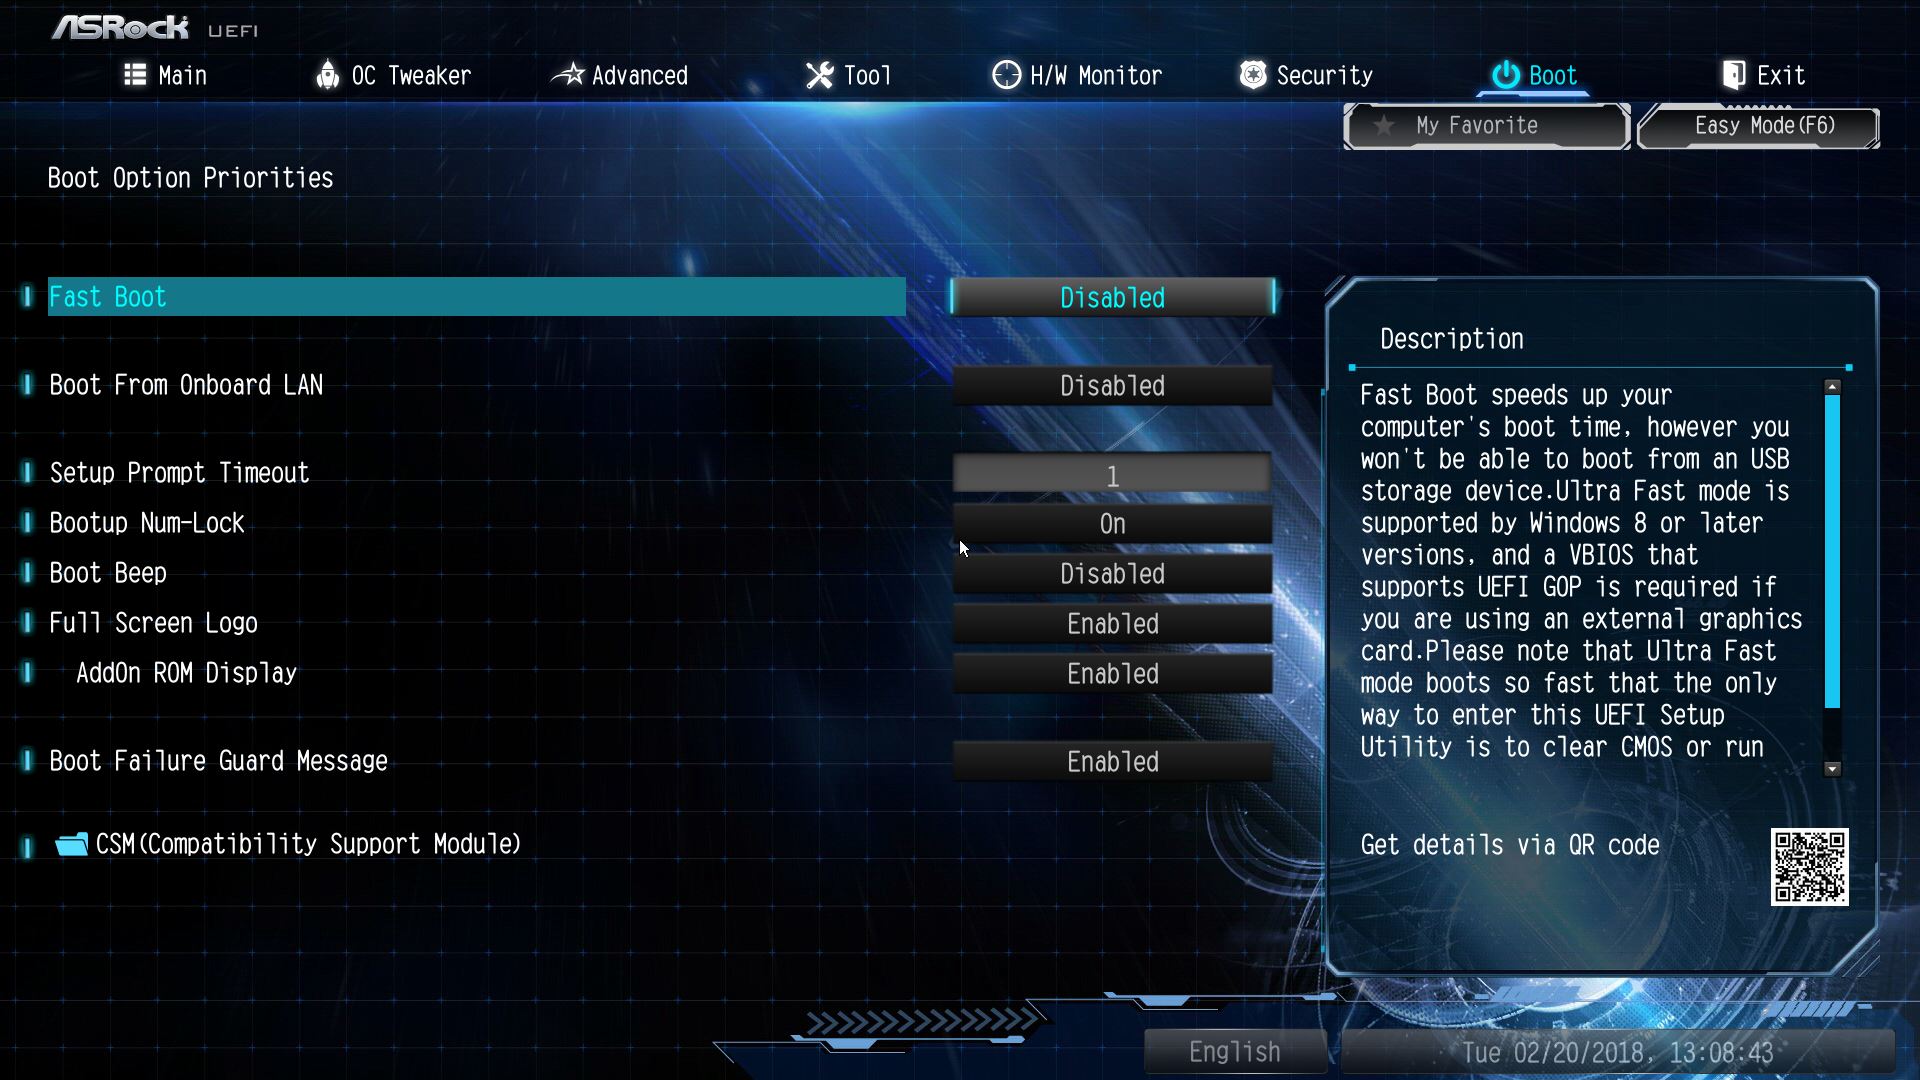
▼Boot部分可以设定开机顺序与其他开机选项
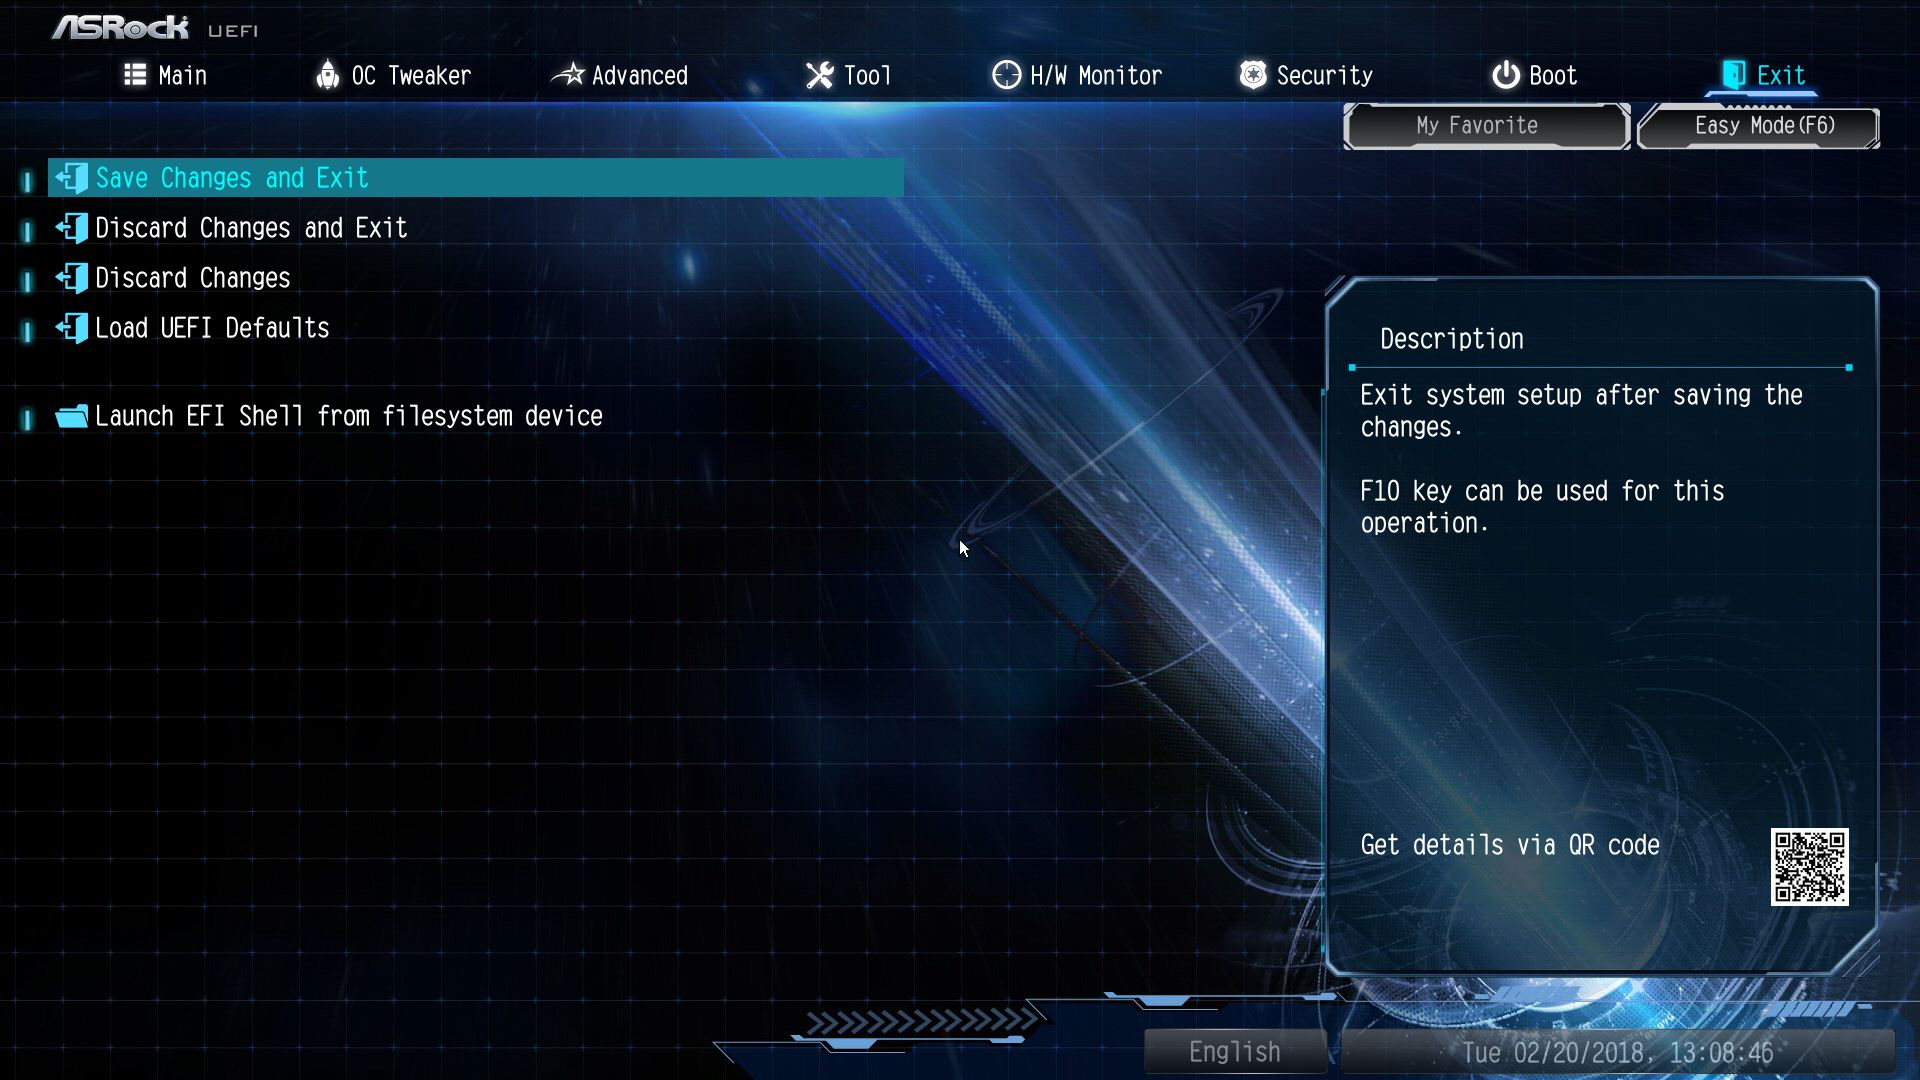
▼最后一部分为设定储存与离开..等选项
 效能测试(预设)
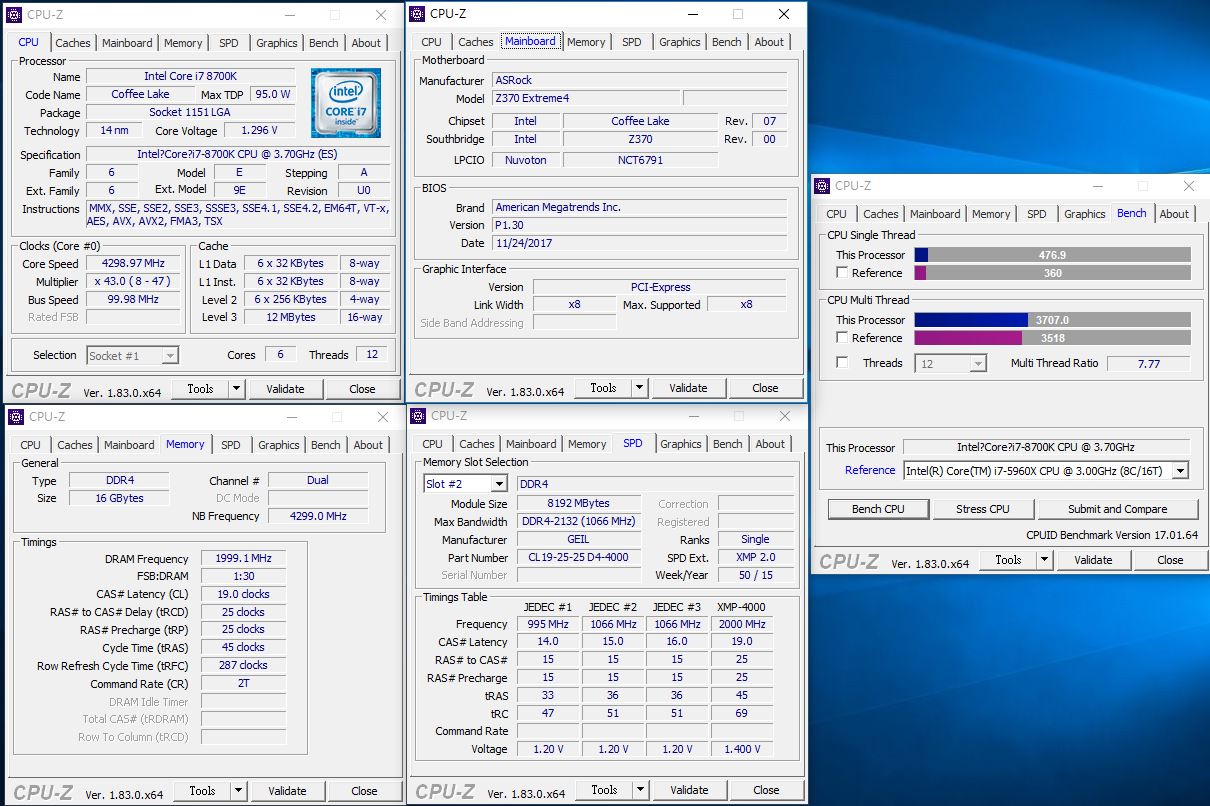
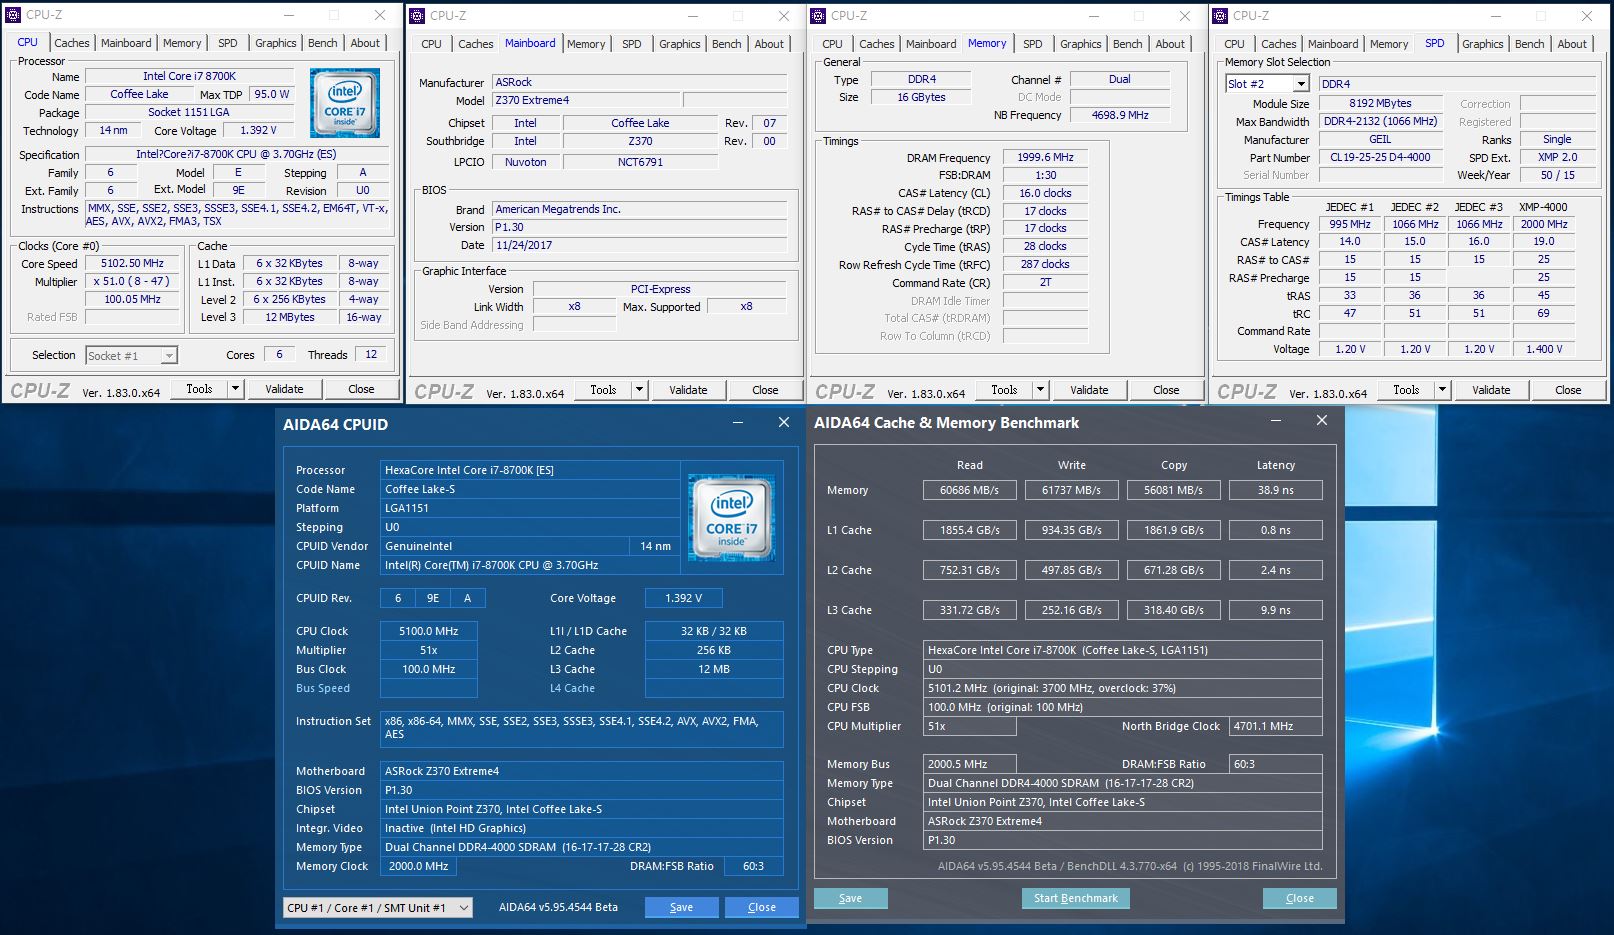
测试平台:
CPU:Intel i7-8700K
Cooler: NZXT. Kraken™ X61
MB: ASRock Z370 Extreme 4
RAM: GeIL DRAGON RAM DDR4-4000 16GB kit (8G*2)
Storage: Samsung MZHPV256HDGL M.2 2280 PCIe 256GB
PSU: Steventeam 500W
OS: Windows 10 专业版 64 Bit
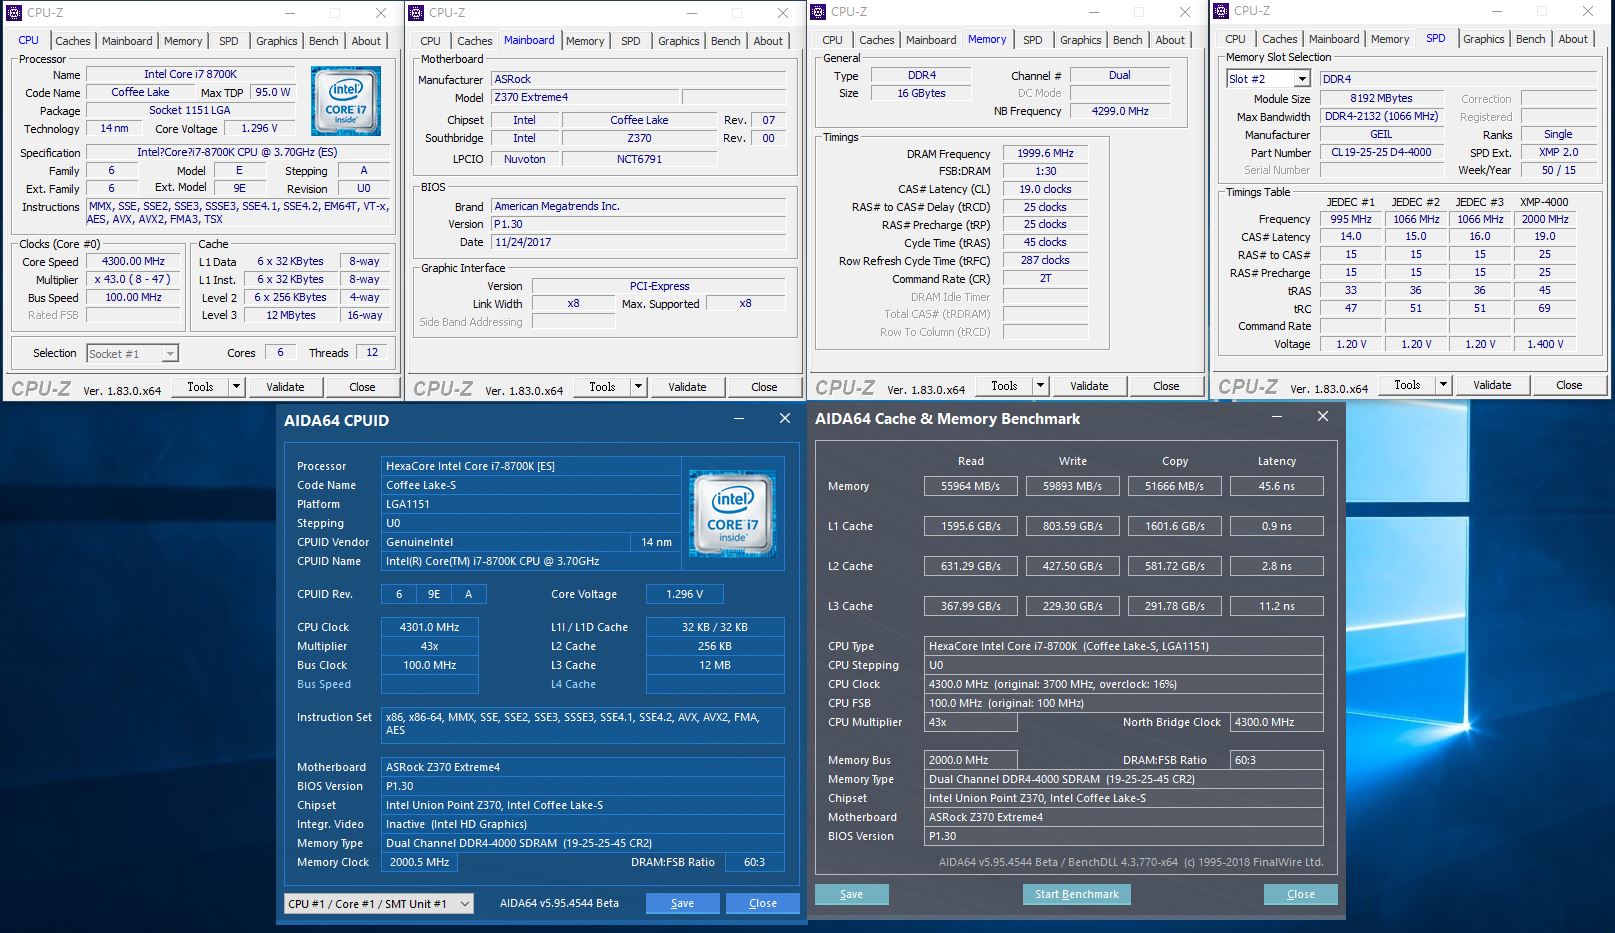
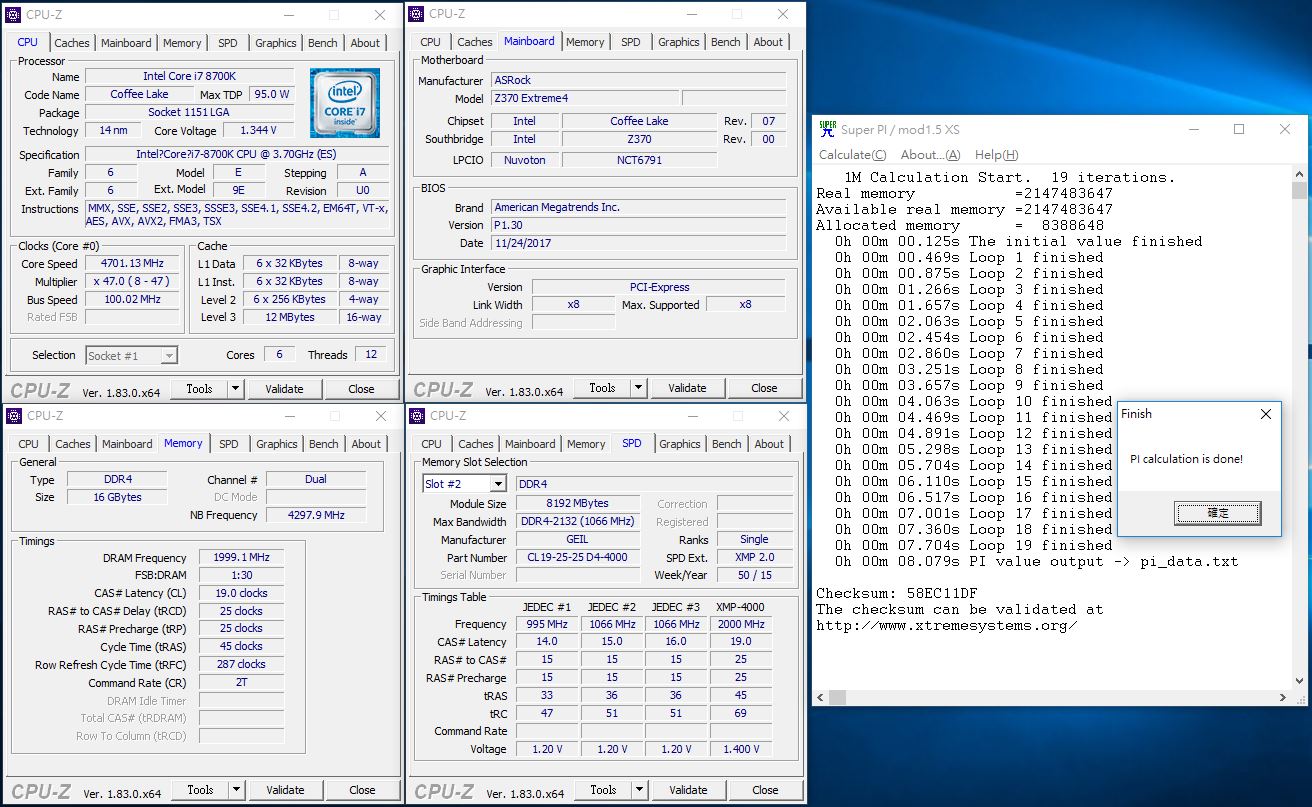
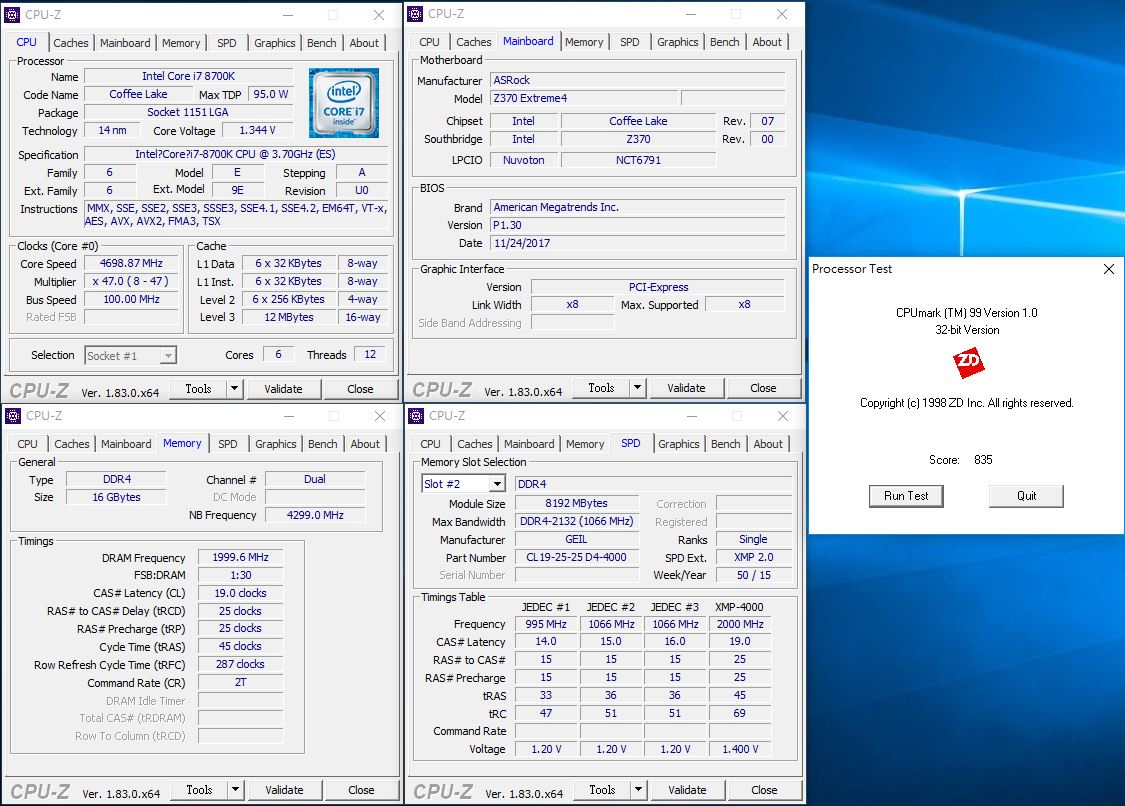
▼验明正身
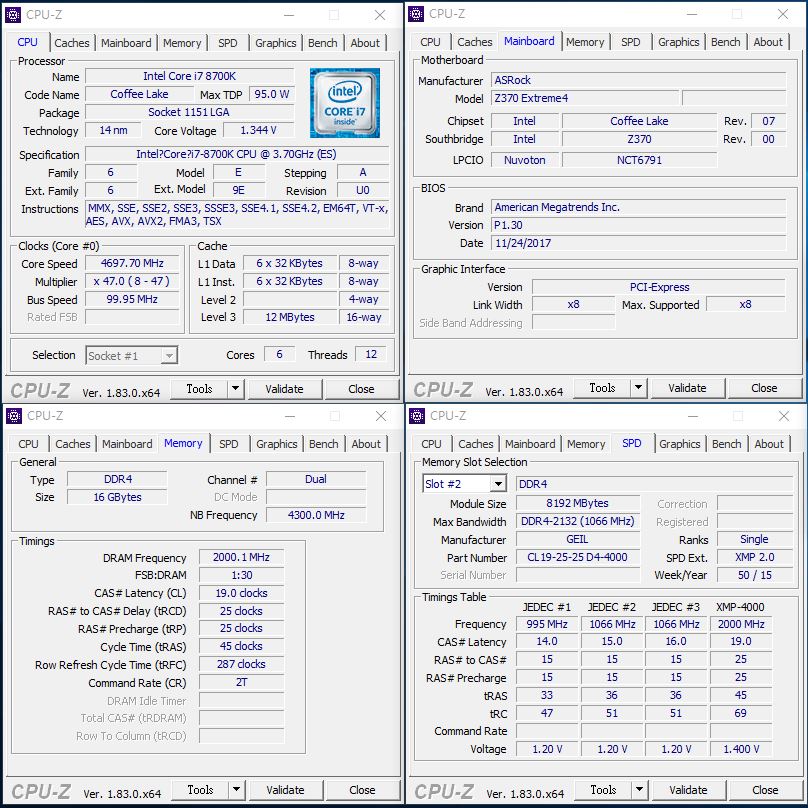
▼CPU-Z Bench
▼AIDA64 Read:56505MB/s Write:59625MB/s Copy:51507MB/s
▼Super PI 1M:7.954s
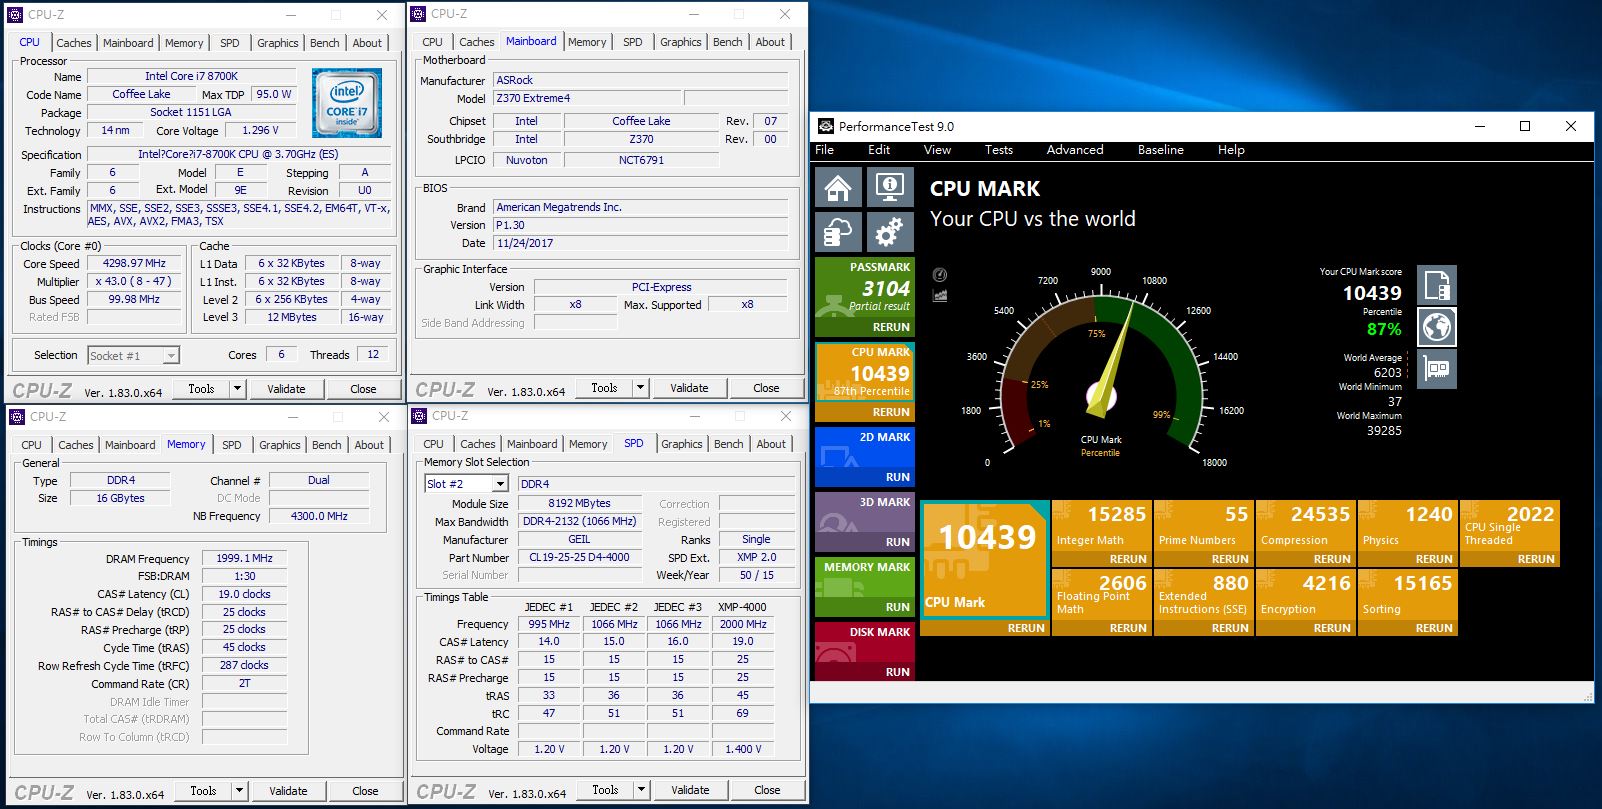
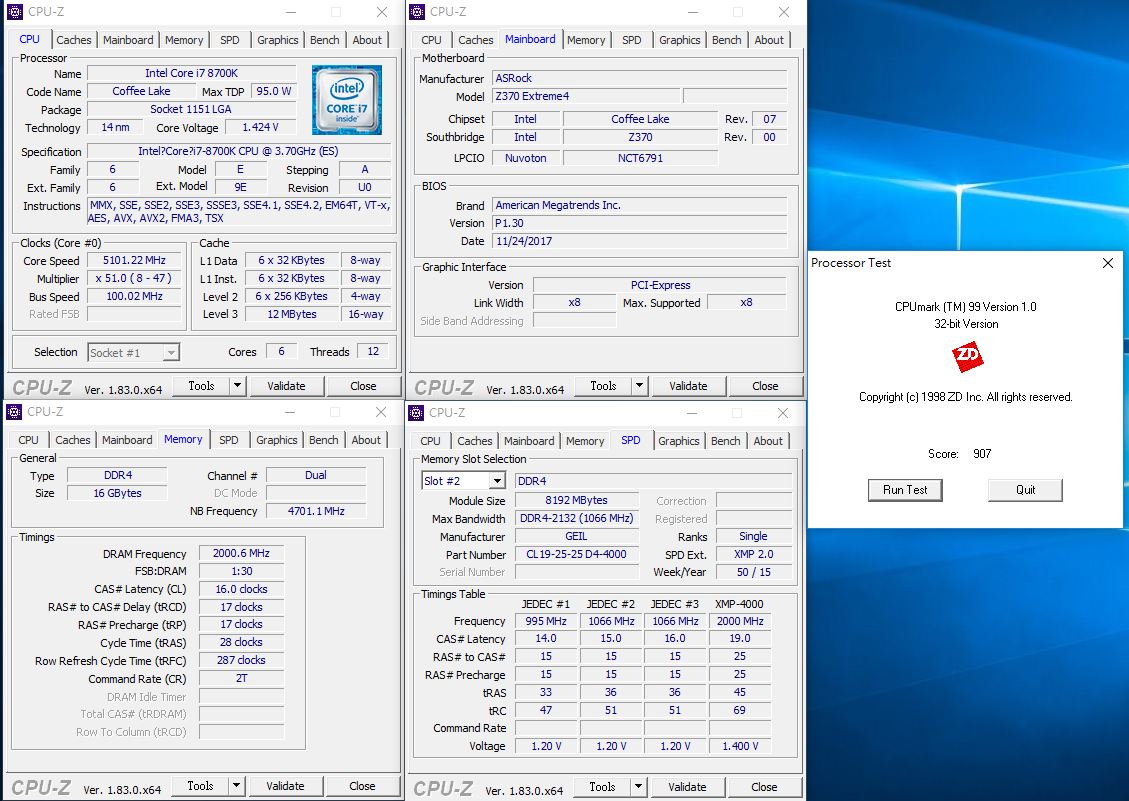
▼CPU Mark:828
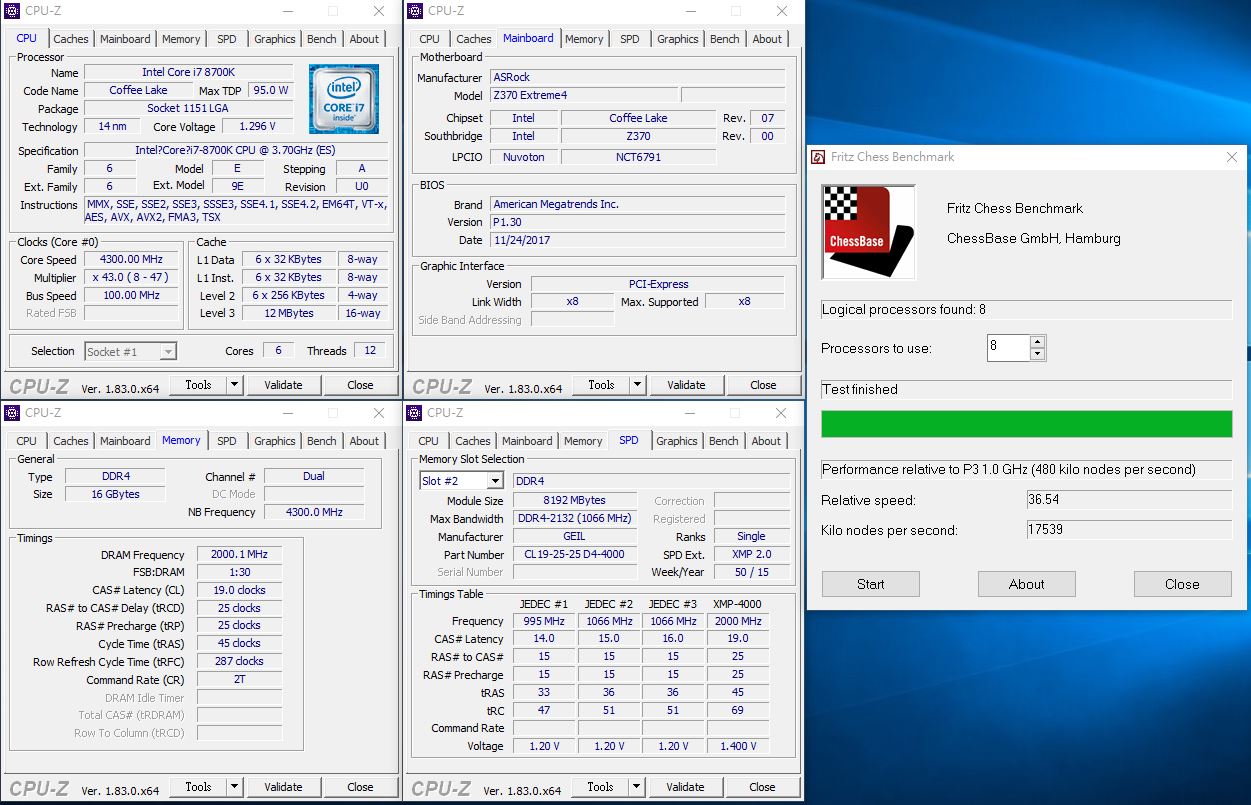
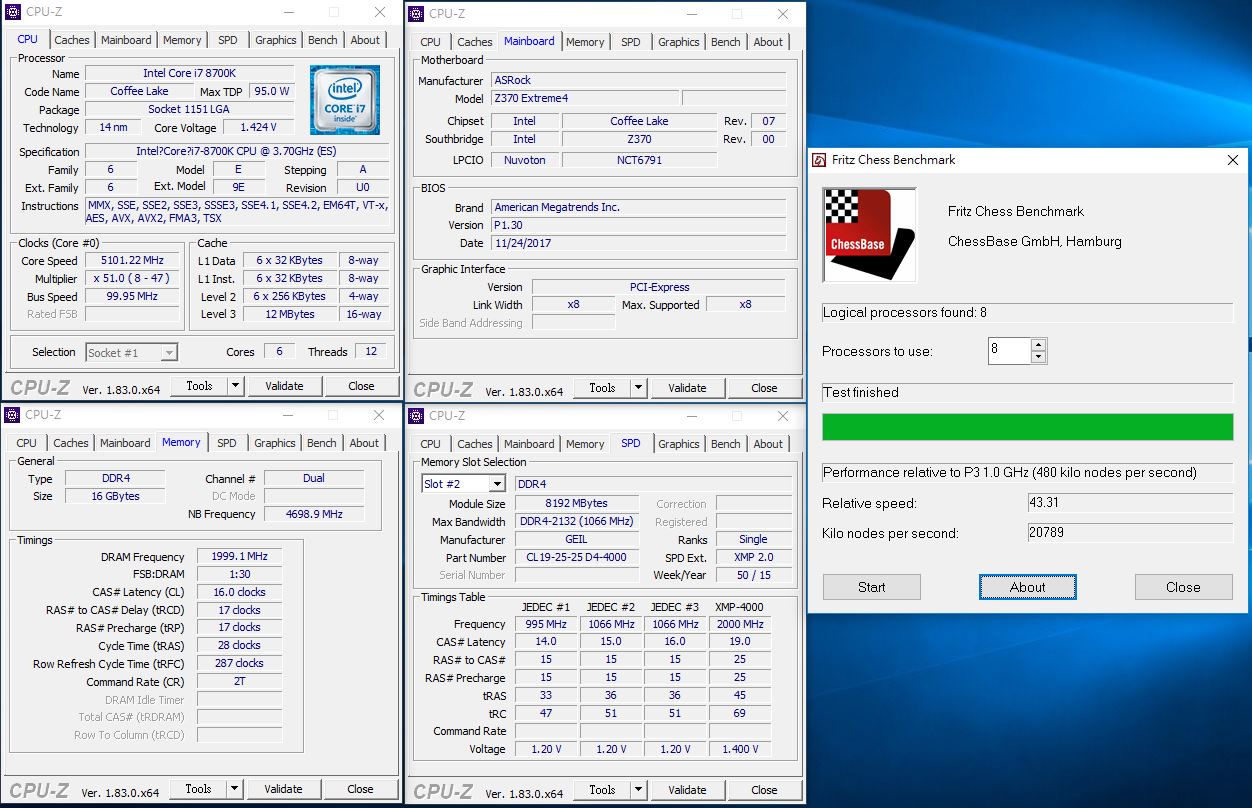
▼Fritz Chess Benchmark
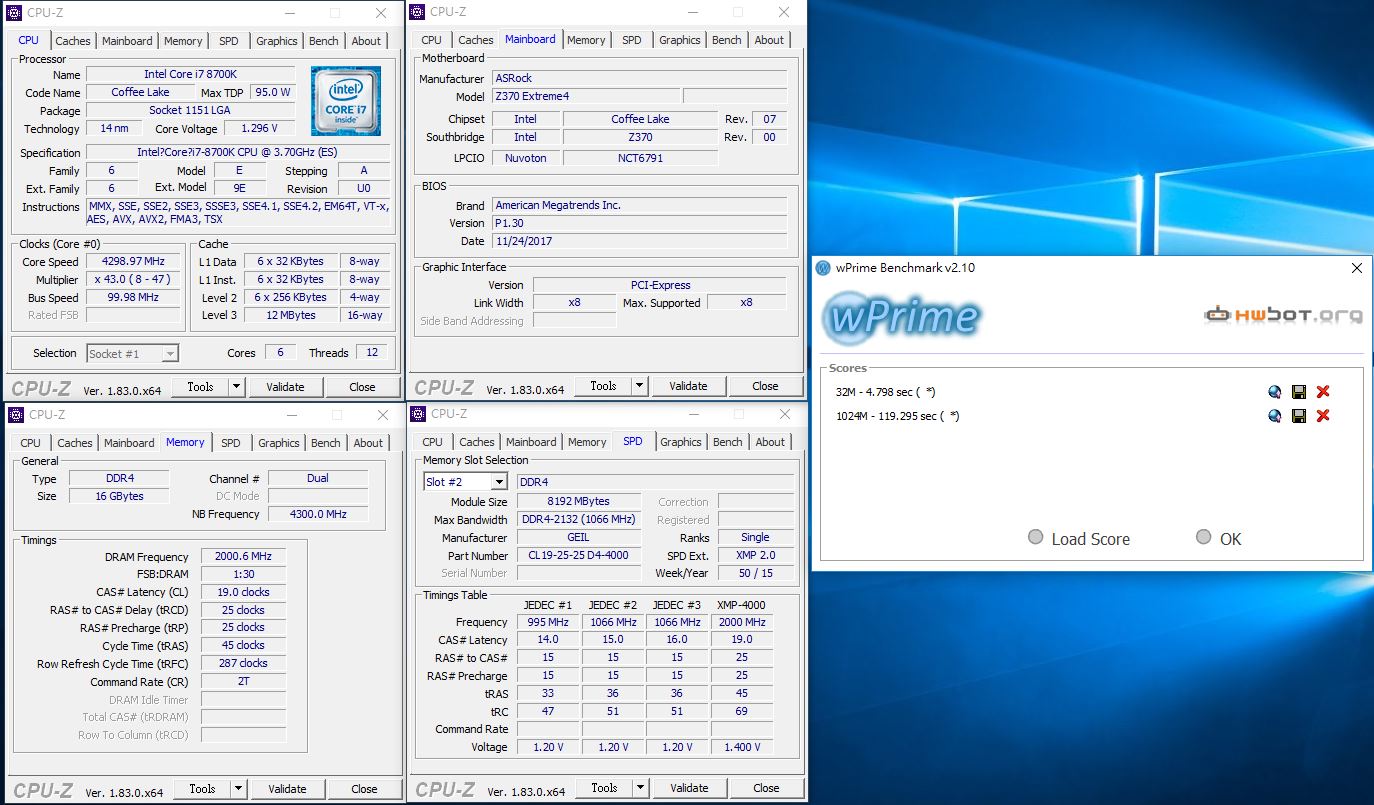
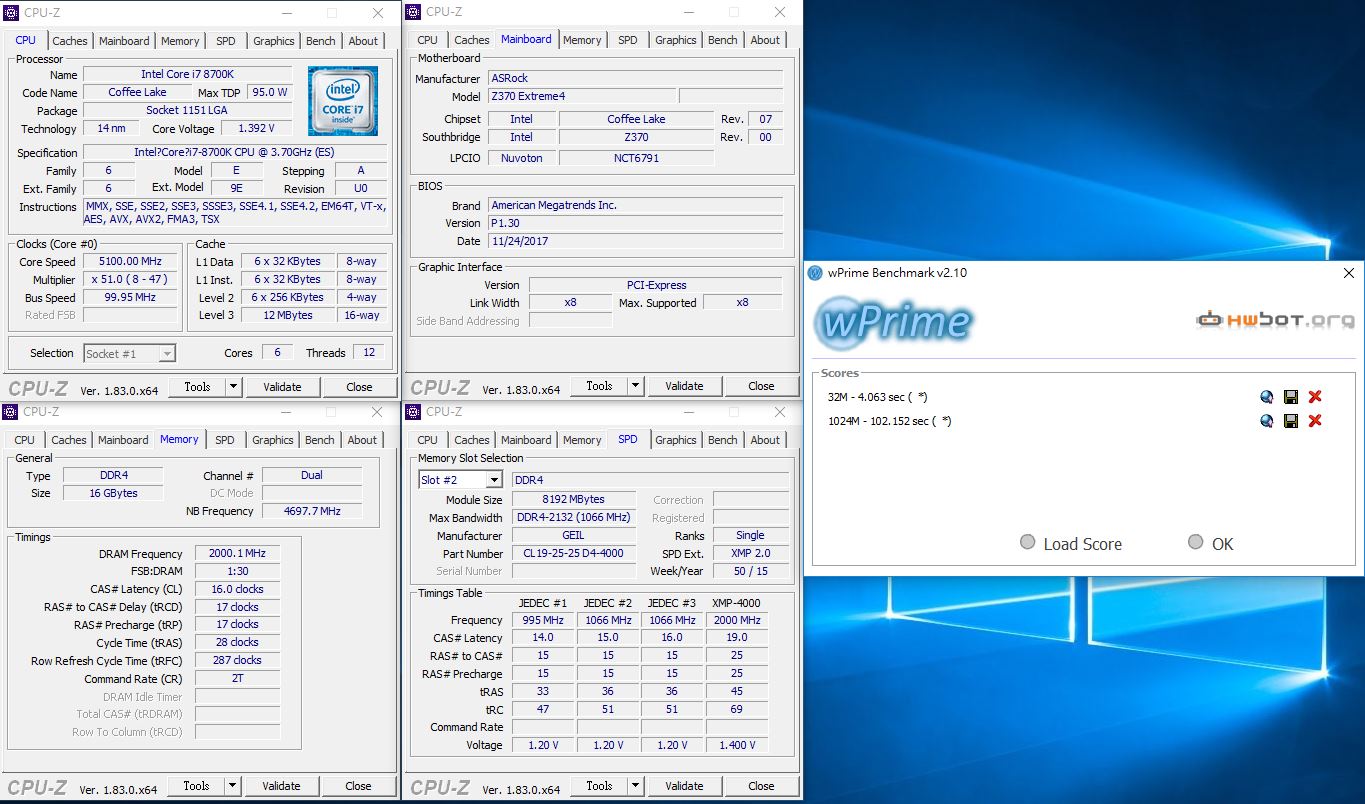
▼wPrime:32M-4.672sec 1024M-118.403sec
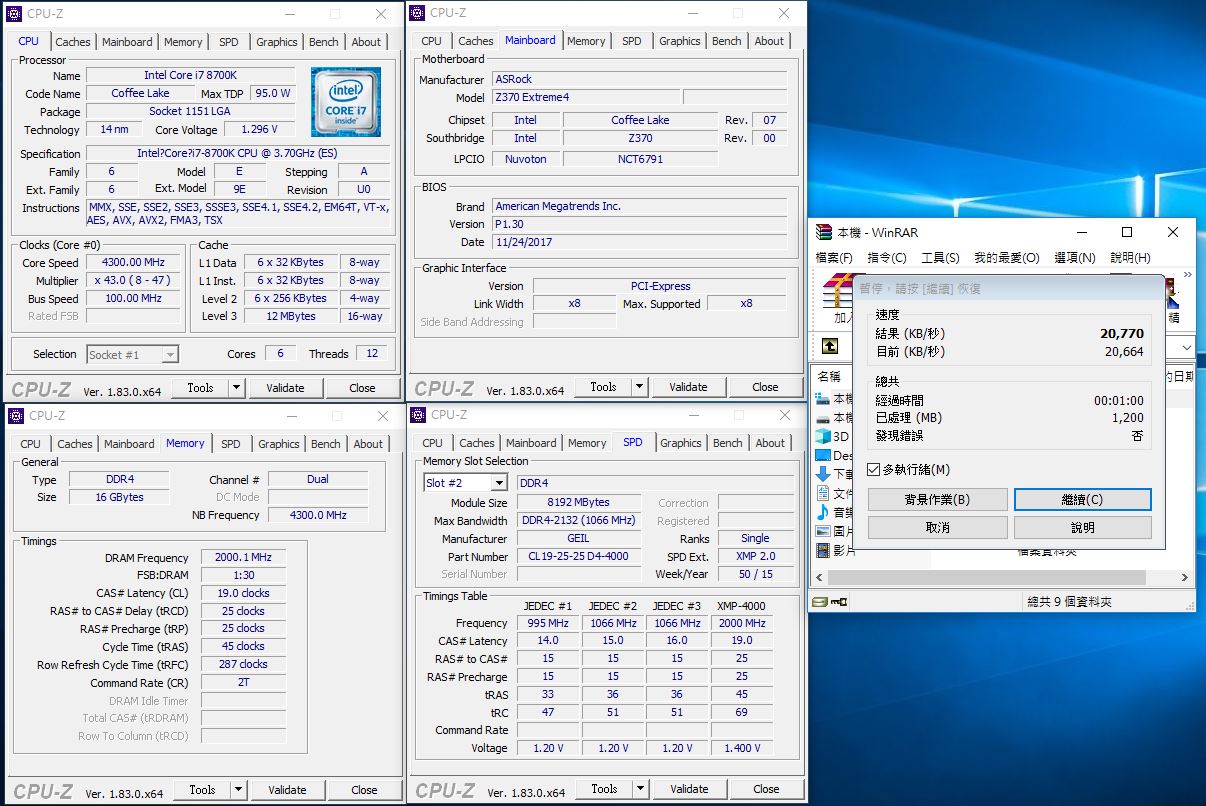
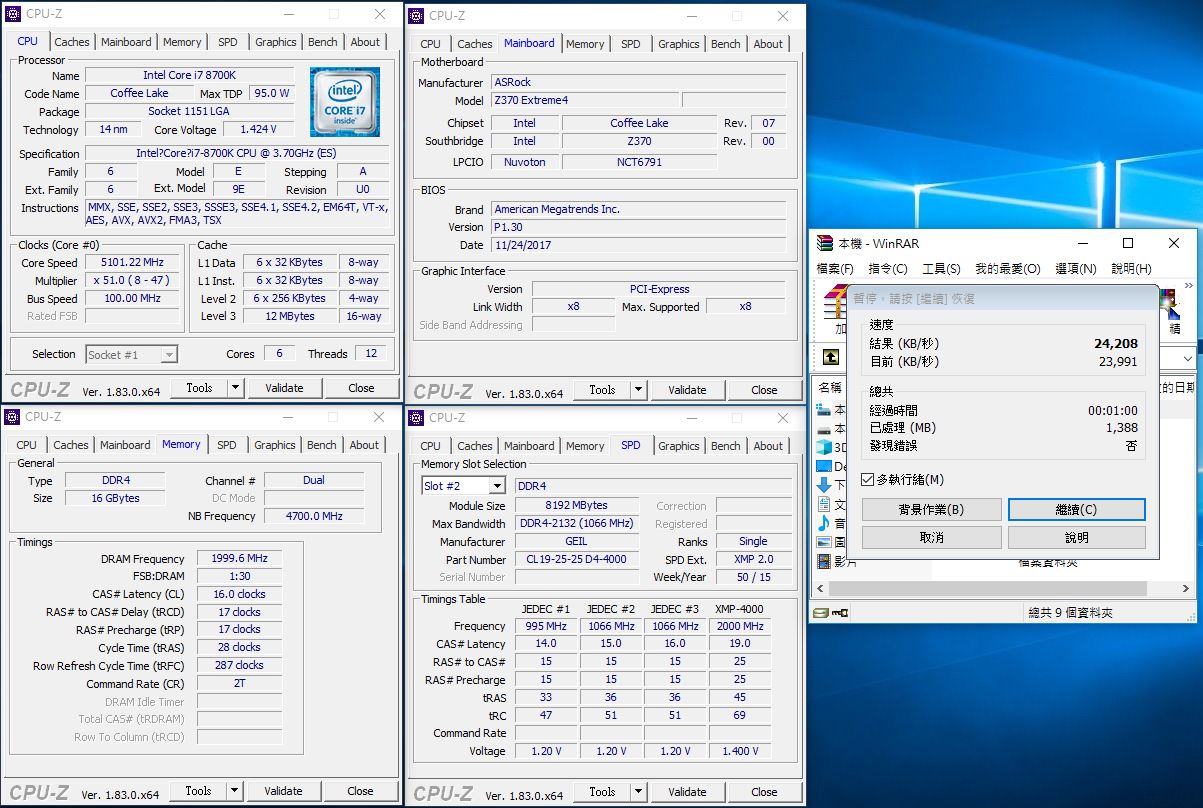
▼WinRAR:20957KB/s
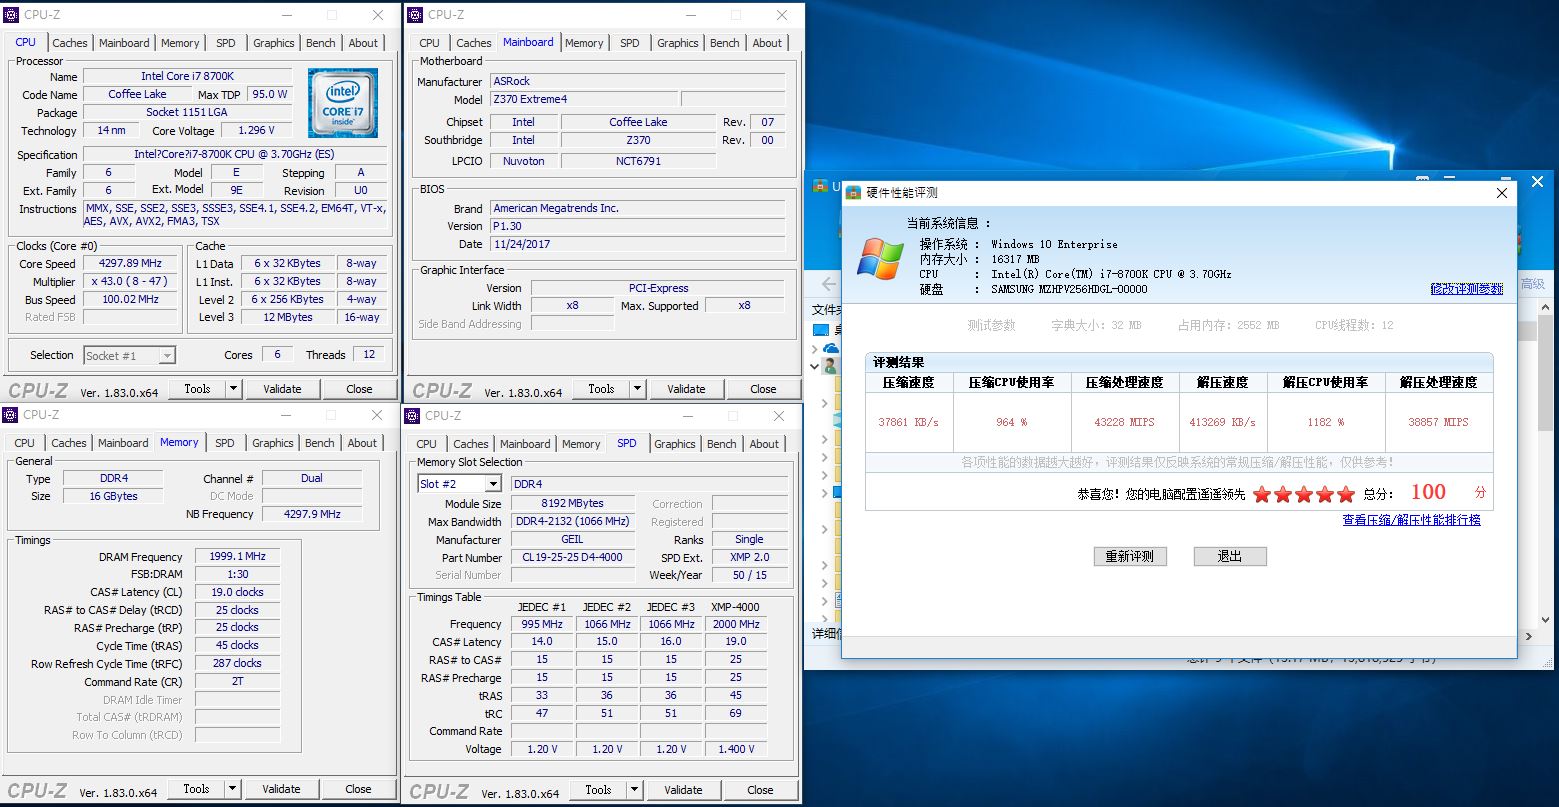
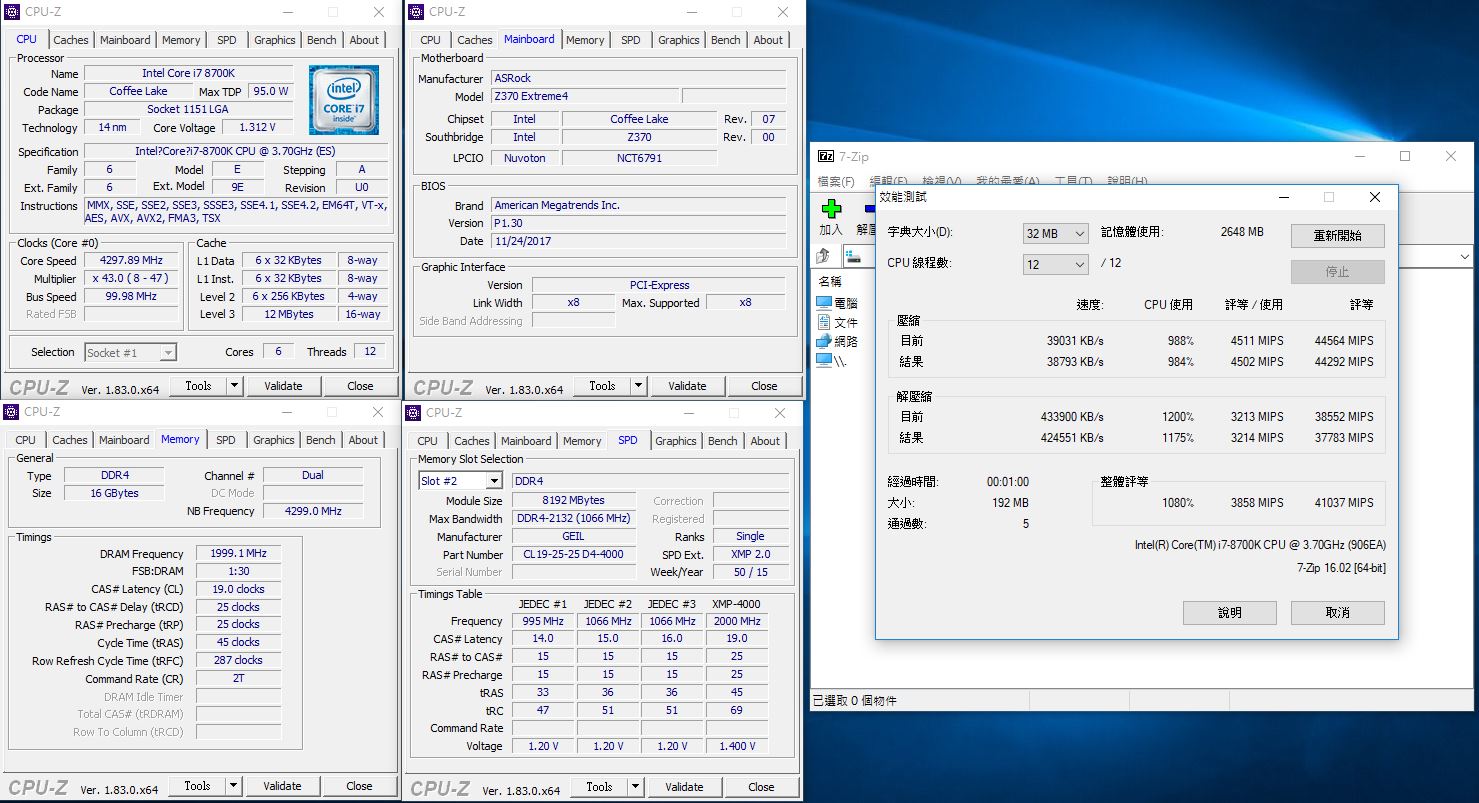
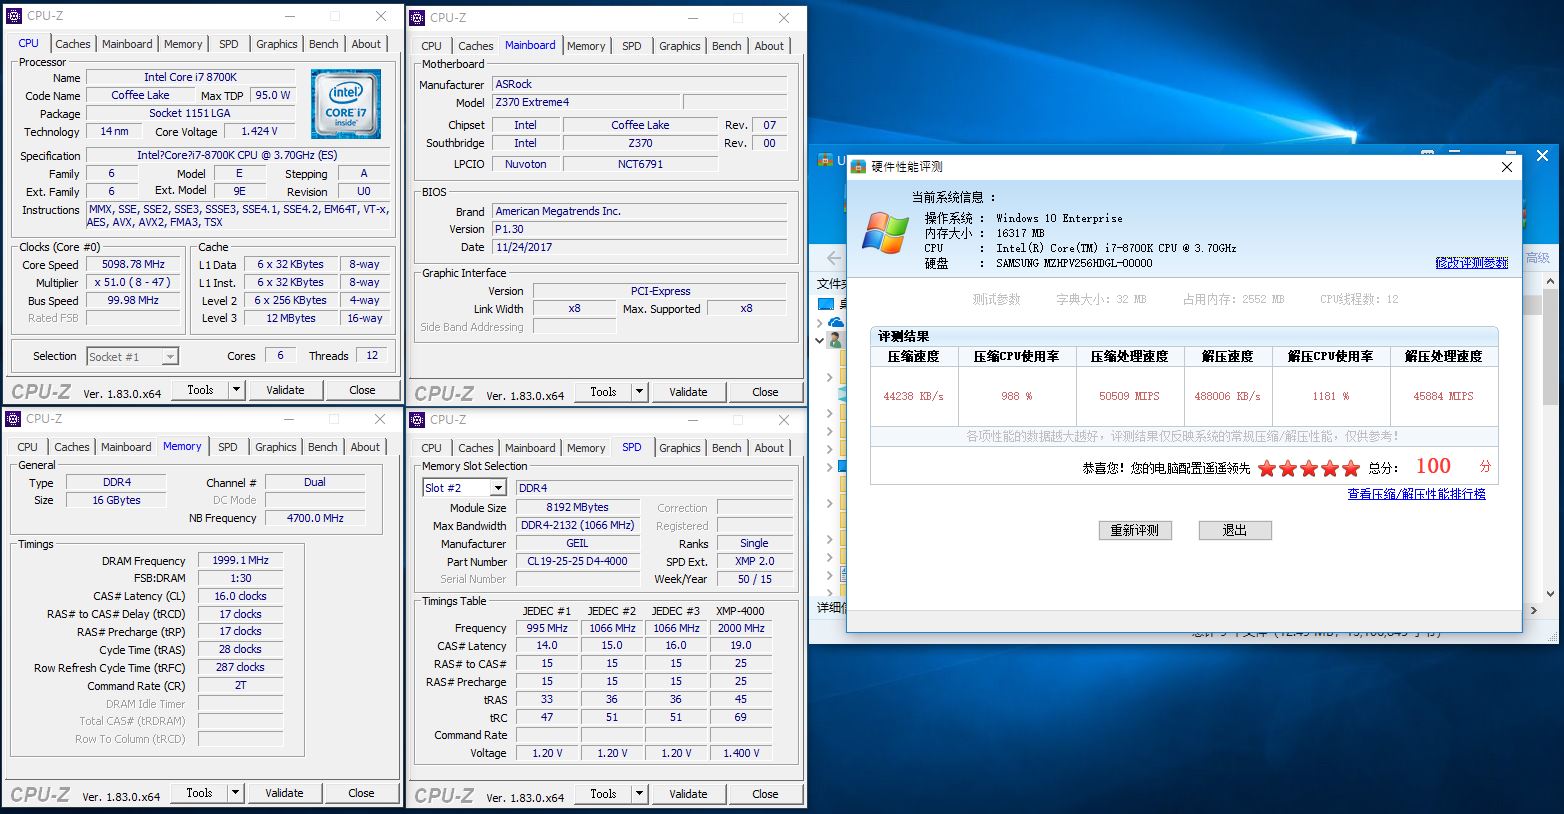
▼2345好压
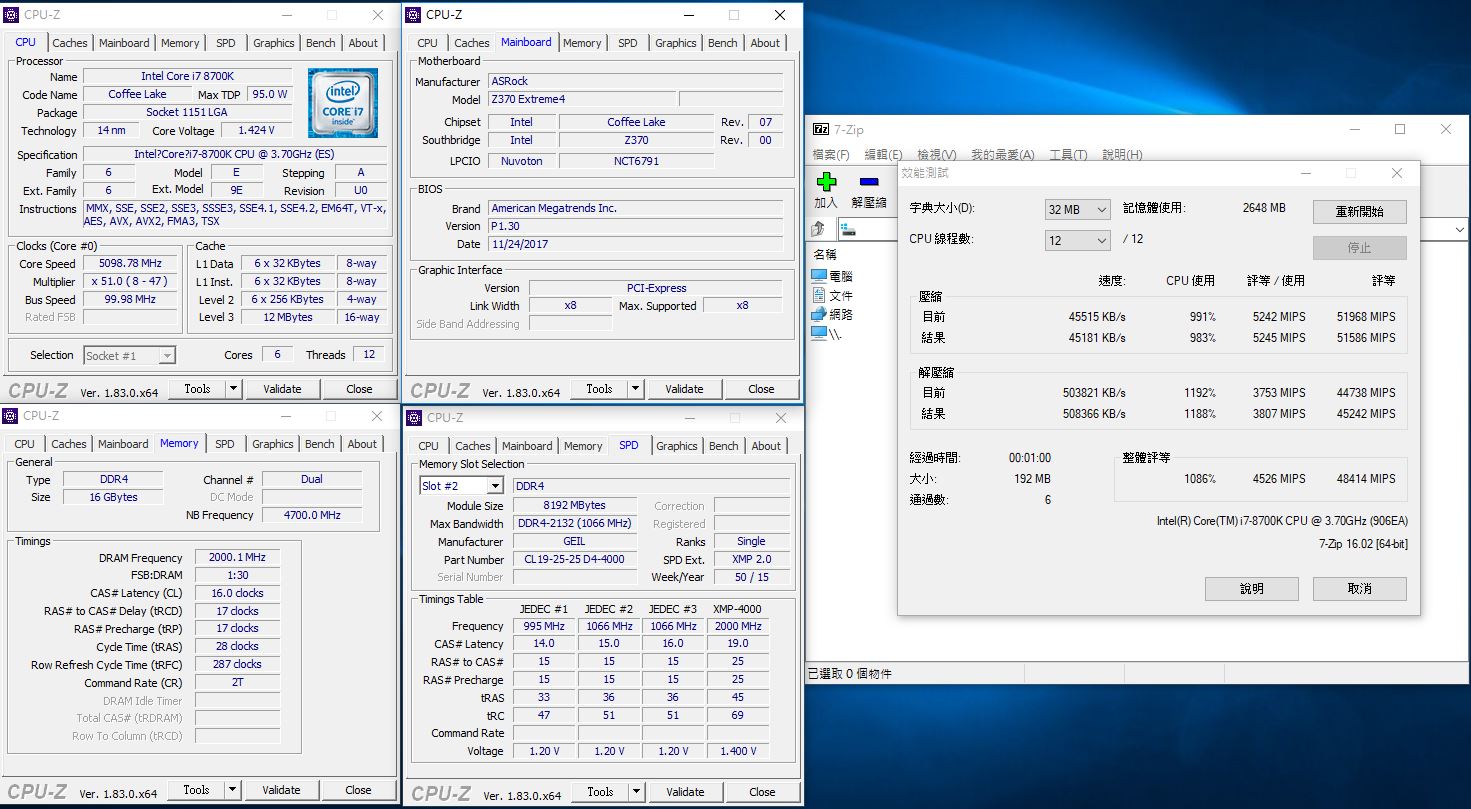
▼7Zip
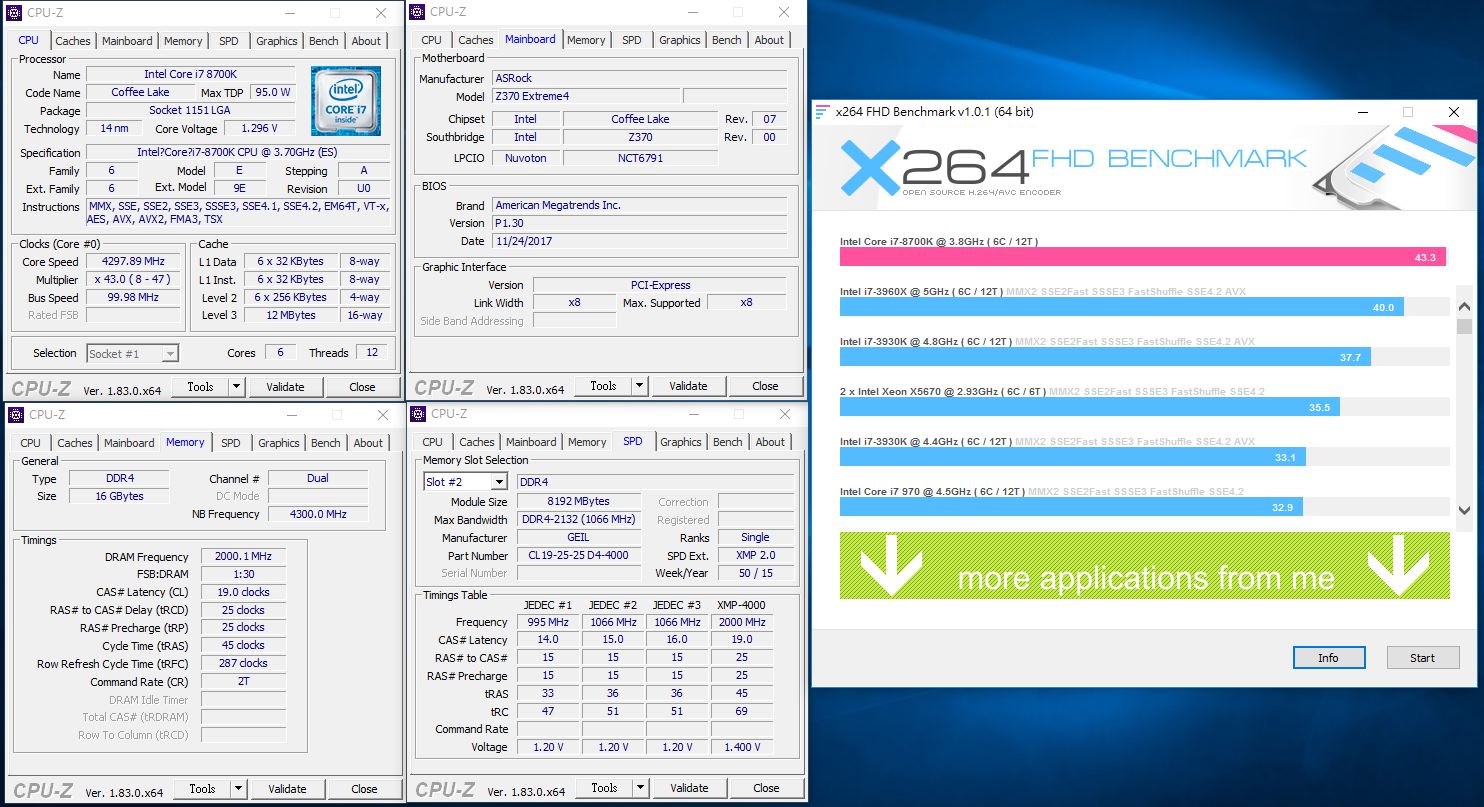
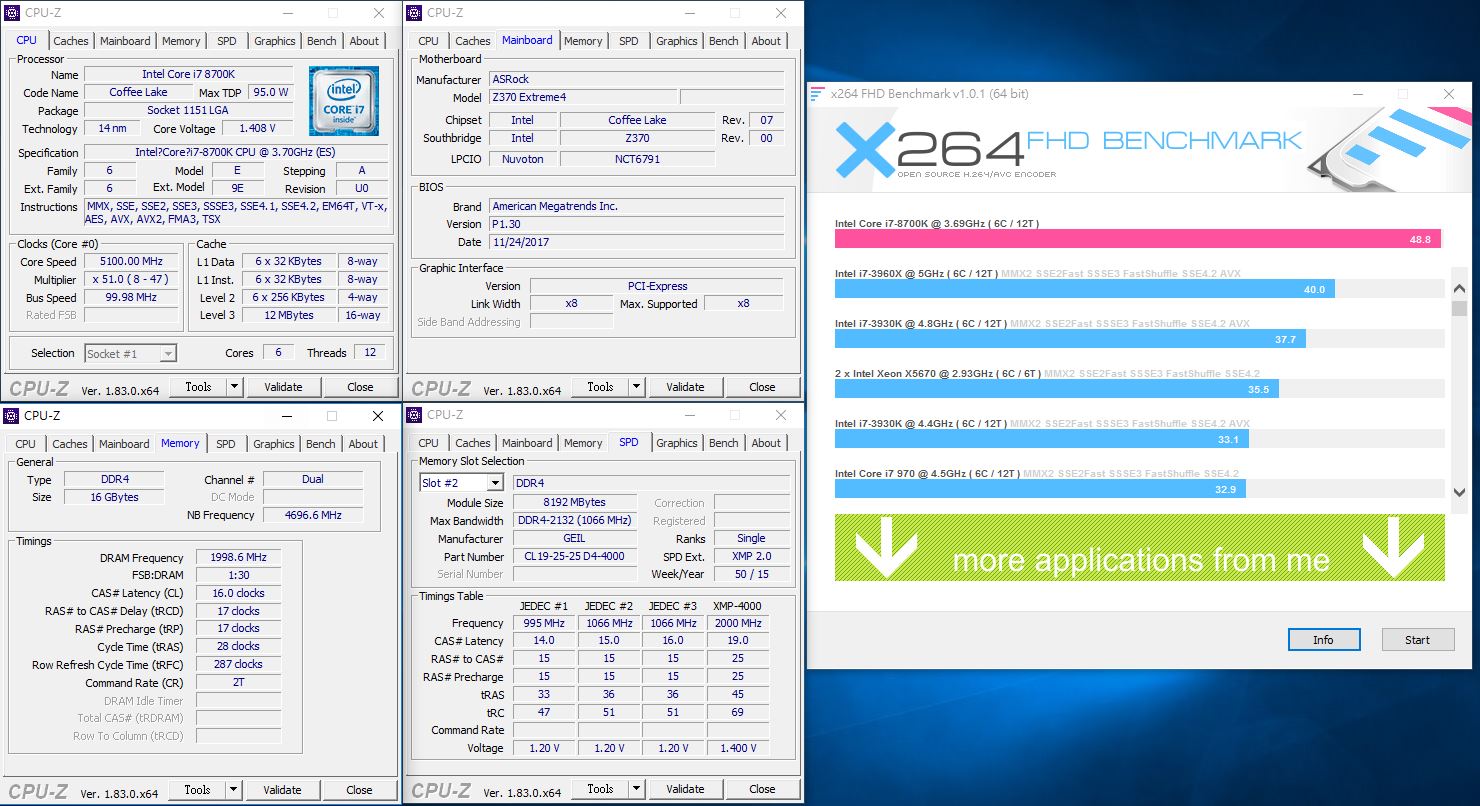
▼x264 FHD Benchmark :43.3
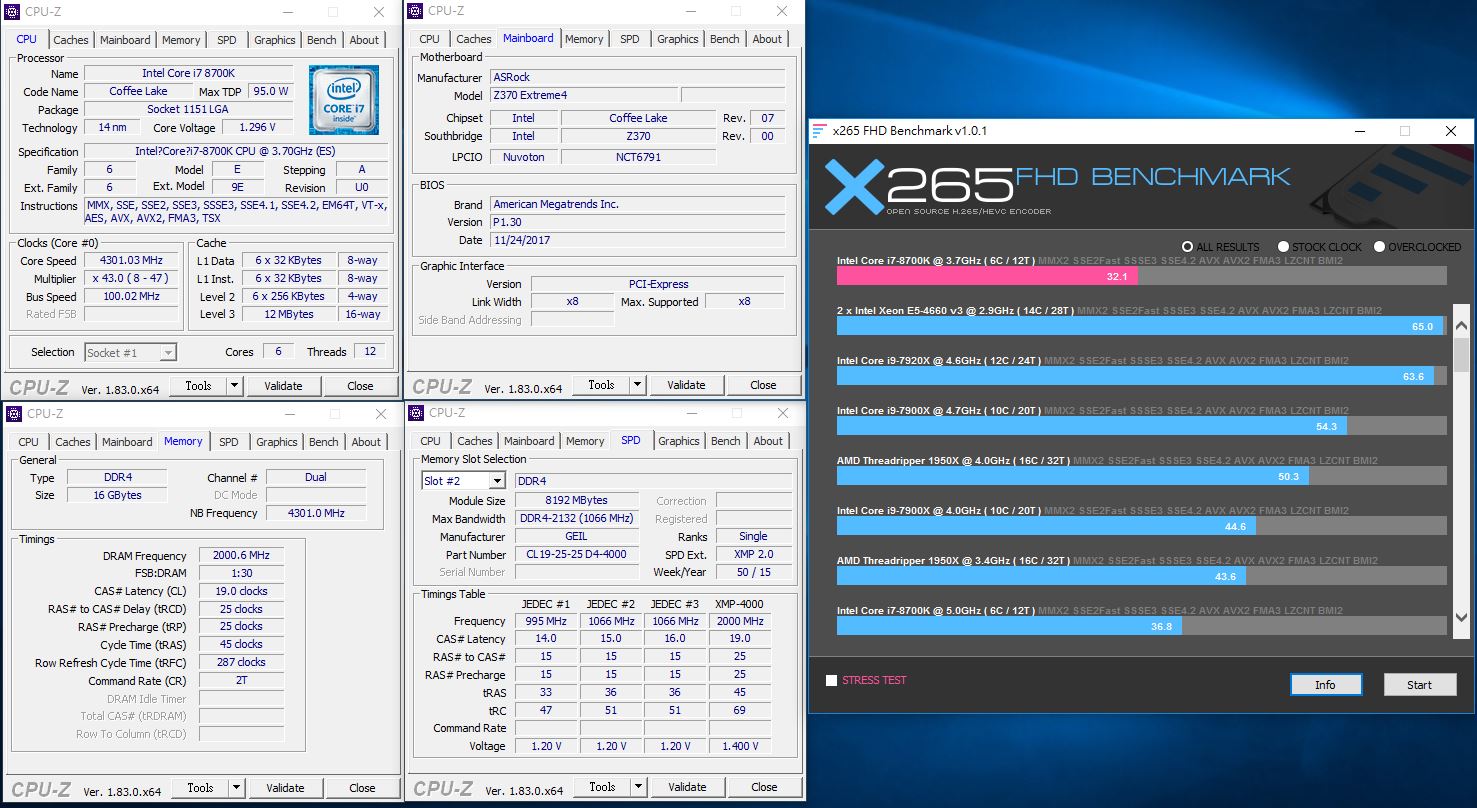
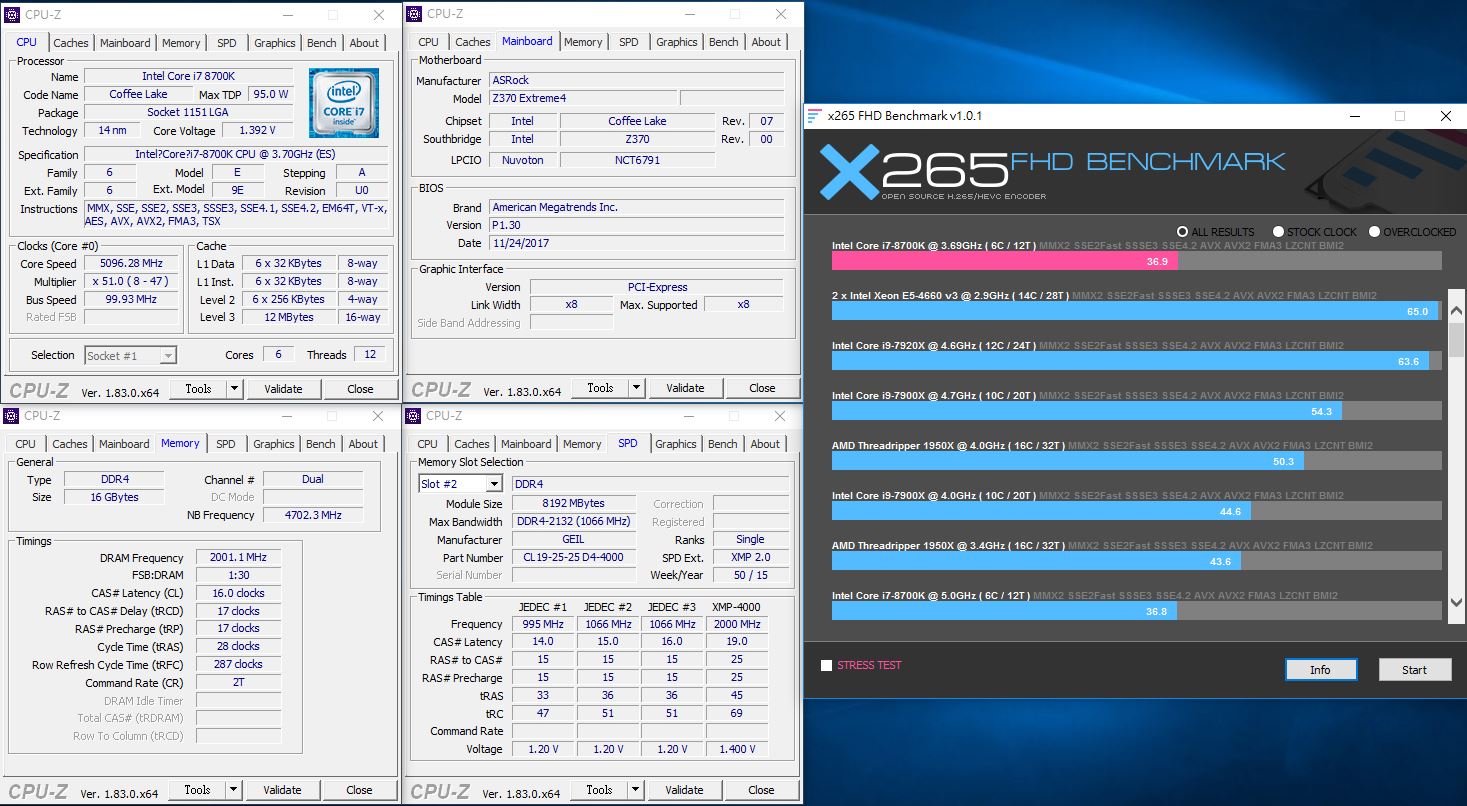
▼x265 FHD Benchmark :32.0
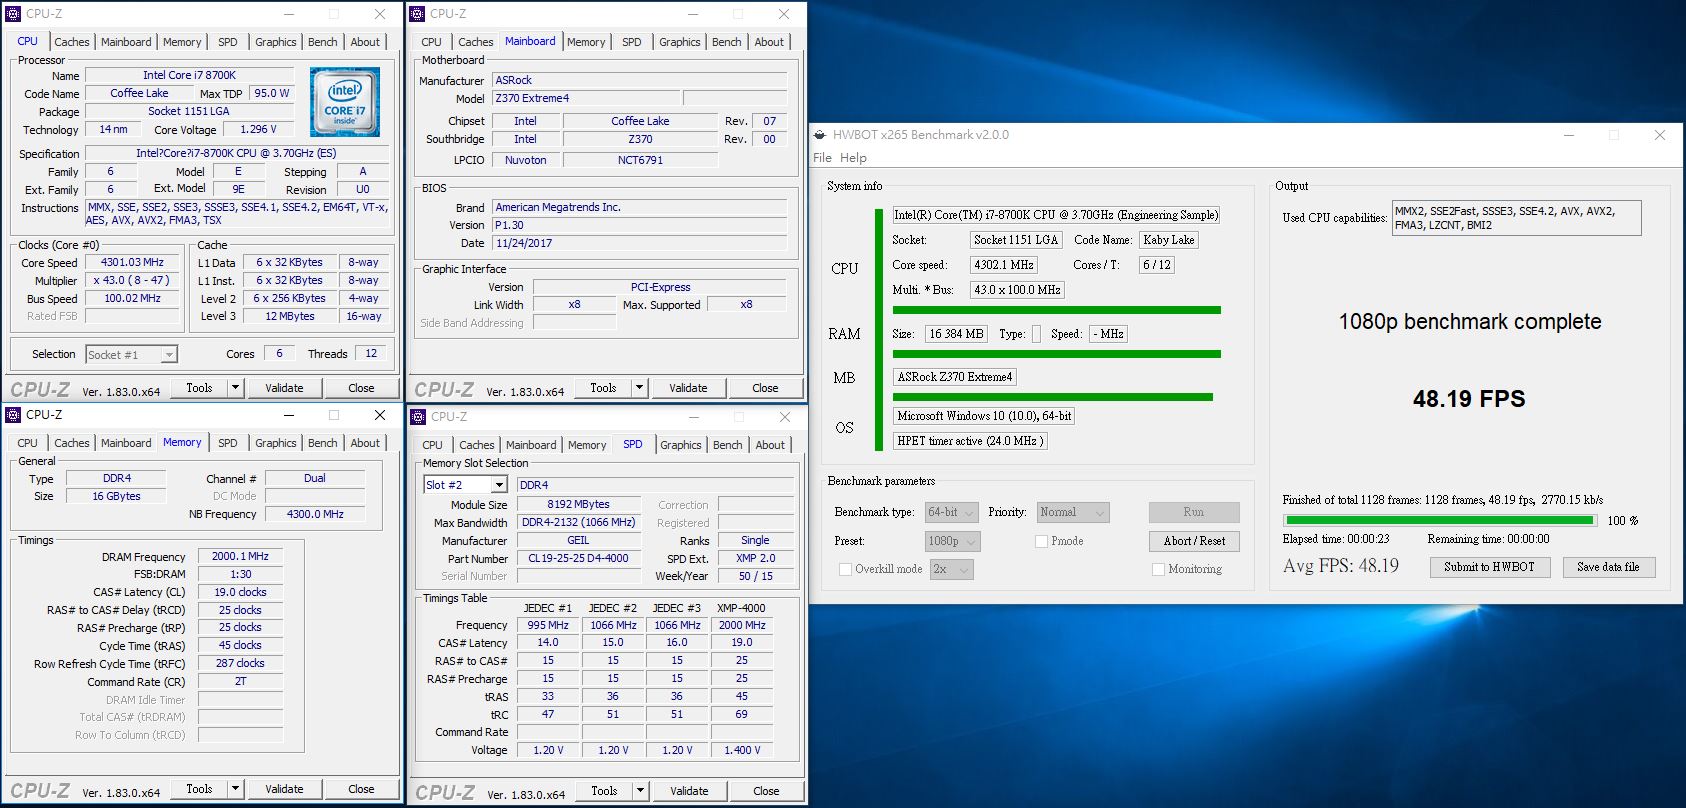
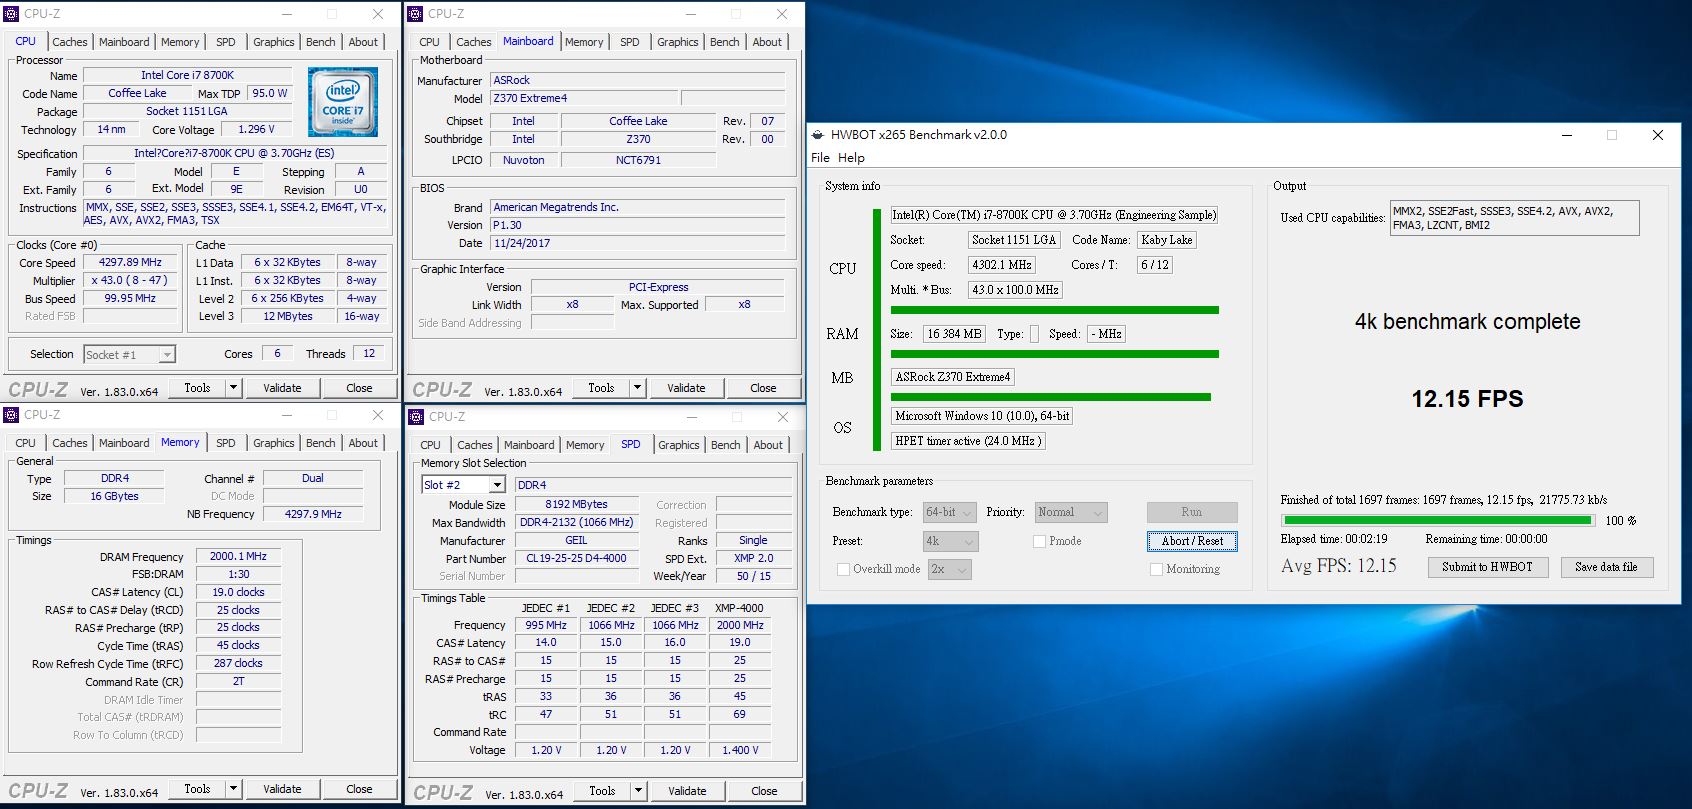
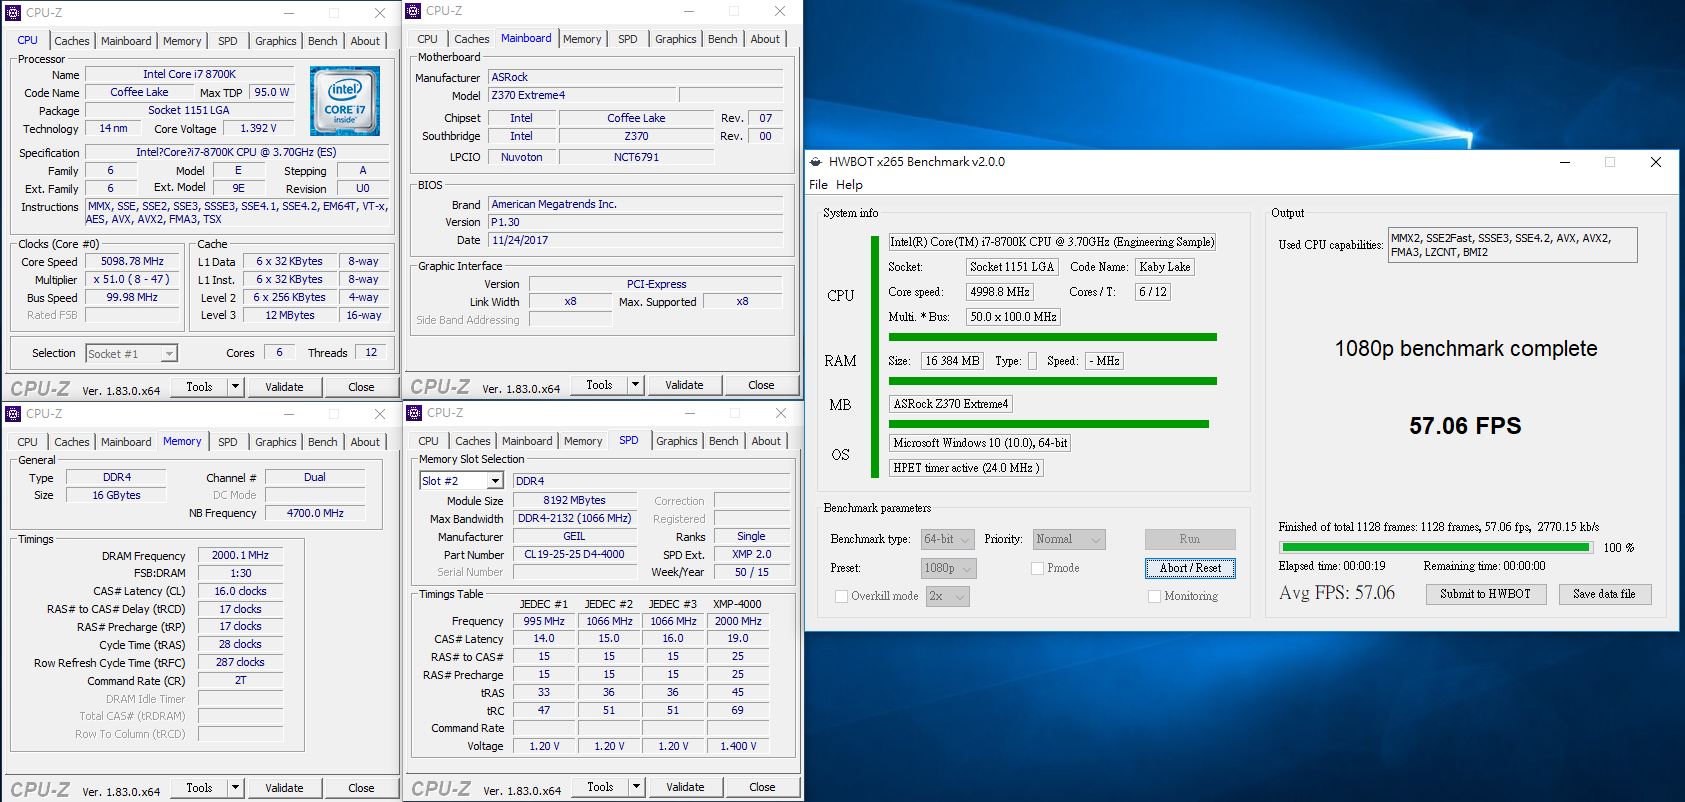
▼HWBOT x265 FHD Benchmark :49.04
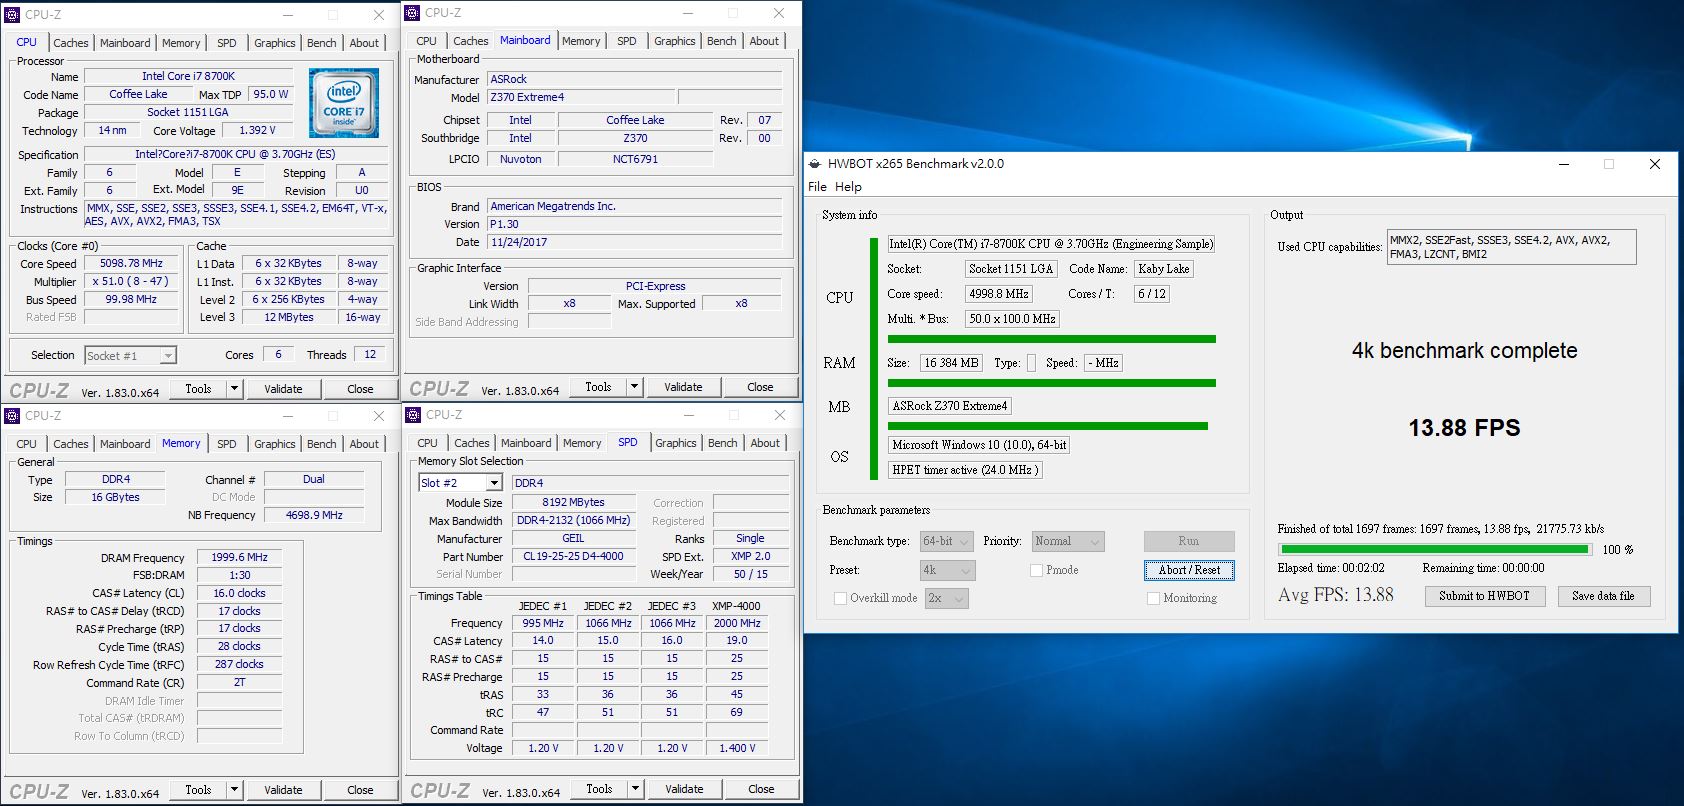
▼HWBOT x265 4K Benchmark :12.19
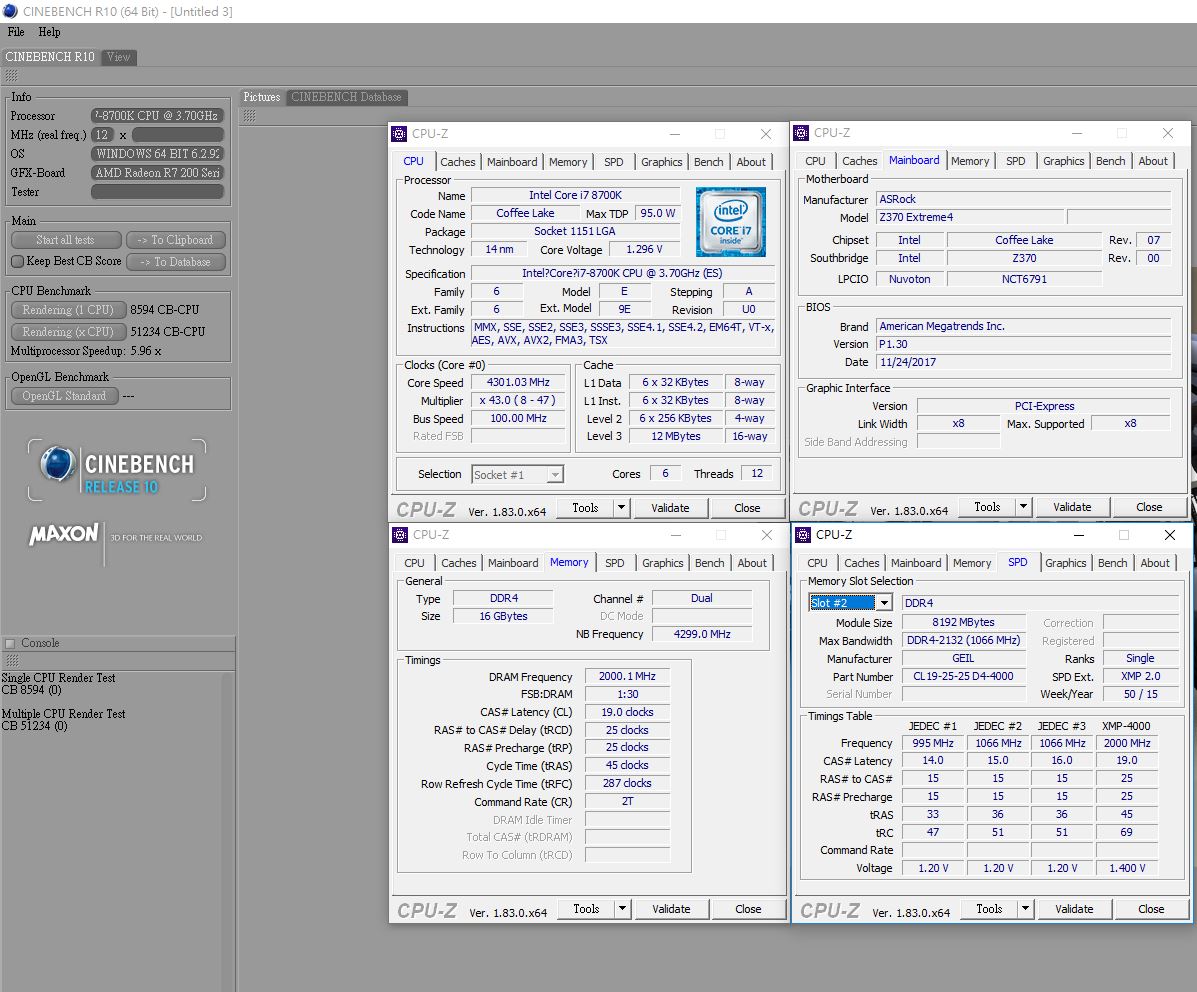
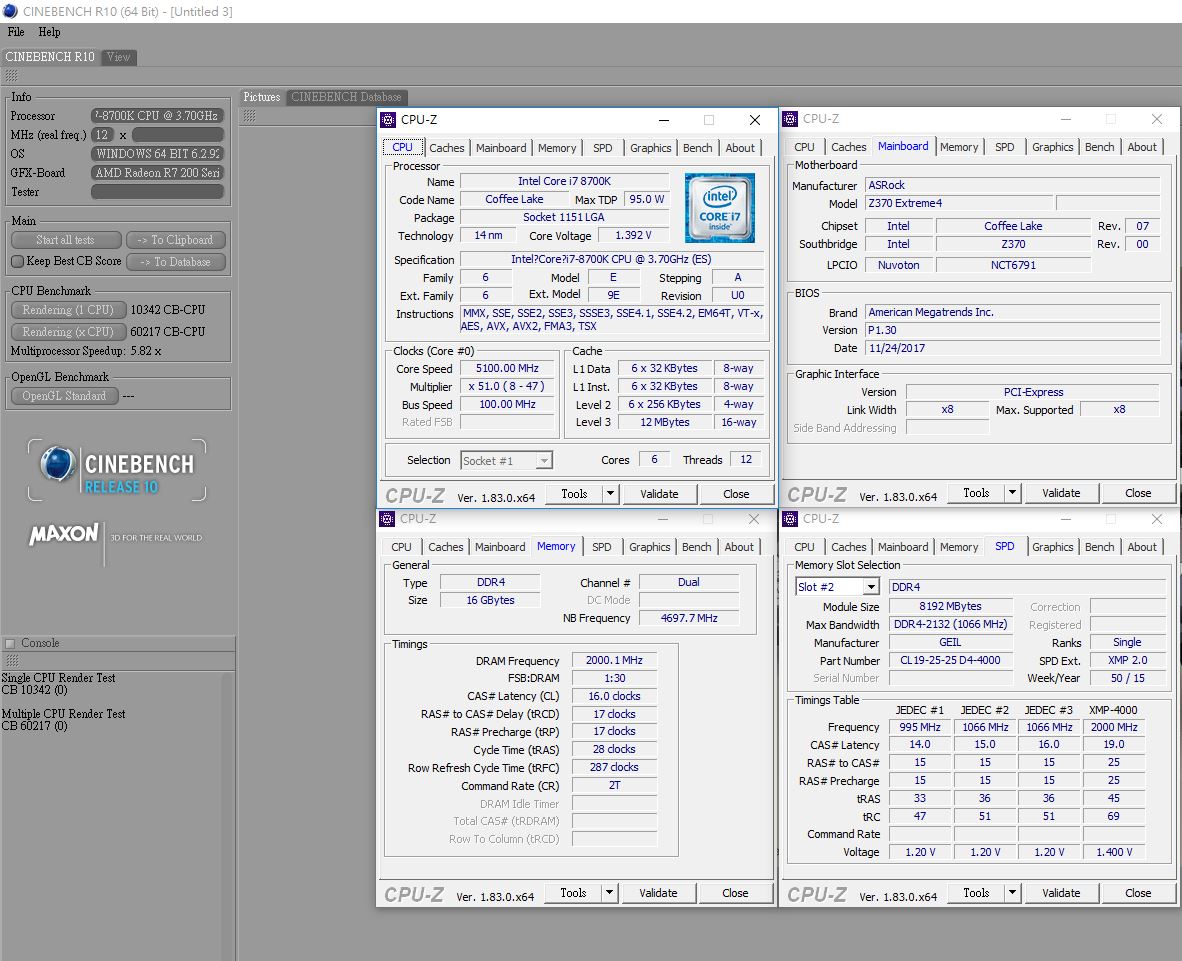
▼CINEBENCH R10
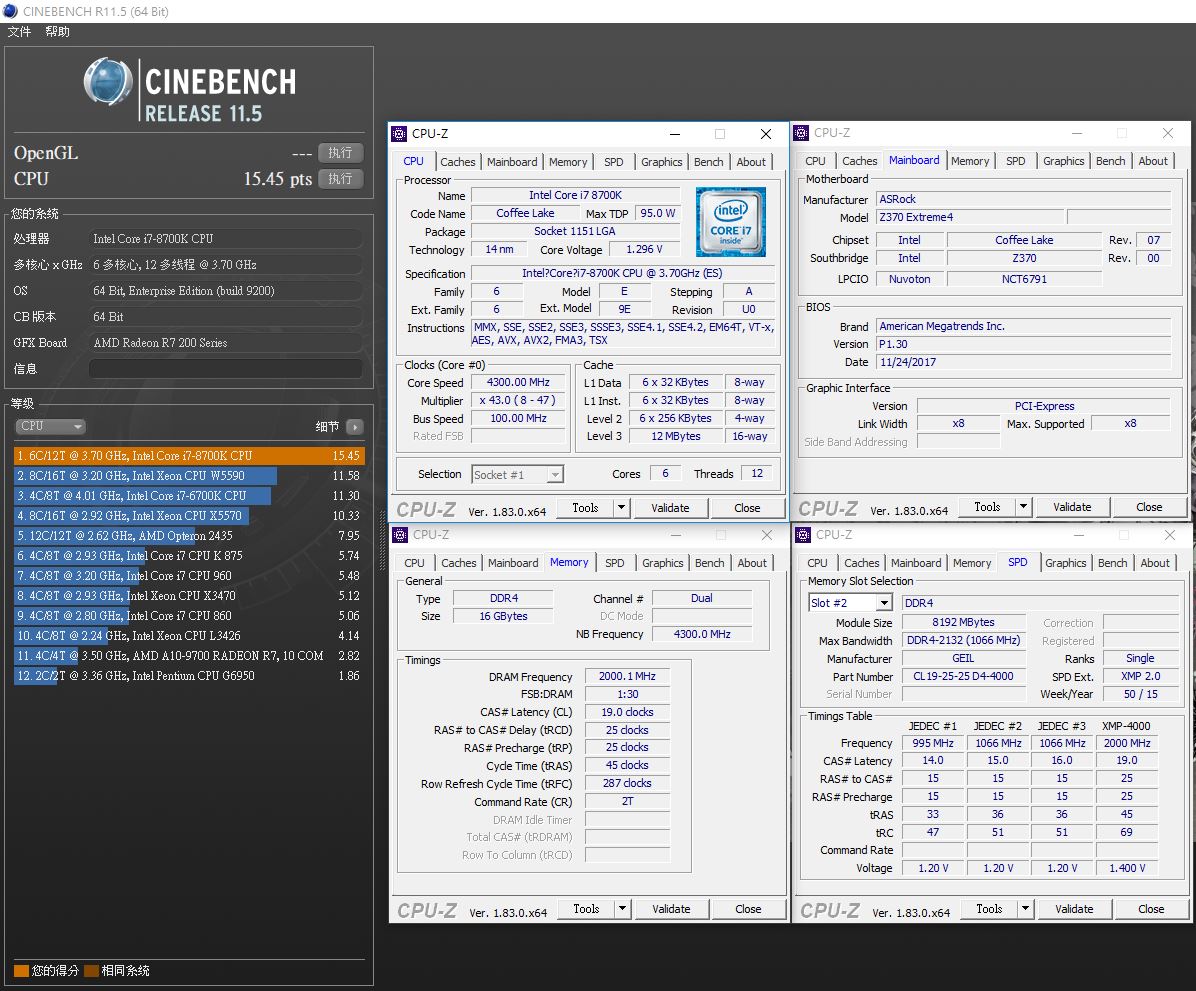
▼CINEBENCH R11.5
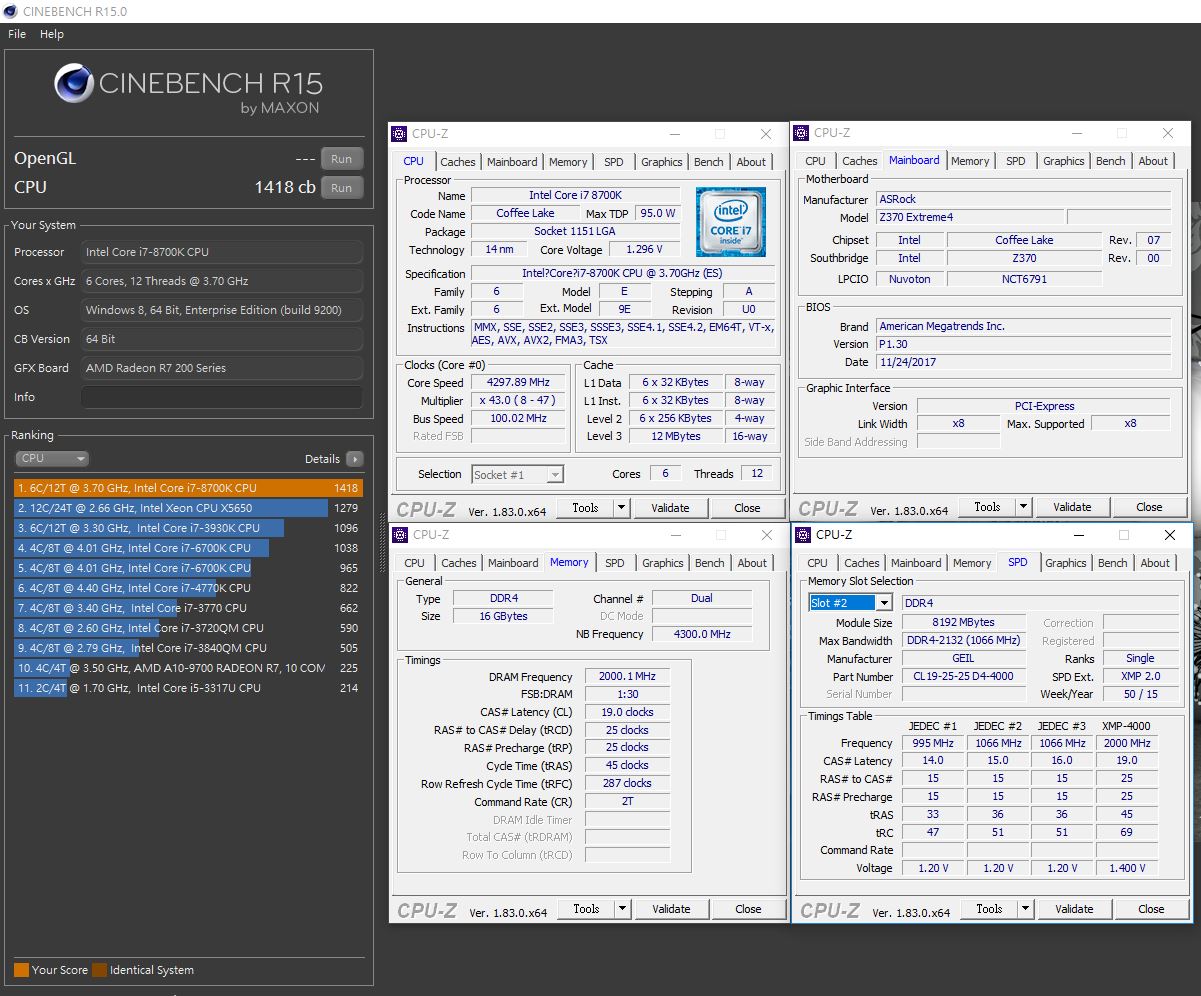
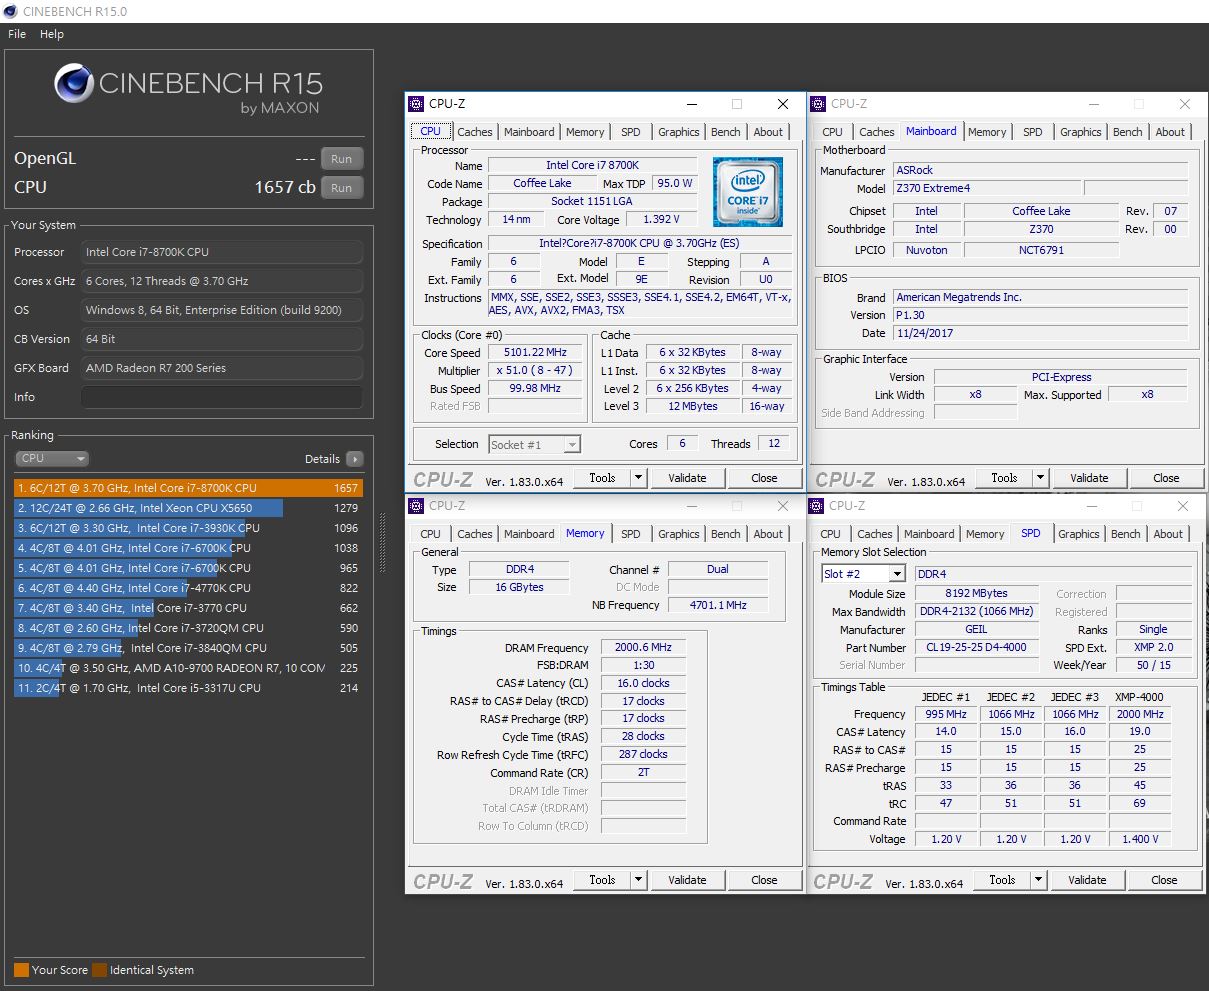
▼CINEBENCH R15
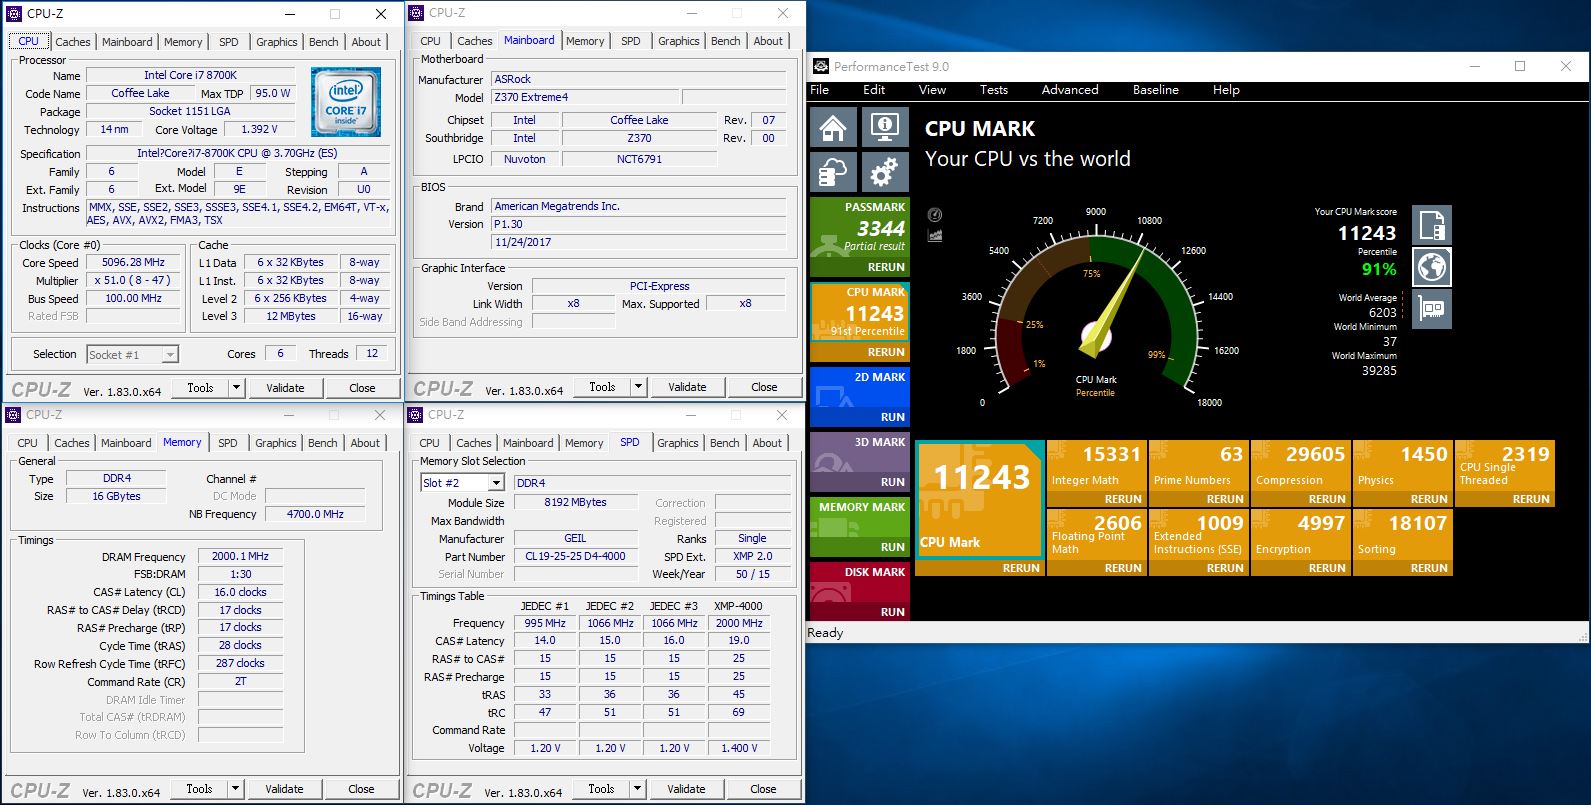
▼Performance Test CPU
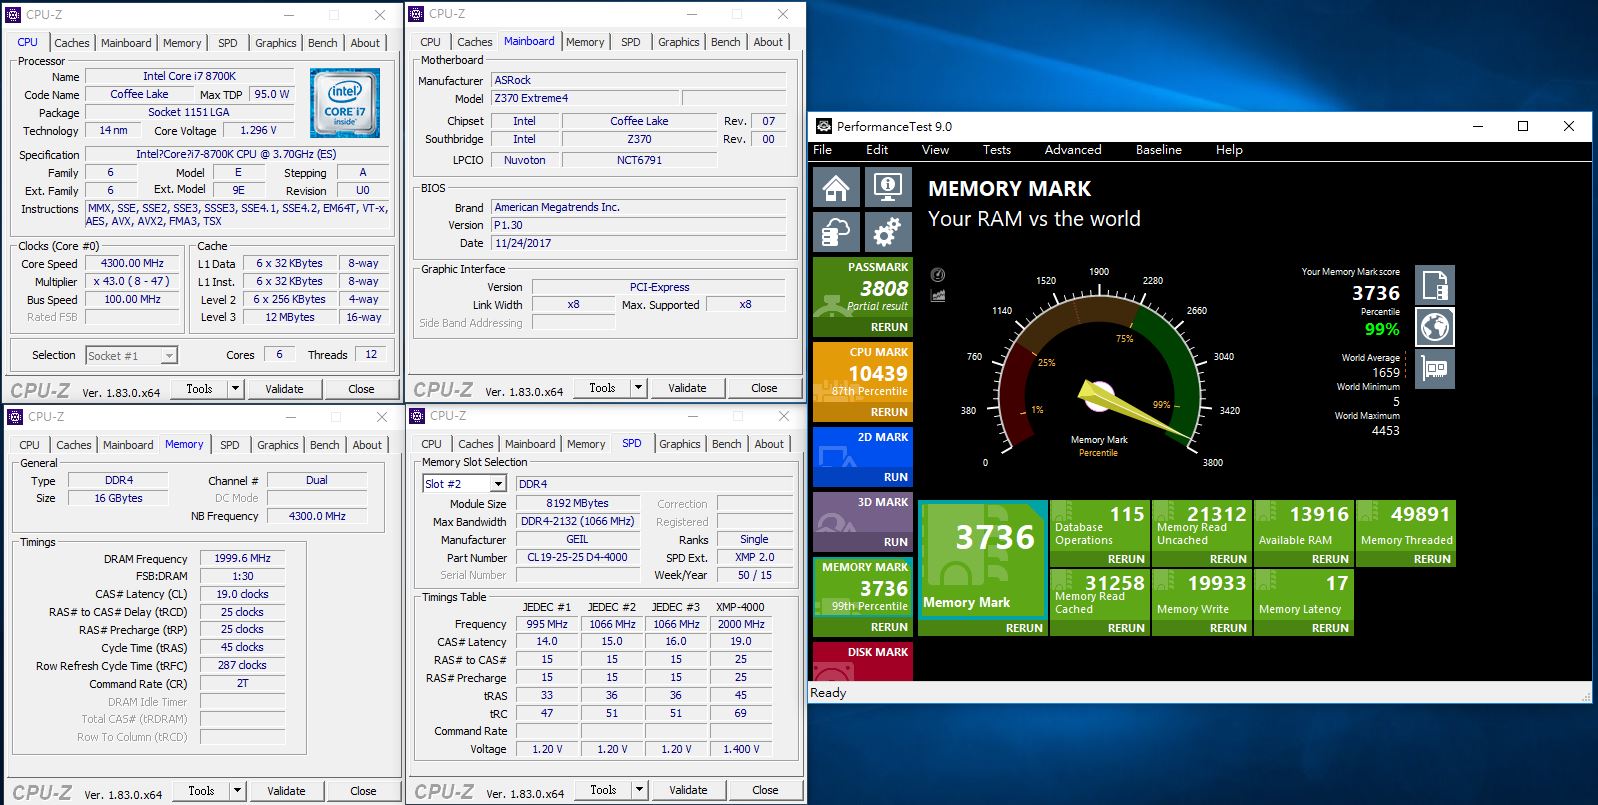
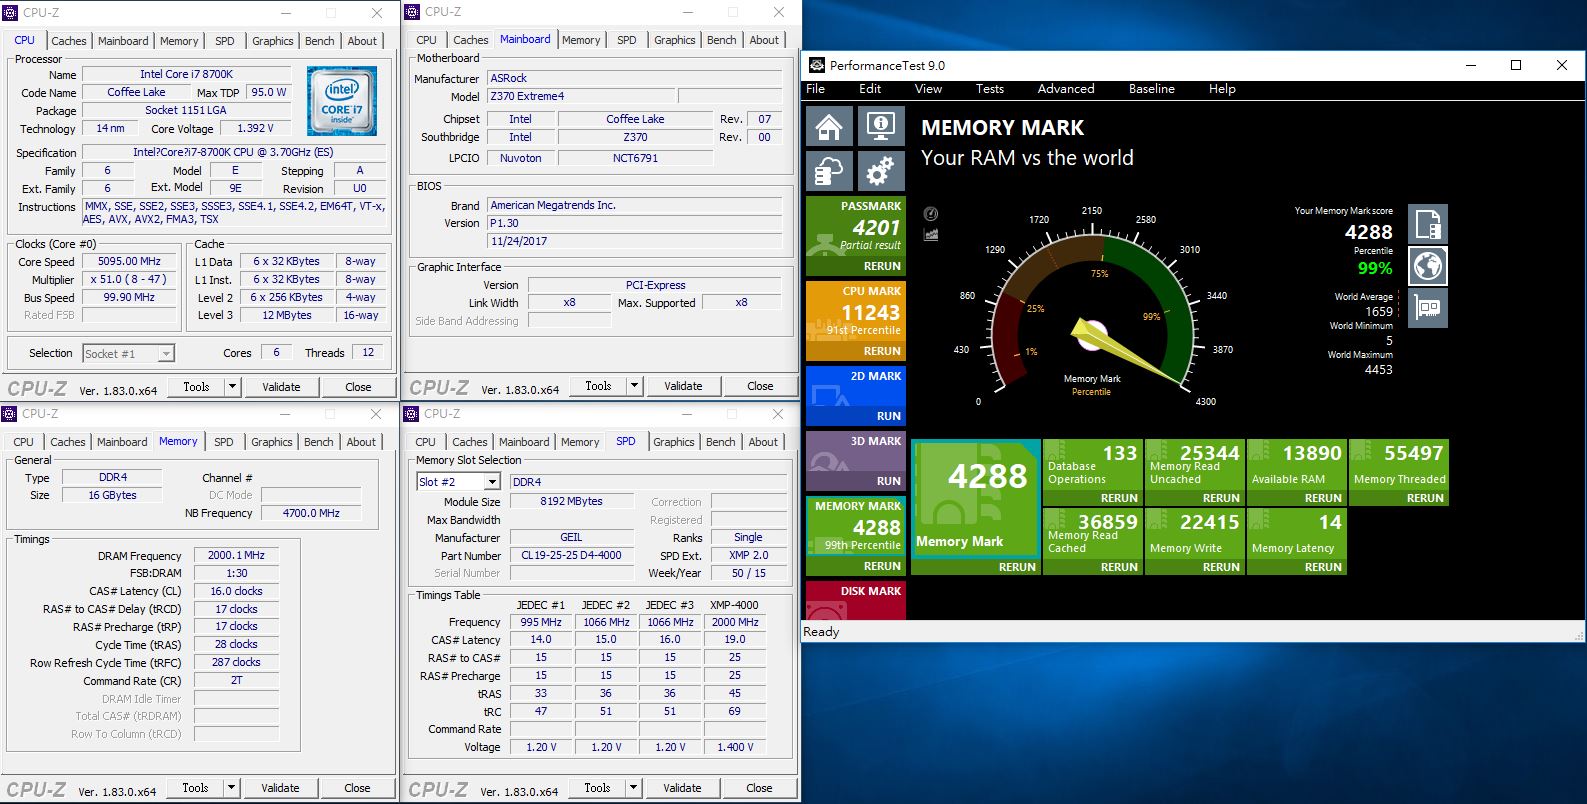
▼Performance Test Memory
 效能测试(超频)
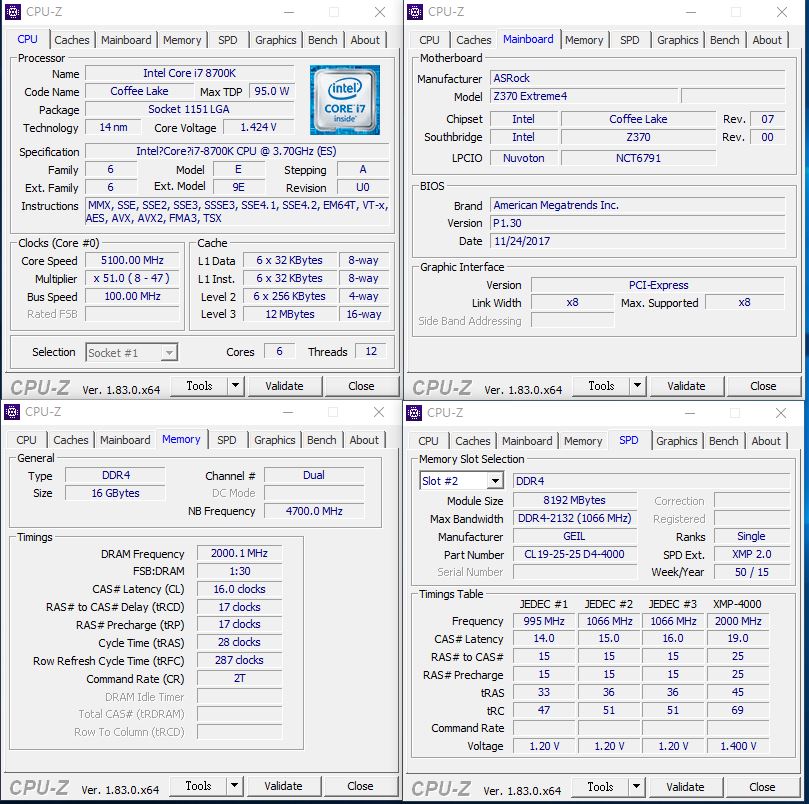
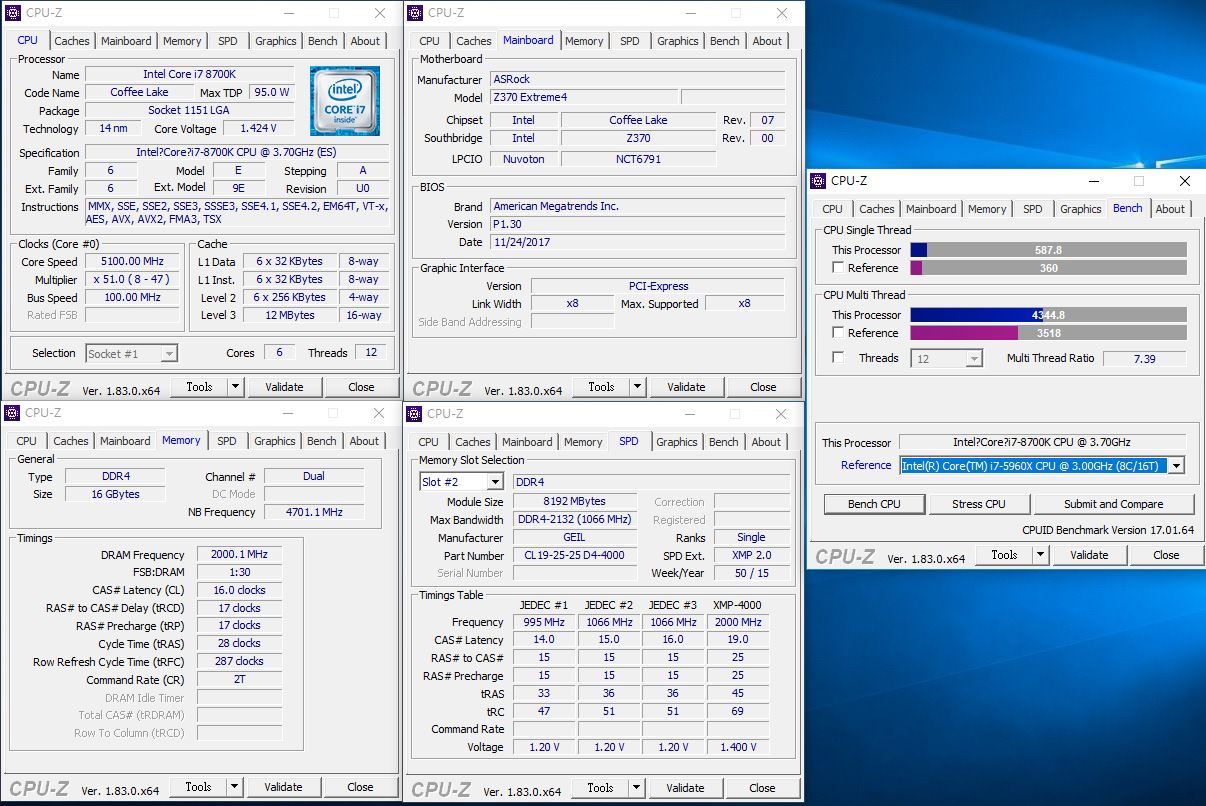
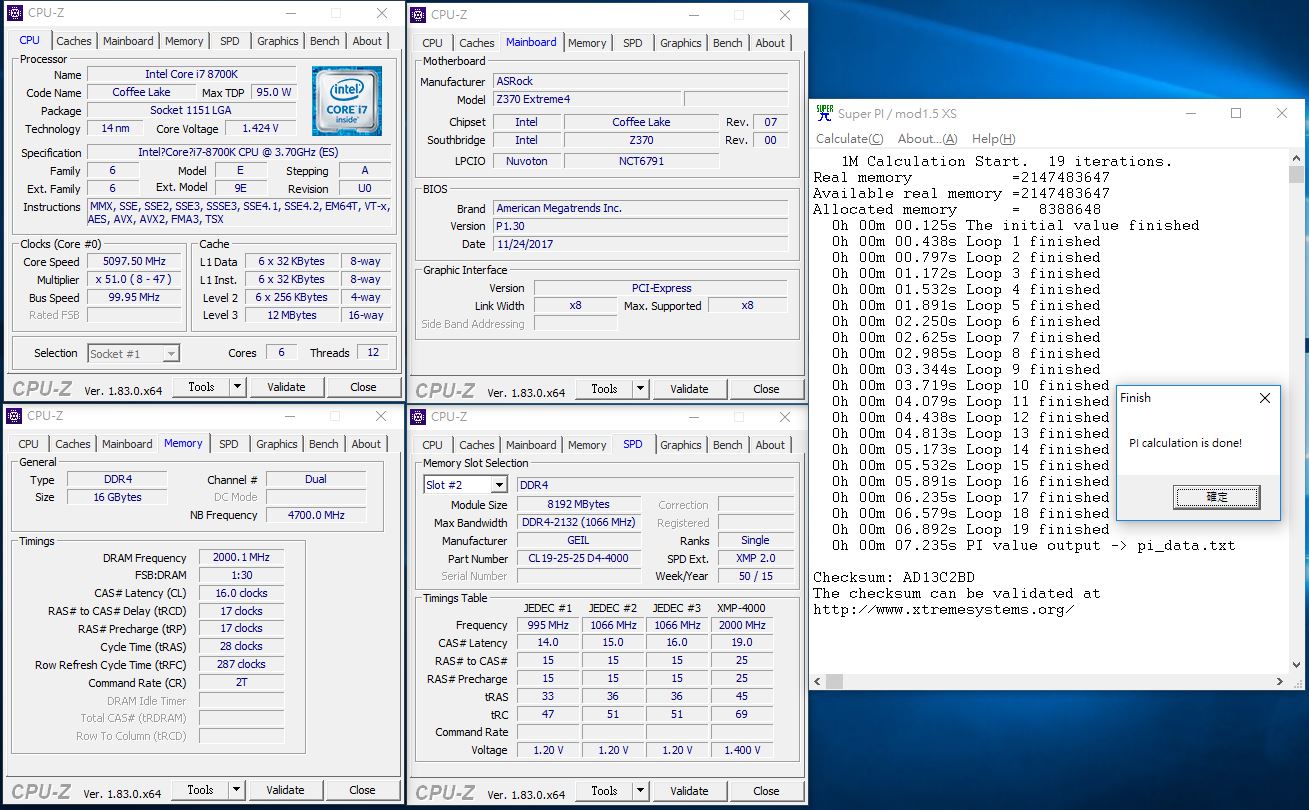
CPU:Intel i7-8700K @ 5.1GHz
Cooler: NZXT. Kraken™ X61
MB: ASRock Z370 Extreme 4
RAM: GeIL DRAGON RAM DDR4-4000 16GB kit (8G*2) CL16-17-17-28
Storage: Samsung MZHPV256HDGL M.2 2280 PCIe 256GB
PSU: Steventeam 500W
OS: Windows 10 专业版 64 Bit
▼验明正身
▼CPU-Z Bench
▼AIDA64 Read:56505MB/s Write:59625MB/s Copy:51507MB/s
▼Super PI 1M:7.954s
▼CPU Mark:828
▼Fritz Chess Benchmark
▼wPrime:32M-4.672sec 1024M-118.403sec
▼WinRAR:20957KB/s
▼2345好压
▼7Zip
▼x264 FHD Benchmark :43.3
▼x265 FHD Benchmark :32.0
▼HWBOT x265 FHD Benchmark :49.04
▼HWBOT x265 4K Benchmark :12.19
▼CINEBENCH R10
▼CINEBENCH R11.5

▼CINEBENCH R15
▼Performance Test CPU
▼Performance Test Memory
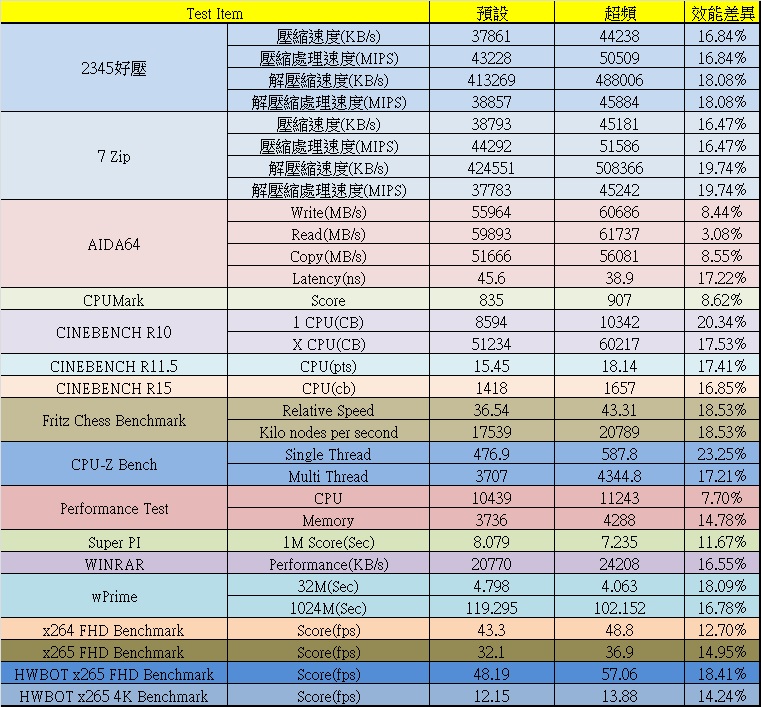
▼效能比较总表
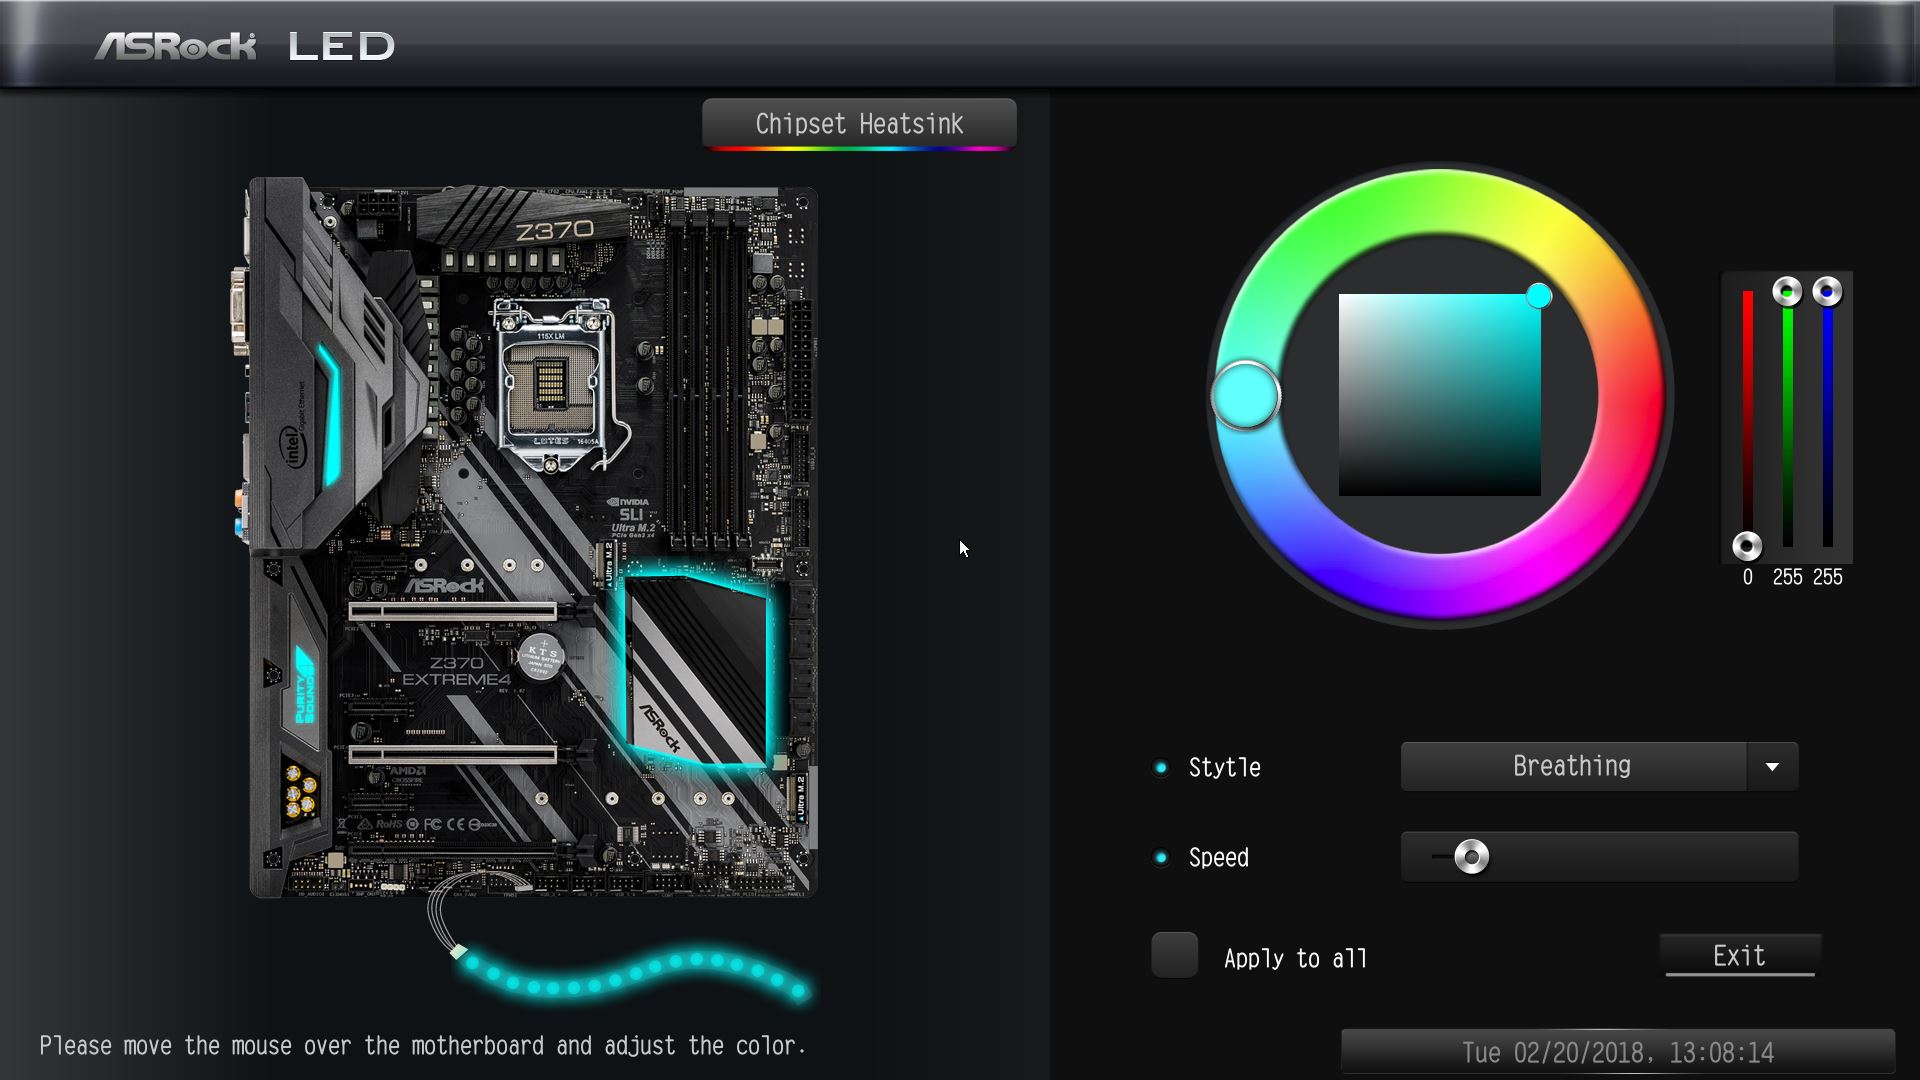
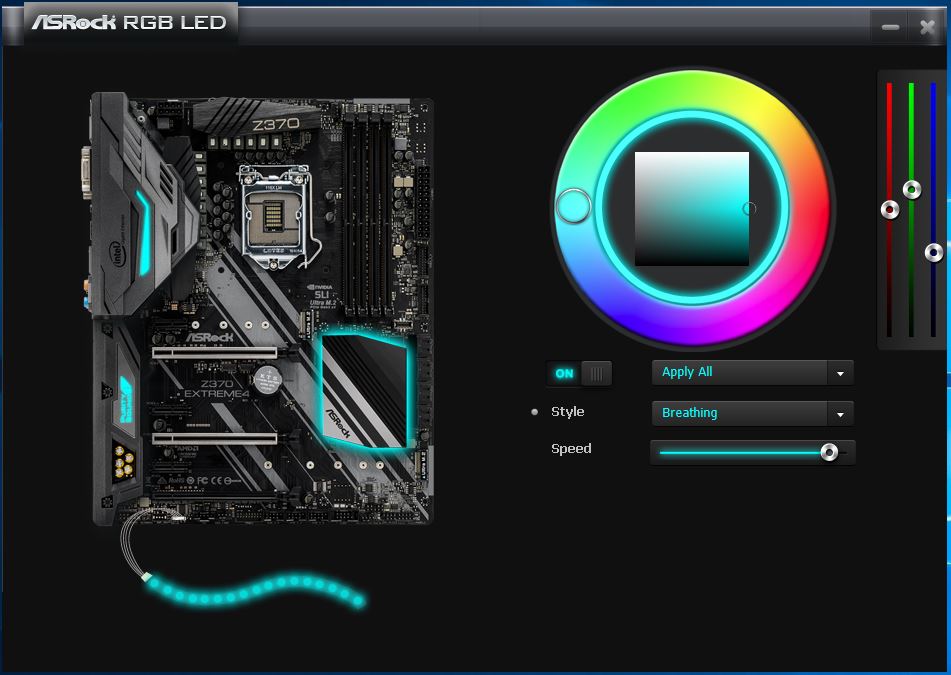
 RGB LED Tool简单介绍
▼主机板发光处
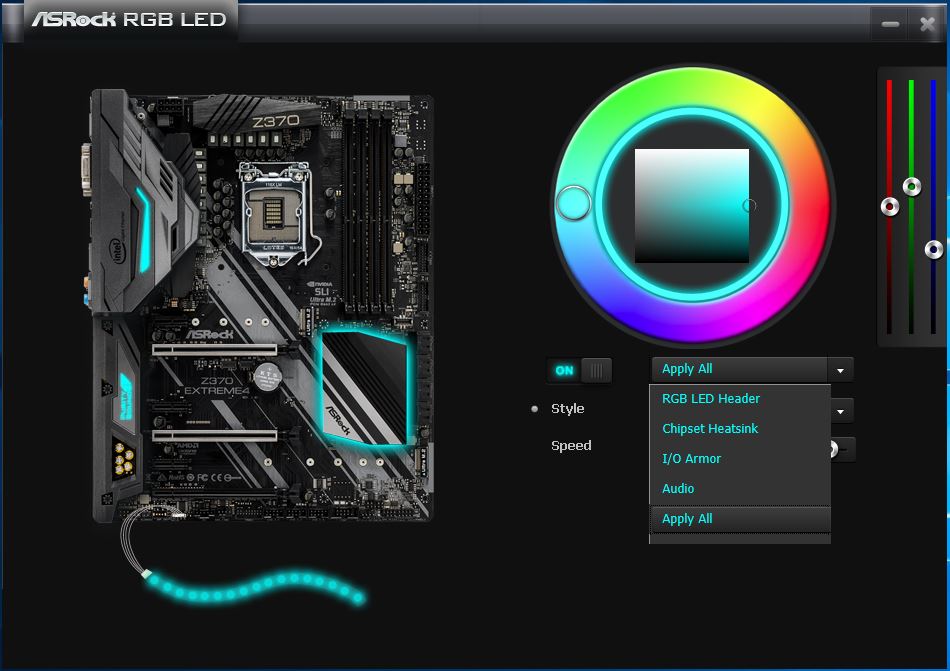
▼透过专用软体可分别修改发光颜色、亮灯模式与亮灯速度
▼除了可以一次同步修改外,还可以分别针对不同地方做不同的调整
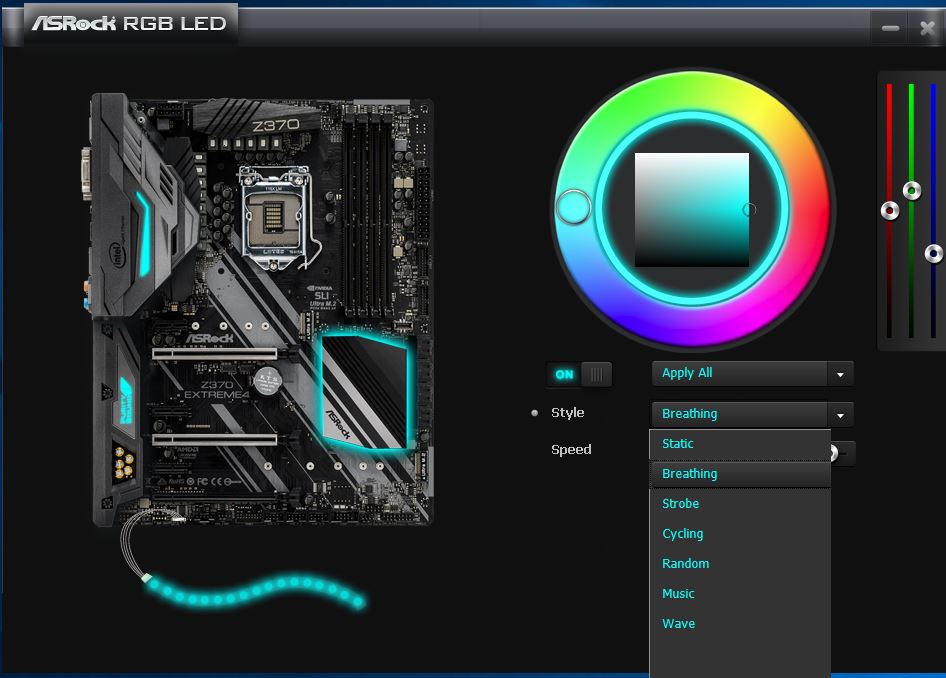
▼亮灯模式共有七种可选择,下方还有亮灯速度可调整
 SATA与PCIe SSD效能测试
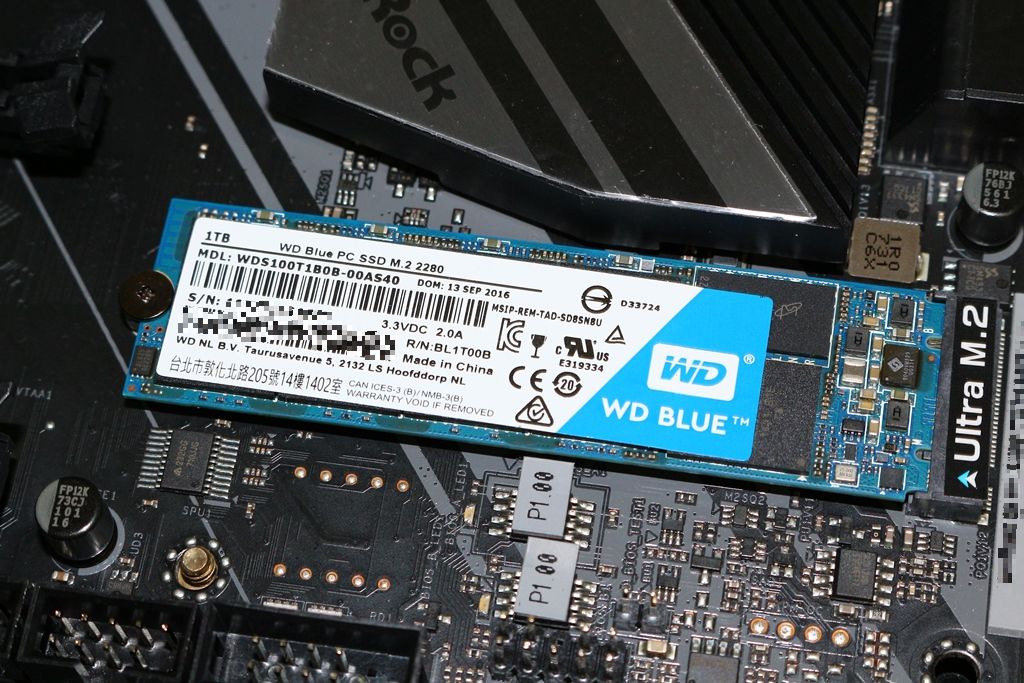
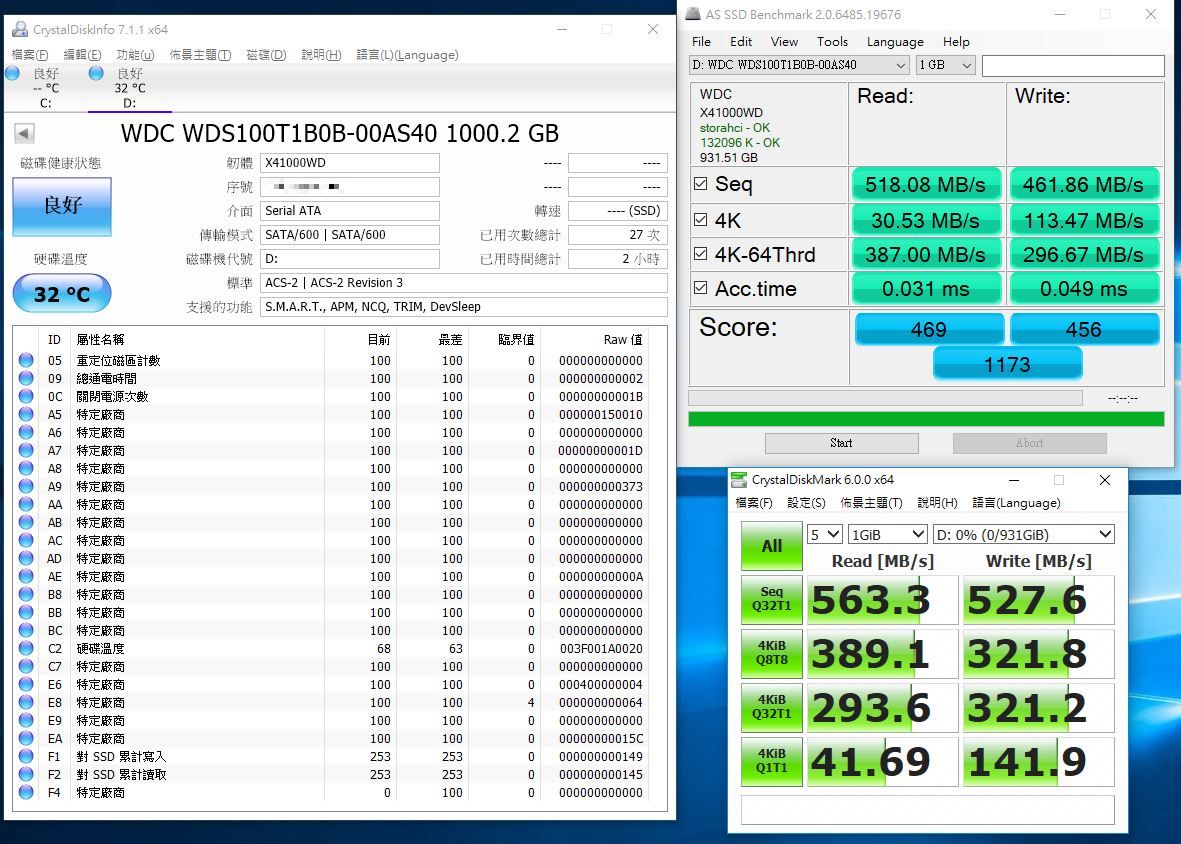
▼搭配WD BLUE PC SSD 1TB效能表现还不错,AS SSD Benchmark有接近1200分的实力!!
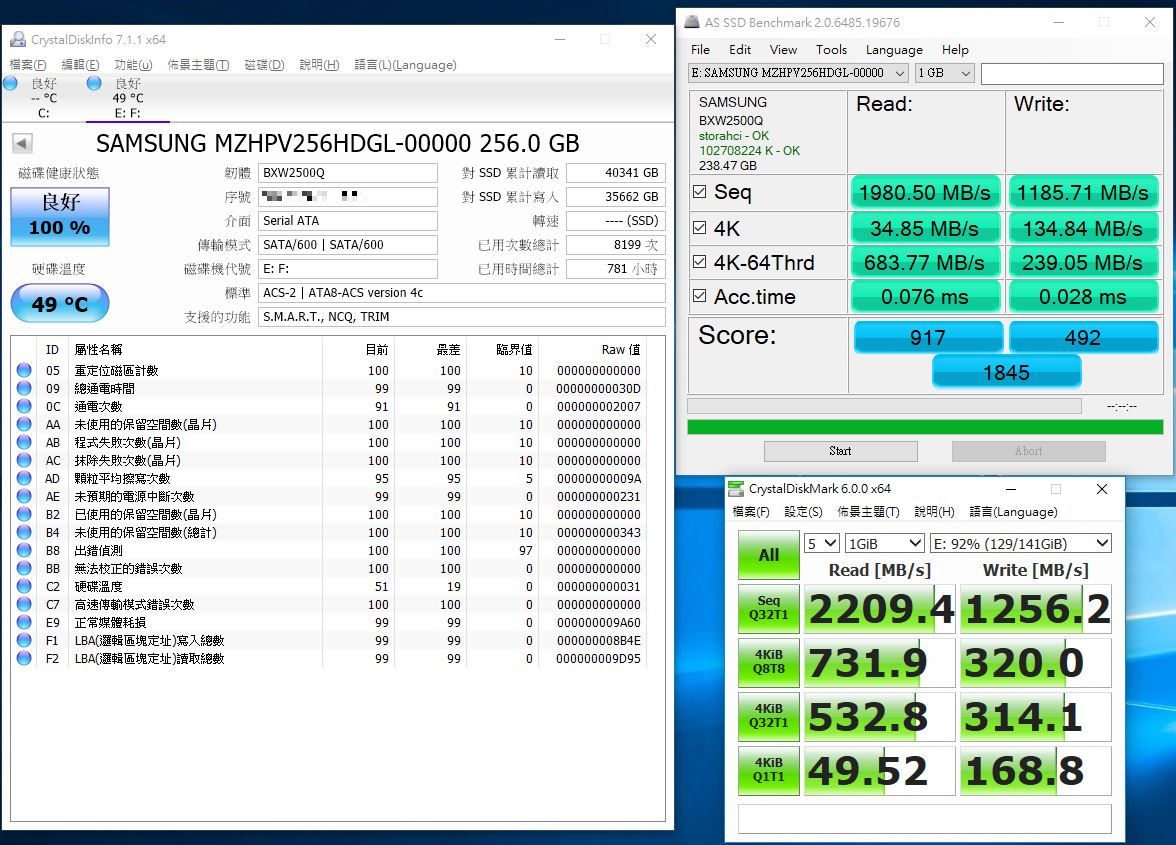
▼搭配SAMSUNG SM951 256GB效能表现同样出色,AS SSD Benchmark已快接近1850分!!
 总结:
总结:华擎ASRock Z370 Extreme 4表现相当不错,,不仅用料实在且超频稳定度表现优异,用料方面采用华擎超合金用料,让整体效能与寿命大大提升,增加了不少CP值,音效部分采用天籁美声四代并搭配Nichicon电容,让声音效果大大提升,降低了许多杂音,让整体音效更加逼真与震撼;在扩充部分提供了两组Ultra M.2可安装PCIe Gen3 x4与SATA Gen 3 SSD,SATA接头部分也相当足够提供了八组,PCIe x16提供三组扩充槽,前两组导入金属遮盖,提降低杂讯,提高效能与讯号品质;效能表现方面搭配i7-8700K预设表现相当不错,超频部分相当给力,提供相当不错的超频性与稳定度,i7-8700K可超频至5.1GHz,记忆体部分则是缩时序方式做超频,记忆体表现相当亮眼读取与写入超过60000MB/s,成绩相当亮眼成绩,BIOS调整部分设定相当容易上手与浅显易懂,如果是超频新手,BIOS选项内有原厂所调整出来的CPU超频参数,让玩家可以一键超频,一点压力也没有,这次超频后各种测试软体中都有3~23%的效能提升,效果相当显着;RGB LED控制已成为主机板标配,Z370 Extreme 4也是如此,主机板部分有I/O护盖区、因校区与PCH区发光,还提供一组灯条扩充,可透过软体调整发光模式与颜色,还可以与主机板发光同步,整体来说功能相当齐全;保固部分原厂提供四年保固(第一年免费换新服务),并且有免费到府收送服务,让玩家有更好与更长时间的保固方案,使用起来也更加安心与放心,目前全省有3间快速服务中心,并与原价屋合作全省8间快换服务中心(一年换新);想找一款用料与规格不错且价格又漂亮的Z370主机板,相信华擎ASRock Z370 Extreme 4是不错的口袋名单。


